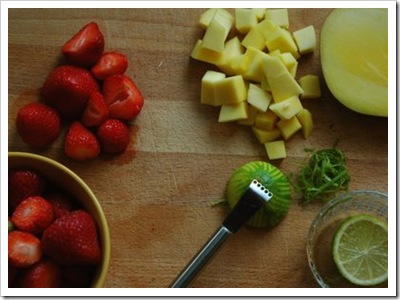
The markets, home gardens and stores are simply bursting with fresh and ripe fruit and vegetables at this time of year. Not only am I getting tons of gorgeous produce in my CSA box each week, I can never resist buying huge loads of colorful, berries, stone fruit or squash from the Farmer’s Markets. To top it all off my mother-in-law and friendly neighbors keep bringing tons of homegrown cucumbers, tomatoes and zucchini harvested from their overflowing gardens. I always have a problem saying no!
So it is not surprising that I have a surplus amount of produce at this time of year. Does this sound familiar to you?
My solution to all this surplus produce is preserving – making jams, jellies, chutneys and preserves is something we have gotten used to doing every year. Although it’s just the three of us, our consumption on these items is rather high.
Every weekend we enjoy long and relaxing breakfasts with warm rolls, organic butter, eggs and homemade jams and preserves. While I am the type who spreads my jam or preserve thinly on my buttered rolls, Tom and Soeren dollop thick layers enjoying the fruity taste. The cooler seasons also has me making more hearty roasts and piquant types of dishes and there is nothing better than having some delicious homemade spicy chutney or a fruity jelly to serve with it. Moreover, giving away colorful jars of jelly and jam as gifts in the holiday season always adds a special touch.
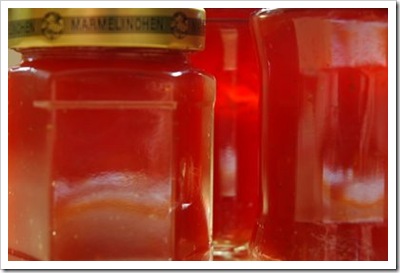
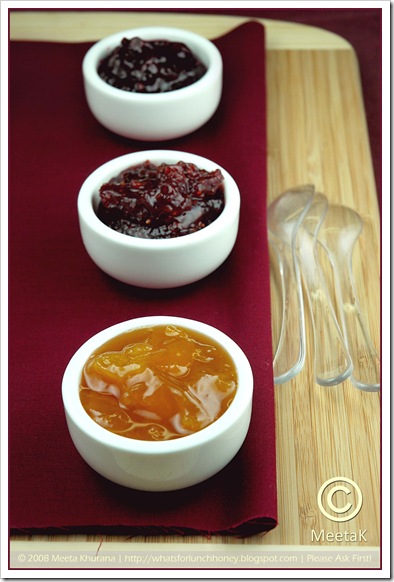
We’ve been doing this every year for the past four years, this year however we were rather creative with a few of our experiments. As I looked into my pantry for that recently made fig and ginger preserve the jars of jams, jellies, preserves and chutney all lined on the rack, gleamed at me. At this moment I was struck with the idea to write this post.
I have often heard some of my friends tell me they have no time to go through the process of making jams or chutneys at home. It’s a lot easier than one thinks. There are however, certain points and tips one has to consider. With this post I hope not only to offer a comprehensive column focusing on preserving and making jams, jellies, chutneys and relishes, I am also going to be sharing several of our favorite recipes.
Jams, Jellies Marmalades, Preserves and Conserves
This is the ideal way to preserve fruit. Sugar is the main ingredient that preserves the delicious summer fruits of choice. Exactly that is what a all of these start with: delicious, succulent and ripe fruit.
Jams are made by crushing or grinding, whole fruit. They usually have a thick consistency due to high pectin content.
Jellies are made using the juices of the fruit. It is much stiffer that a jam and if cut it will hold its shape.
Marmalade is a jelly with pieces of cut fruit in it. Often citrus fruit like oranges, lemon or lime are the basis of a marmalade.
Preserves is usually interchangeable with jam, but it often applies to cooked and gelled whole fruit, which includes a significant portion of the fruit.
Conserves are made using a mixture of fruit, not necessarily fresh, and also contains nuts and citrus fruits.
Chutneys and Relishes
Chutneys originated in India and comes from the East Indian word chatni, which means "strongly spiced," Chutneys are basically condiments which usually consists of a mix of chopped fruits, vinegar, spices and sugar cooked into a chunky spread.
Relishes are hardly cooked and use much less sugar. It is made by coarsely chopping fruit or vegetables, giving it a crunchier bite.
Although both chutneys and relishes are interchangeable, often chutneys are made using fruit and relishes using vegetables.
Sterilizing Your Jars and Lids
Whether you are making a jam, relish, chutney or a marmalade one thing that needs the highest priority before you start is that everything you use, needs to be scrupulously cleaned. The pan, spoons and most importantly the jars should be scrubbed cleaned and wiped dry. Boil jars and lids to sterilize them to prevent bacteria from getting into the jam/chutney and spoiling it.
How To:
Place your empty jars, upright, without lids and open side up in a large clean pot. In a tea kettle bring water to a boil, and then pour enough water in the pot, filling the jars with the hot water. The jars should be covered with water. Bring the water to a boil and continue boiling for 10 minutes. In the meantime lay out clean kitchen towels on your counter. Using tongs take the jars out and allow to drip dry.
Place the lids in the hot water and leave them in the hot, not boiling, water until ready to use.
For best results with your fruity jams or preserves, it’s best to work with approx. 1 to 2 kgs of fruit at a time. Using more than that makes it difficult to handle in a home kitchen and it also becomes difficult to get the jam to set as it does not boil fast enough. With 2 kgs of fruit I often yield approx 6 jars of 450g-sized jars.
Making Of
Jams, Jellies, Preserves and co. can be made with or without using pectin. Pectin is needed to allow the thickening or gelling of the jam. It is created from a compound, protopectin, during the ripening of fruit and during the cooking of under-ripe fruit. All fruits contain some pectin. Large amounts of pectin can be found in apples, gooseberries, plums and citrus peel. Fruit like rhubarb, blueberries, strawberries or cherries have very little pectin.
If using fruit with little pectin and you do not want to add commercial pectin, the jams, preserves and co. will thicken or gel only if it is combined with other pectin rich fruit or powdered or liquid pectin is incorporated in it.
Jams and co. made without added pectin will require longer cooking time and you might notice a slightly different taste from those with added pectin. They also yield a less finished product.
You will find that most recipes call for powdered or liquid pectin. Purchase pectin fresh every year as old pectin may result in poor gels. When preparing a jam, jelly & co. with powdered or liquid pectin, it is vital to carefully follow the directions accompanying the pectin product. Generally 50-125 ml of liquid or 2 teaspoons of dried pectin to each 450g of fruit is sufficient. The order of combining ingredients depends on the type of pectin used. For successful preparation of pectin-added jams and co., accuracy of timing is very important. Begin counting time when the mixture reaches a full rolling boil.

Sugar is another important ingredient in jams and co. You can use any type of white sugar however; I find finer types of sugar dissolve more quickly. I often use gelling sugar, which is specifically used for preserves and contains pectin, in my jams and co. It is very important to make sure that the sugar has dissolved in the simmered fruit before it is brought to the boil. If not the jam may become crystallised and sugary. The amount of sugar needed for gelling basically depends on the amount of pectin present. If you have used fruits with plenty of pectin, use 1½ times the amount of sugar to fruit. If there is just enough pectin, use equal amounts of sugar and fruit.
The easiest way to test the consistency of the jam or jelly is by placing a saucer into the freezer for a few minutes, then spoon about ½ teaspoon full of the jam onto the saucer. Place the saucer back into the freezer for approx. 30 seconds. If the sample is firm to the touch and has your required spreadable texture then it is done. It can now be removed from the heat.
Chutneys and relishes I love them - the best is that the variety seems endless. The combinations and alterations can be varied according to personal taste and the ingredients available. They can be sweet, sour, hot or mild.
One of the big advantages to both chutneys and relishes is that they improve with age. If properly stored they will remain in good condition for several months or years and you will be rewarded with spectacular bursts of new flavor.
Vinegar, spices and sugar are all the things that make chutney or relish nice. As vinegar is the most important ingredient, it is vital that a good quality is used. I love using white wine vinegar, but you can use apple cider or a champagne vinegar too. Although any kind of granulated sugar can be used, I prefer brown or Demerara sugar as it gives the final product a wonderful rich and dark color. However, you can also achieve the darker color by simply cooking the chutney a little longer. Spices really make the chutney or relish nice. Your imagination is required here. Use whole spices rather than powdered. If you just want the flavor of the spice in your chutney then slightly crack or bruise them and tie them in a spice bag. Then cook along with the rest of the ingredients. Finally remove and discard. However, I often prefer having the spices in my chutney and just throw the amounts loose in the pot.
Good chutney is relatively smooth in texture and it will have a rich mellow flavor. The best way to achieve this is to cook it long and slow. Ideally, it should be left to mature for at least three months.
Relish on the other hand is cooked for a lot less and the texture is crunch, with bits of coarsely chopped vegetables.
Whatever you preserve one thing is for sure nothing will satisfy you more than opening a jar of freshly preserved summer! I hope you will find this Preserving 101 helpful and refer to it whenever you require more information. You will find it conveniently in my sidebar category “The Know Hows of Food” under the section “How To…”.
Now if I have gotten you into the mood here are a few of our favorite recipes.
Recipes

Apricot Chutney
Ingredients
Printable version of recipe here.
(makes 3 200ml jars)
600g ripe apricots
1 red chili, slit in half, seeds removed and finely chopped
3-4 Shallots, finely chopped
1 tablespoon black mustard seeds
1 teaspoon coriander seeds
1/8 l white wine vinegar
100 g Demerara sugar
Salt
1/2 bunch fresh coriander leaves, coarsely chopped
Method
Place the whole apricots in a large pot. In a tea kettle bring water to a boil. Pour over the apricots until they are covered. Allow to sit for 30 seconds to 1 minutes. Then take them out, one at a time, peel, cut in half, remove pit and coarsely chop.
Add all of the remaining ingredients, except for the fresh coriander leaves. Pour in about 100ml of water and bring the entire mixture to a rolling boil. Turn the heat down and simmer for 20 minutes, stirring occasionally. Add the chopped coriander leaves.
Fill the chutney immediately into sterilized jars (as described above) and tightly screw the lids shut. Turn the jars upside down and allow to cool.
Notes:
- Tastes great to cheese, lamb, and poultry.
- Will keep in the fridge for 4 weeks

Cucumber Zucchini Relish
Ingredients
Printable version of recipe here.
(makes 4 250ml jars)
2 large cucumbers, very finely chopped
2 large zucchini, very finely chopped
250g onions, very finely chopped
1 garlic clove, mashed
200 ml white wine vinegar
200g Demerara sugar
Salt
Method
Place all the ingredients in a large pot and bring to a boil, stirring regularly. Keep the mixture at a boil, regularly stirring for approx. 10 minutes.
Immediately fill in the relish into the sterilized jars (as described above)and tightly screw the lids shut. Turn the jars upside down and allow to cool.
Notes:
- Is perfect on burgers, hot dogs, fish and steaks
- Will keep in the fridge for 4 weeks

Spicy Raspberry Jam
Ingredients
Printable version of recipe here.
(makes 5 200 ml jars)
900g raspberries, washed, dripped dry on kitchen towel
2 red chilies, slit in half, seeds removed and very finely chopped
100ml Cassis Liqueur
500g gelling sugar (I used Dr. Oetker's Extra Gelling Sugar 2:1)
Method
Place the raspberries in a large pot, cover with sugar, pour in the cassis liqueur and add the chopped chili. Allow to steep for 15 minutes to release the juices.
Bring the mixture to a boil. Now start timing and keep the mixture at a rolling boil for 3 minutes stirring all the time. Check to see if the mixture gels using the saucer test mentioned above. If not keep at a boil for another minute and then check again.
Fill the jam in sterilized jars (as described above), leaving 3 mm space at the top of the jar, turn upside down and leave for 5 minutes. Then store in your pantry
Mirabelle Silver Edge Lavender Preserve
Ingredients
Printable version of recipe here.
(makes 5 200 ml jars)
1 kg mirabelles (or yellow plums), cut in half, pits removed then quartered
2-4 sprigs silver edge lavender, tied tightly into a bouquet garni
500g gelling sugar (I used Dr. Oetker's Extra Gelling Sugar 2:1)
Method
Place the mirabelles in a large pot. Put the lavender bouquet garni into the pot and cover with the sugar. Stir well to coat the fruit with the sugar and to release the juices.
Bring the mixture to a boil under constant stirring. Now start timing and keep the mixture at a boil for a good 3 minutes, constantly stirring and crushing the fruit gently. Remove the bouquet garni and discard.
Check to see if the mixture gels using the saucer test mentioned above. If not keep at a boil for another minute and then check again. Skim off any foam.
Fill the jam in sterilized jars (as described above), leaving 3 mm space at the top of the jar, turn upside down and leave for 5 minutes. Then store in your pantry.
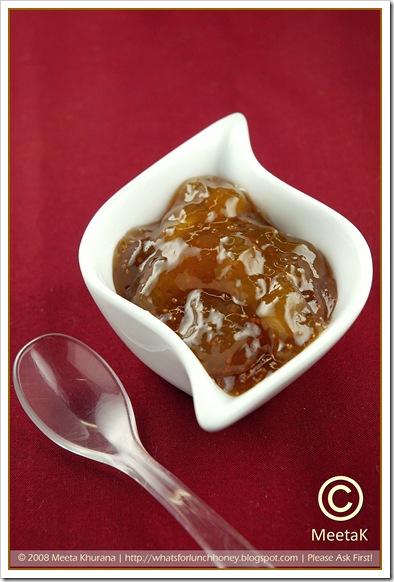
Fig Ginger Preserve
Ingredients
Printable version of recipe here.
(makes 5 200ml jars)
950g fresh figs, stems removed and peeled
30g fresh ginger, very finely chopped
5 tablespoons orange juice
500g fine sugar
1 packet (25g) commercial pectin
Method
Place the figs and ginger in a large pot. Pour in the orange juice and mix. Mix the powdered pectin and sugar and then add to the figs.
Bring the mixture to a boil under constant stirring. Now start timing and keep the mixture at a boil for a good 3 minutes, constantly stirring and crushing the fruit gently
Check to see if the mixture gels using the saucer test mentioned above. If not keep at a boil for another minute and then check again. Skim off any foam.
Fill the jam in sterilized jars (as described above), leaving 3 mm space at the top of the jar, turn upside down and leave for 5 minutes. Then store in your pantry.
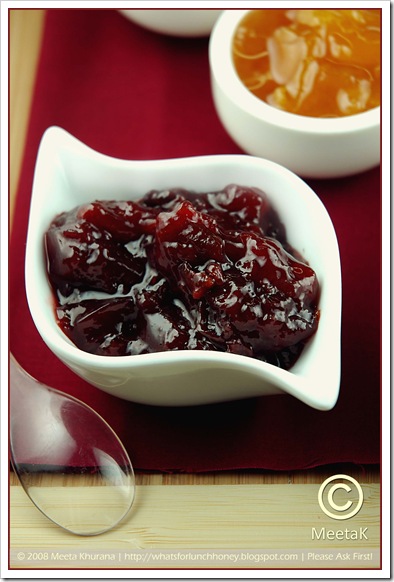
Plum Cinnamon Preserve
Ingredients
Printable version of recipe here.
(makes approx. 3-4 200 ml jars)
1.3 kg red plums, cut into quarters, pits removed
120 ml water
1 kg sugar
1 stick cinnamon
1 tablespoon lemon juice
85 g commercial pectin
Method
Place plums, cinnamon, lemon juice and water in a large pot and bring to a rolling boil, stirring often. Cover and reduce heat to low and allow the mixture to simmer for 10 minutes, until the fruit softens. Stir often.
Add the sugar, returning the heat to medium-high and bring back to a boil, stirring constantly. Incorporate the pectin, stirring constantly. Boil for another minute, then remove from heat. Skim off any foam.
Place the cinnamon stick in the jar then fill the jam in sterilized jars (as described above), leaving 3 mm space at the top of the jar, turn upside down and leave for 5 minutes. Then store in your pantry.

Berry Cherry Jam
Ingredients
Printable version of recipe here.
300g black cherries, halved and pitted
220g blackberries
200g raspberries
1 tablespoon lemon juice
150g sugar
56g natural fruit pectin
Method
In a large pot mix the cherries, berries, lemon juice and pectin. Over a medium heat, bring the mixture to a boil, mashing the fruit with a wooden spoon. Boil for a further minute. Add the sugar and continue cooking, stirring often until the mixture thickens. Remove from heat. Skim off any foam.
Fill the jam in sterilized jars (as described above), leaving 3 mm space at the top of the jar, turn upside down and leave for 5 minutes. Then store in your pantry.
Verdict
It's all about mixing, tasting and experimenting. Jams, jellies, chutneys or relishes. There is not much of a science to it, just a few basic guidelines. You do not need special equipment, just a large pot that you use mainly for your jam/chutney making. You will find these recipes are fairly easy and will offer you a wonderful array of summer flavor throughout the year.
All photographs and written content on What's For Lunch, Honey? © 2006-2008 Meeta Khurana unless otherwise indicated. | All rights reserved | Please Ask First
 by MeetaK")

 by MeetaK")
 by MeetaK")
 by MeetaK")


 by MeetaK")
 by MeetaK")
 by MeetaK")

 by MeetaK")
 by MeetaK")
 by MeetaK")
 by MeetaK")


 by MeetaK")

 by MeetaK")
 by MeetaK")
 by MeetaK")
 by MeetaK")

 by MeetaK")