Warm Garlic Potato Salad

| 1 comment
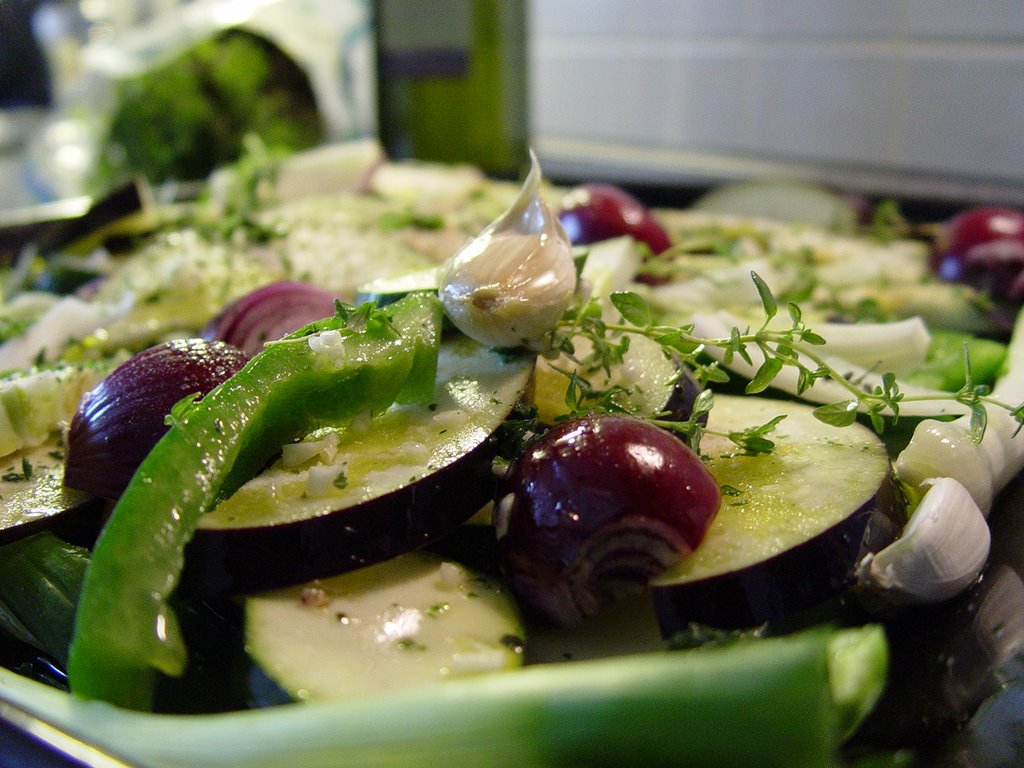
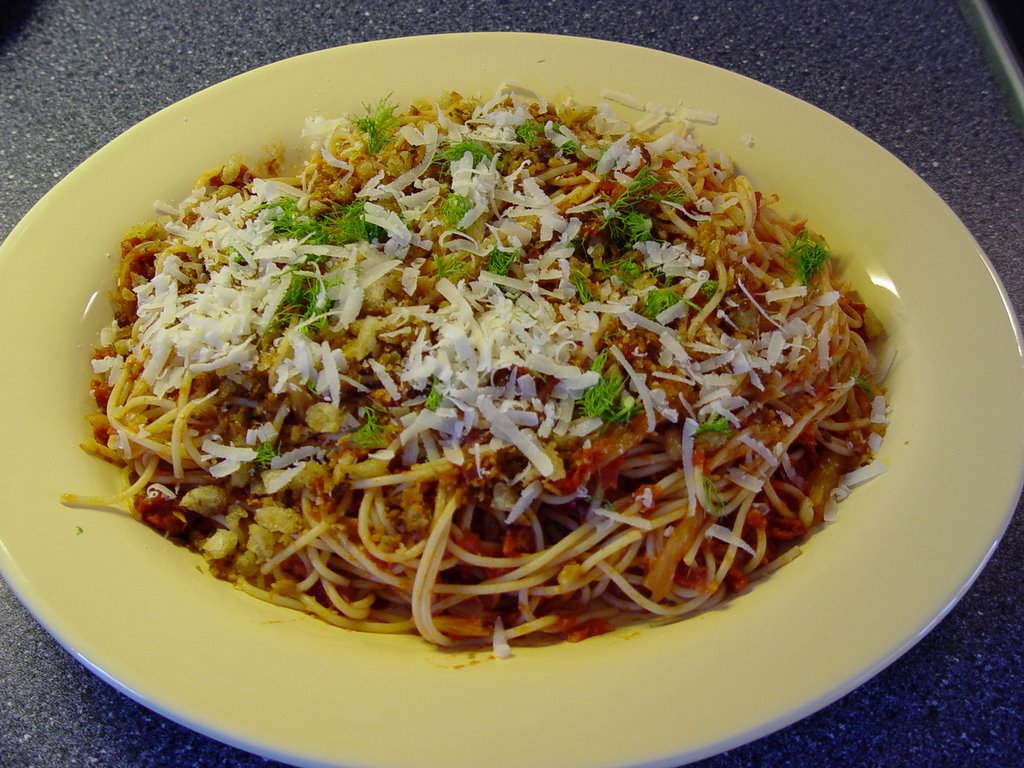
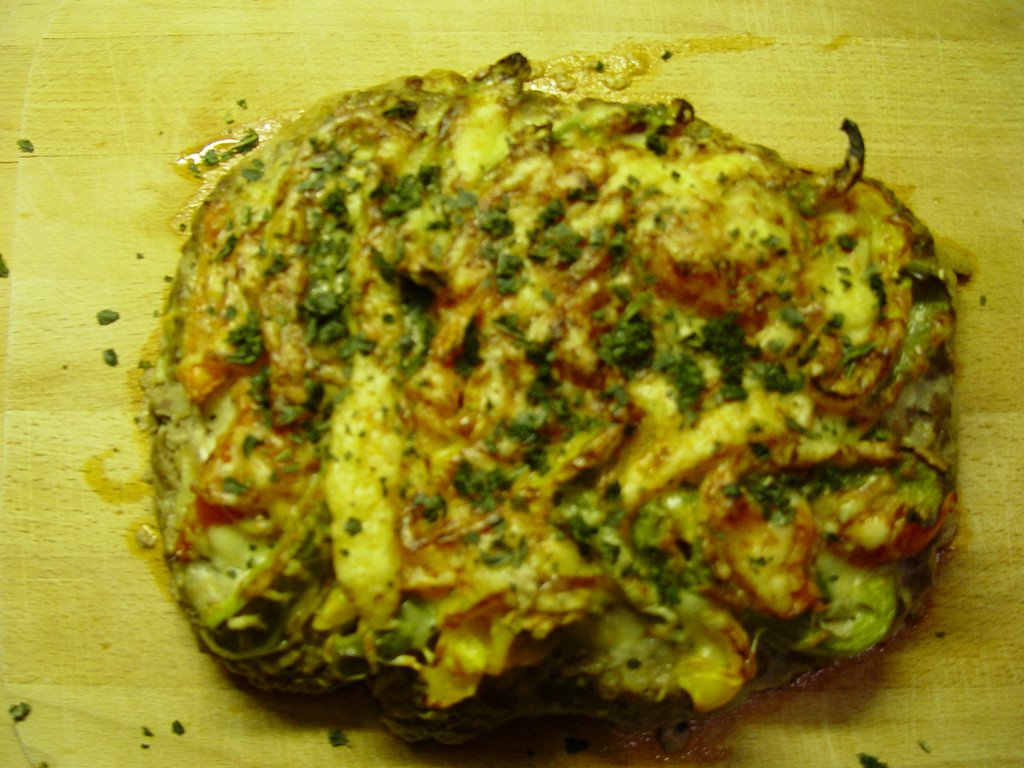
I love barbecuing. As a matter of fact all three of us just love the great charcoal grilled taste of the steaks and chicken. In Germany a potato salad always accompanies the barbecued meats. I am not always such a big fan of the traditional potato salad, with mayonnaise and other real heavy ingredients. I was rather happy when I found this recipe a few months back on the internet. So, when we decided to open the 2006 barbecue season I was eager to try this out. This was accompanied with my favorite Italian oven vegetables.


Ingredients:

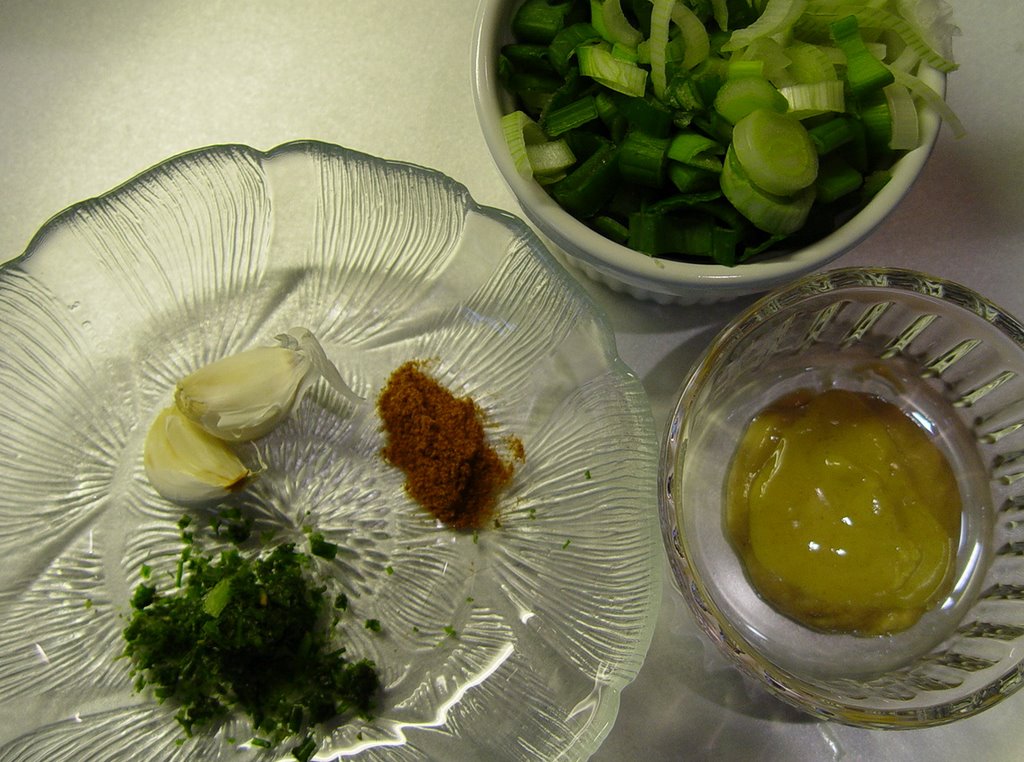
4-5 medium potatoes - steamed and peeled
3/4 cup mixed herbs of your choice - chopped
2 cloves garlic - mashed
1 tablespoon lemon vinegar (lemon juice will also do just fine)
1/2 teaspoon paprika powder
1 teaspoon dijon mustard
3 tablespoons extra-virgin olive oil
1 cup spring onions - chopped
salt and cracked black pepper to taste


Method:

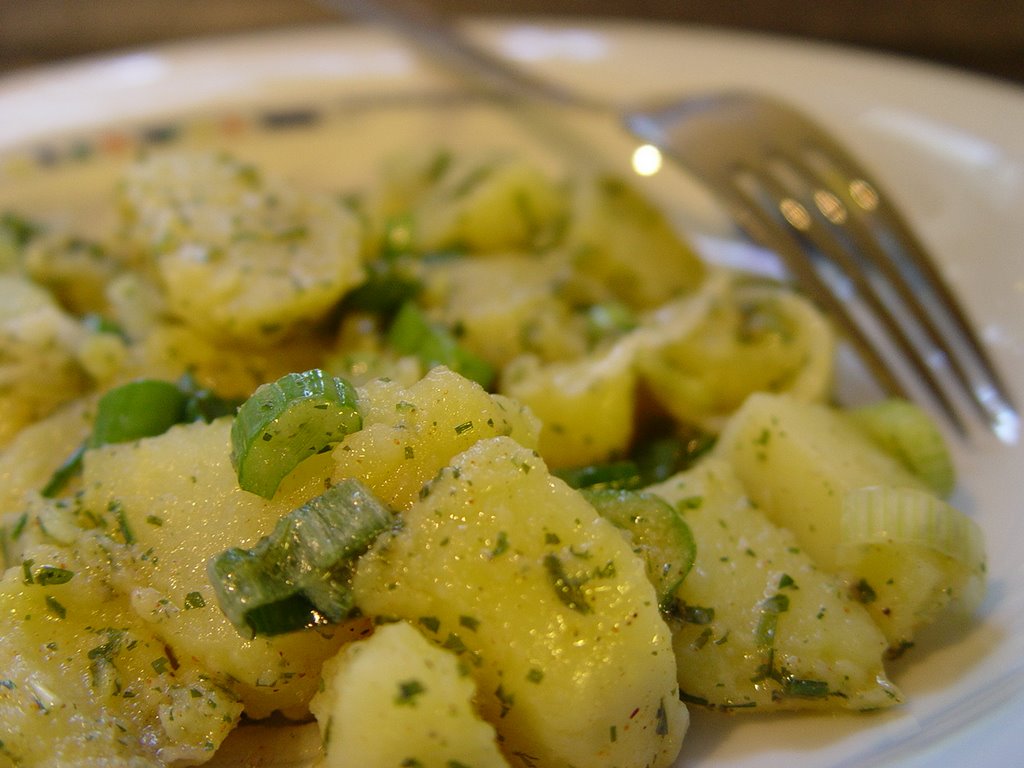
In a large bowl mix together the herbs, garlic, lemon vinegar, paprika powder and mustard. Mix well.
Add the olive oil and whisk thoroughly.

Mix in the spring onions

Cut the potatoes in cubes and gently toss in the dressing mixture. Salt and pepper to taste and mix once again.


Verdict:

I am the type of person that buys/cooks for far too many people. My portions tend to be bigger than usual and it has taken me a long time to learn to cook accordingly. Coming from an Indian family where food always played an important role, the meals with family and friends where some of the happiest moments in my life. My mum was always very happy and proud when nothing was left-over!
Well, measured in this fashion I will say there was no end to my happiness. I did buy far to much and I did cook far too much. Considering we were only 4 at the dinner table and one was a child of 3 1/2, it pleased me that every little bite was devoured.
Our guest was also German and he praised the potato salad. When he said it tasted better than anything else he had eaten, it really made me beam. The empty bowl was proof enough!
1 comment Continue »

Italian Oven Vegetables

| 1 comment
The weather has been pretty great lately and today, although it was a little windy we decided to get our barbecue out and officially open the 2006 barbecue season. Tom brought a colleague home from the university and we had ourselves a real cosy dinner. Besides the usual steaks, chicken and sausage, I made my favorite Italian oven vegetables and Warm Garlic Potato Salad. These Italian vegetables are so fantastic and throws you back into holidaying on the Italian Riviera. We actually had this dish last summer when we vacationed in Liguria. This was served as an appetizer with some fantastic focaccia and a great chilled white wine.

As I was cutting up the vegetables and reminiscing, I thought this would be a perfect entry to My Dhaba's Virtual Cooking Competition


Ingredients:

Vegetables!
I used:

2 zucchini - sliced
1 aubergine - sliced
1 green bell pepper - sliced
1 small fennel - sliced
2-3 small red onions - cut in halves
1 bunch spring onions - cut in halves length way
1 whole garlic spud - 2 cloves chopped finely, the rest leave skin on
fresh thyme
handful of mixed italian herbs
good portion of olive oil
salt & cracked black pepper
balsamic vinegar - just a few sprinkles


Method:

Preheat the oven to 190°C. On a baking tray spread a generous helping of olive oil. Place all the vegetables evenly on the tray. Spread the chopped garlic over the vegetables. Also add the other cloves with the skin on to the tray. This tastes great when peeled and the warm garlic is spread on some toasted bread.

Place some fresh thyme over the top and sprinkle the herbs on the mixture. Now salt and pepper to taste. Pour another helping of olive oil over all the ingredients and a few good shots of the balsamic vinegar.

Place the whole tray in the oven for approx. 30-45 minutes, depending on the way you like the vegetables. I left them in for just 30 minutes as I prefer them a bit crunchy.

Take out and serve warm. This can also be eaten cold on bread. I love it as a sandwich filler.


Verdict:
The jury was overwhelmed. Soeren always loved these type of vegetables, although he sorts the fennel out.
The men where delighted to have something extravagant to their German bratwurst and beer. I was hoping there would be something leftover for tomorrow, for sandwiches - but no luck. Every last vegie was picked off the tray and the olive oil mixture scraped off with bread. Finger lickin' good
1 comment Continue »

Where am I taking Tom for his Birthday?

| 6 comments
Here is a little game I am playing on my personal blog, The Family Buzz. Thought the readers here might want to play too.

I am taking Tom somewhere special for his birthday. Over Easter we will be off to this great city. Can you guess by looking at the pic above where this is? Actually, there is a cheat to this, but I hope you are all honest enough to guess without the cheat.

If you do guess right then I will send you a postcard from this place, so make sure you leave your address!
6 comments Continue »

Alu Pitta Parantha Fusion

| 5 comments
I have often said this: In the past I have shyed away from making Indian food too often. I am not exactly sure why. Maybe it has to do with the lack of availability of all the ingredients here in Weimar (Germany). Or it could be due to the fact that it all sounds too complicated in the recipe books that I decide to stick with something I am more familiar with. It's not like I never cook Indian, just not that often. Whatever it was I have started to get over the hesitations thanks to a few blog buddies I have made across the net. These are mostly Indians also living in different countries. Reading their blogs and communicating with them has inspired me to keep trying. Well I was craving for Alu Paranthas. The best way I can describe these is, a bread made with different types of stuffing. Alu is hindi for potato. What I did not want to do was go through the dough making. I remembered Meena over at Hooked on Heat was having a special theme running this month - "Fusion" which I wanted to take part in. I decided to improvise and kill two birds with one stone - satisfy my hot desire for alu paranthas and fuse it with something else. Thus my Alu Pitta Parantha Fusion was born.


Ingredients:

The spice is right
I guess you can use a wide array of spices here depending on what suits your taste-buds.

I used:
1/4 teaspoon garam masala
1/2 teaspoon cumin powder
1/2 ajwain (carom) seeds
1/2 teaspoon paprika powder (if you are not cooking for children then you can substitute this with chili powder)
1/2 teaspoon turmeric powder
Parsely - chopped (this should be substituted with cilantro/coriander)

The filling
3 potatoes - cooked and mashed (I put the potatoes in a bowl with some water and "nuked" it in the microwave for 5-8 minutes)
1 red onion - finely chopped
2 cloves garlic - mashed
small piece of ginger - finely chopped

Oil
Pitta bread


Method:

Mix all the spices, onions, garlic, ginger and a small shot of oil into the mashed potatoes. Incorporate well.

Heat some oil in a large frying pan.

Cut open the pitta bread and spread a generous helping of the stuffing. Close and press down gently. Fry this for a few minutes on both sides on a low heat, until filling is warmed through and the bread is golden.

Serve this with refreshing plain yoghurt and a few spicy Indian pickles.

Verdict: The verdict is from me today as I made this for lunch. I'll be making a batch of fresh ones tonight for my men and will add their comments later.
For me - amazingly good. I can still taste the aromatic combination of the ingredients on my tongue. The fragrance took me back to my parents kitchen in Dubai. Without the dough making this is so easy that I think I'll be having these pitta paranthas more often!!
What I do want to mention at this point is a thank you to my new found blogger buddies (some of whom are listed on my sidebar) who have encouraged me to be creative. Yes, creativity is also possible with Indian food! Thanks folks!
5 comments Continue »

Carrot Coconut Walnut Apple Muffin

| 2 comments
WOW! Ever heard of so many gorgeous ingredients in a muffin? Along the lines ... the more the merrier. This is not only merrier but fantastically scrumptious. Unfortnately I cannot take the credit for this. I only baked them according to Stephanie from Joy of Baking's recipe. For those of us who are not born to bake (like me) take it from me these are as easy as ... muffins! I did make minor variations though in the amounts of certain ingredients.


Ingredients:

280g all purpose flour
200g white sugar (the recipe calls for 250g but I think with all the other ingredients it becomes naturally sweet)
50g walnuts - toasted and coarsely chopped
270g carrots - grated
1 large apple - grated
2 teaspoons baking powder (actually the recipe called for baking powder and baking soda, but I did not have any baking soda so I just increased the amount for baking powder)
1 cup coconut (fresh or dried - I used the dried type)
3 large eggs
180 ml canola oil
1 1/2 teaspoon vanilla extract
pinch of salt
1 1/2 ground cinnamon

For the cream cheese frosting:
56g butter - unsalted and at room temp.
110g cream cheese
3 tablespoons icing sugar


Method:

Muffins
Preheat oven to 180°C. Line your muffin tin with muffin paper liners or simply grease the tin.

Toast the nuts until lightly browned. Set aside to cool.

Mix the dry ingredients - flour, sugar, baking powder. salt and cinnamon together. Add the walnuts and coconut and mix.

In a separate bowl whisk the eggs, oil and vanilla extract and then fold in the grated carrots and apple. Add this mixture to the dry mixture, stirring until the dough is moist. Divide mixture in the muffin tin and bake for 20 to 25 minutes (mine were done in 20). Allow to cool completely before adding the frosting.

Frosting
Cream the cheese and butter together until smooth. Mix the icing sugar into this until it is nicely incorporated.

Using a teaspoon place a bit of the frosting on each muffin.

My advice - If you are going to serve these immediately I would recommend to place the frosting on the muffin straight away. I made the frosting and placed in a separate bowl and placed it in the refrigerator. Every time we want to eat one I just put a spoonful on the muffin. As I store the muffins in a tin (not in the fridge), I did not want to leave the frosting on the muffin. This way the frosting is cooled, lasts longer and has a better consistency.

Verdict:
Brilliant! A mother's dream, as it contains fruit, vegie and nuts. Not too sweet and deliciously fluffy.
I gave Soeren one for dessert after dinner last night. He said to me "and after the muffin I get my fruit?" I said "No .... the fruit is in the muffin!" ;-) You all can imagine how he beamed. Yes, this is going to be a hit. I had three yesterday and have to stop myself from going to the tin every time I am in the kitchen.
This recipe is for keeps - thanks Stephanie!
2 comments Continue »

Rucola Herb Quiche

| 3 comments
This is a fantastic recipe for a light dinner. The fact that it does not require the usual dough kneading gives it a few more bonus points and that it is nutritious a couple more. I thought I would make this recipe as a nice change to the usual spinach and ricotta. Not to mention the fact I have invited full blown Spring into the house to banish winter forever. I found this a very "springy" kind of dish.


Ingredients:
230g puff pastry - finished product that is available in stores
100g fresh Rucola - finely chopped (I used my electric chopper for this) leave a few leaves aside
2 bunches of mixed herbs - finely chopped
250g ricotta
1 egg yolk
1 egg
100g cream
pinch of salt, pepper and nutmeg
75g pecorino - grated


Method:

Preheat the oven at 175°C. Grease the quiche form well and lay the puff pastry evenly, pulling over the edges. Prick the base of the pastry with a fork and pre-bake in the oven for approx. 8 minutes.

In the meantime whisk the ricotta, cream, egg yolk and egg together. Add salt, pepper and nutmeg, then fold in the rucola and herbs.

Spread the rucola mixture over the puff pastry and sprinkle the pecorino cheese over the top. Bake in the oven for 25 minutes.

Take out and decorate with the rest of the rucola leaves.

Serve with chilled white wine!


Verdict:
This was received with mixed feelings. Tom expected spinach, which gave a confused look after the first bite. Rucola tastes nuttier and is stronger than spinach. So, if the brain is thinking spinach but tasting rucola I can understand the mixed signals. After this he tried it again and found it "exquisite" with the white wine.
Soeren, on the other hand was not very impressed. He said he found it too sharp. He peeled off the pastry and ate that.
My advice for the next time rucola is great when serving for adults, because it really did taste exquisite. For children I would recommend using spinach.
3 comments Continue »

Vegetable Patties

| 9 comments
This is my first entry to Cate of Sweetnicks' ARF/5-A-Day weekly edition. Every Tuesday, food bloggers who made a recipe that includes an ARF (Antioxidant Rich Food), fruit, veggie or any combination of the three can be included in the ARF/5-A-Day Tuesday evening round-up. I have been thinking about this sometime and came up with this great recipe.
Vegetable patties are quite simple, versatile and can be made in a multitude of ways. My recipe is something I made up and that is why I do have to apologize for not always having the exact weight or amount. I encourage everyone trying out this recipe to use their imagination and be a little creative. You really can't do anything wrong here.


Ingredients:
250-300g potatoes - cooked and mashed
1 garlic clove - mashed
1 small red onion - finely chopped
1 egg
Cheese - grated (either Gouda or cheddar)
1 medium sized zucchini - grated (squeeze the water out of this)
1 medium sized carrot - grated
a small handful of sunflower seeds
salt & pepper
1 tablespoon oil
fresh herbs (I used cilantro and chives) - chopped
For my fellow Indians or those not cooking for kids: 1 small green chili - chopped
a bit of flour


Method:
Pre-heat oven to 200°C.

Mix potatoes, garlic, onions and egg in a large bowl. Add the sunflower seeds, grated cheese, carrot and zucchini, salt and pepper, herbs and chilies (if using). Mix all the ingredients well. (Either with your hands or get your little one to do it for you)

Form patties and coat very lightly with the flour.

Heat a large frying pan and quickly fry the patties on both sides until they just start to color.

Take out and pat dry. Put the patties on a baking tray and bake in the oven for approx. 15 minutes.

Verdict:
Soeri helped me make these, mixing the egg into the mixture. I filled pitta bread with tomatoes, lettuce and cream cheese and then added the patties. It looked great! The trouble was that Soeri nibbled on a small patty as they came out of the oven and probably was pretty stuffed. He did not manage to finish his pitta patty sandwich. Tom ate two and said they were scrumptious. For the next time he said we should try them with some oriental/indian spices and a bit of tahini sauce. No problem there!
9 comments Continue »

Club Sandwich Deluxe

| 2 comments
Club Sandwich deluxe is my way of serving this sandwich, loved by many. There's just one little twist that makes it really scrumptious.


Ingredients:

Toast bread - for each sandwich you will need 3 slices
Egg salad - either self made or self bought
Cooked ham - for each sandwich at least one slice
Tomatoes - sliced
Cheese - either Gouda if you prefer it mild or mature cheddar if it should have a more cheesy taste.
Butter
Egg - beaten
Milk
Oil


Method:
Mix together egg and milk in a bowl. Set aside.

Spread some butter on the slices of toast. On one slice add a bit of egg salad and then the ham. Close with another slice of toast.

On this slice add the cheese and the sliced tomatoes and close with the last slice of toast.
Press down gently.

Heat the oil in a frying pan.

Soak the sandwich in the egg and milk mixture and put in the frying pan. Fry this quickly on both sides until nice and golden brown.

Enjoy with a large bowl of salad.


Verdict:
Fantastic alternative to the normal sandwiches. Dipping them in the egg mixture gives it just enough softness to make it a light meal.
Tom was delighted with these sandwiches. Soeren found them extremely tasty even though some of the filling kept falling out! This was something that Soeren wanted to take in his snack box the next day too. So if you should make these make sure you have enough of the ingredients leftover to whip up some fresh sandwiches the next day.
2 comments Continue »

Chocolate Muffins

| 7 comments
WOW! The ultimate chocolate muffin for the ultimate chocolate fan! These were so fluffy and rich that with every bite you know something so good must be a sin!


Ingredients:
30g unsweetened chocolate, coarsely chopped
255g semisweet chocolate chips - divided use
1 cup all-purpose flour
1/2 teaspoon baking powder
1/2 teaspoon salt
2 large eggs
1 cup brown sugar, firmly packed
2/3 cup whole milk
1/2 cup (1 stick) unsalted butter, melted and slightly cooled
1 teaspoon vanilla extract


Method:
Melt the unsweetened chocolate and about 1/2 cup of the semisweet chocolate chips in the top of a double boiler over simmering water. Remove from heat and cool slightly.
Preheat oven to 175*C.

Grease and flour a 12 cup muffin tin or line with paper liners.

In a large bowl, whisk together flour, baking powder and salt.

In another bowl, beat eggs; add the brown sugar, milk, butter, melted chocolate mixture and vanilla; mix well. Pour this mixture into dry flour mixture. Stir until just moistened; do not over mix. Gently fold remaining chocolate chunks into batter.

Fill prepared muffin tins two thirds full. Bake for 20 to 25 minutes or until muffins test done. Cool in pan on wire rack.

Makes approx. 12 muffins

Verdict:
Do I really have to give an verdict on this one? I baked 12 of these on Sunday as a little surprise when Soeri came home from the weekend at his grandparents! Today is Tuesday and I just ate the last one while entering this post!!! I have never seen muffins disappear so fast. Just one word of warning though: Please serve with tall glass of milk or other liquid ... no, not because they are dry ... because the are so rich!
7 comments Continue »

Mexico Stew

| 1 comment
This was something I did not make this weekend but rather a couple of weeks ago. It is a great recipe for the kids. The meatballs are always a favorite among the little ones and it is a great way to get them to eat beans and other vegies that might be turned down in the normal case.


Ingredients:
300g Beef mince
1 egg
2 tablespoons oat flakes
Salt & pepper
1 teaspoon medium mustard
2 tablespoons oil ( I normally use rape or sunflower oil)
2 Onions - coarsely chopped
1 garlic clove - coarsely chopped
2 red bell peppers - coarsely chopped
1 leek - cut in slices
300 ml vegetable fond
1 can (approx. 800g) canned tomatoes
2 (400g) medium sized zucchini cut in slices
1 can (250g) kidney beans
140g sweet corn


Method:
The best thing to do is prepare the meatballs first. To to this mix together mince, egg and oats in a mixing bowl. Add salt and pepper to taste and the mustard. Make small meatballs and fry in a hot pan. Take out and pat dry.

In the same pan add the onions, garlic, peppers and leek. Cook for and minute or so and then add the vegetable fond. Simmer covered for 10 minutes. Now, add the canned tomatoes and bring to a gentle bowl. Taste the stew and add salt and pepper. .If you have a purée mixer then purée the mixture. Otherwise, pour the mixture in a blender and purée.

Now, add the zucchini, kidney beans and corn to the stew and simmer for a further 5-8 minutes. Add the meatballs and warm through.

Before serving add a sprinkle of salt and pepper to taste.

Serve this with nice, thick and good mixed grain bread.


Verdict:
In Germany we are really spoilt for choice when it comes to bread, so it is not hard to find really good bread. The bakery I go to has a large selection of organic bread. For this I used a dark multi-grain bread and toasted this in a pan with olive oil.
Soeri, loves this stew. As any three year old he loves meatballs with pasta, but when I served this I got a "ummmmm .... no need for pasta anymore mum!" Tom, who is not a stew fan, ate this with delight. For the both of us I had chopped up some red chillies that we sprinkled on top. This gave it a nice little spice.
1 comment Continue »

Sweet & Sour Fish

| 1 comment
Next stop Shanghai! On our food journey across the world this weekend, I decided to make this great alternative to the usual sweet & sour chicken. A lot of people shy away from making Chinese cuisine at home as it is known, that although the cooking time does not take so long it is the preparation that makes one slog in the kitchen. This really does not have to be if you prepare and plan in advance. I normally go to our fresh fruit and vegie market at least once a week. Once a month I buy in bulk. I buy all types of vegetables and fruit that we like to eat at home and spend part of my weekend chopping and freezing these in portions. This way I always have fresh vegies nicely frozen for any type of meal. When I wanted to cook this sweet & sour fish I hardly spent any time cutting and preparing the vegetables.


Ingredients:

500g fish (do not use a very soft type of fish for this) - cut in bite size pieces
1 egg
3 tablespoons cornstarch
soya sauce
1 large onion cut in thick slices
1 garlic cloves, finely chopped
300g Mixed Chinese vegetables (I used cauiflower, peas, carrots, leeks, mushrooms, sprouts, bell peppers etc.)
2 tomatoes cut in half then in thick slices
1 small can pineapple

For the sauce:
3/4 cup of water
1/4 vinegar
1 tablespoon sugar
3 tablespoons ketchup
1 tablespoon cornstarch
1 tablespoon soya sauce


Method:

Blend cornstarch, egg and some water together and make a nice smooth batter. Add some soya sauce to taste. Put the fish pieces in the batter and mix so that all the pieces are nicely covered. Take out, let drip and fry in portions in hot oil until nice and brown. Remove from oil and put on some kitchen paper so that some of the oil gets soaked up. Keep warm.

In a wok add some oil (Rape or Sesame oil) and fry the onions and garlic until tender. Except for the tomatoes and pineapple, add all the vegetables you are using.

Mix all the ingredients for the sauce in a bowl. Add the mixture to the wok and let simmer for a few minutes. When the sauce has thickened add the tomatoes and pineapple. At the very end add the fish pieces to the sauce & vegetable mixture.

Serve this with steamed basmati rice.

Verdict:
"Different with the fish, but extremely good" was Tom's comment to this. Soeri, asked what the pieces of meat were and I told him it was fish "Hmmmnnn I like to eat this stuff" and with that he literally stuffed his mouth spoonful after spoonful. I was a bit worried that Soeren might turn this down, as he likes to separate his vegetables to his fruit ... and keep them that way. I was very glad that he excepted this combination.
1 comment Continue »

Greek Feta Chicken

| 2 comments
Today I thought we would take a trip to Greece. Last week I found Alanna Kellogg's great website Kitchen Parade and this great recipe for Greek Feta Chicken. I wrote to her and told her it sounded great and promised to try it out and let her know what the verdict was. I liked the idea of preparing something light and easy for lunch, especially on a hectic Saturday!


Ingredients:
1 low fat yoghurt
1 clove garlic, smashed or minced
Dried oregano - I did not have dried oregano but had some frozen mixed herbs that I used
black pepper & salt
3 chicken breasts - cut in mouth sized pieces
250 g feta cheese


Method:

Whisk the first four ingredients ( yoghurt, garlic, herbs, salt & pepper) together. Place the chicken in the marination and marinate for at least 30 minutes.

Place chicken on oven rack and bake for 6 to 8 minutes, then turn over. Sprinkle with feta and bake for another 5 to 8 minutes.

That was it!

Verdict:
Tom found it a tad too dry. I served this with a Potato/Vegetable Gratin which had a bit of liquid to it so it was not all that bad. Soeri, picked off the feta and ate the chicken mixed with the gratin. The next time I will maybe take the chicken out of the oven in between and coat with the marination, or maybe put the chicken with a bit of the marination into the oven to keep it moist.
2 comments Continue »

Cranberry & Mandarin Loaf

| 4 comments
I will be honest: I do not bake very often so you might not find all that many cake recipes here. However, when I do bake, it is mostly scrumptious and easy to make cakes. This loaf recipe I got a long while back from a dear friend (thank you Susan) and it is one of our favorites.


Ingredients:
475g all-purpose white flour
235g white sugar
1 teasp. baking powder
a pinch of salt
360g fresh, frozen or dried cranberries (if using frozen you do not need to thaw)
2 eggs
175 ml low fat milk
1 tablespoon oil
freshly grated orange zest
1 can (285g) mandarin orange in natural juice - save 1/4 cup of the juice.


Method:
Pre-heat oven to 185°C. Coat a loaf pan with oil.

Combine all dry ingredients - flour, sugar, baking powder and salt - in a mixing bowl. Add the cranberries and coat with mixture.
In another bowl beat the eggs and the milk with a mixer. Add the mandarin juice, oil and the orange zest.

Stir in wet mixture to the dry mixture, making sure not to over mix. Just so that the mixture is well blended with eachother.

Add the mandarins to the batter and mix gently. Pour into the loaf pan and bake for approx. 50 minutes. Check with a tester and when it comes out clean it is done.

Cool on a rack and then enjoy!

Verdict:
On this I did not just have my regular jury - Soeri and Tom, but also my inlaws. They loved this cake. I was lucky I had some leftover to potograph! Very yummy!
4 comments Continue »

Pasta, Spinach Salad

| 1 comment
This is a great and light salad for an evening supper. Furthermore, a clever way to get kids to enjoy the spinach.


Ingredients:
Spirelli pasta
Hand full of frozen Spinach
200g Cottage Cheese
Italian Dressing (I use Kraft)
Carrot and Leek - cut in thin strips
Spring onions - chopped
Pine Nuts - roasted in a pan
Olive oil


Method:
Cook pasta according to instructions. Thaw spinach at room temperature (you can also do it in the microwave). In a mixing bowl add spinach, carrots, leek, spring onions and cottage cheese and mix well. Mix in the pasta, italian dressing and a good shot of olive oil. Lastly, throw in the pine nuts.

Serve with warm garlic bread.

Verdict:
Soeri loves spinach and was delighted that pasta can be served as a salad. Both Soeri and Tom gave this one plus points and wanted to take the leftovers to KIGA and University the next day.
1 comment Continue »

Spaghetti with Fennel & Salami

| 1 comment
Today I decided to try out one of Jamie Oliver's recipes. I like the way he uses different types of ingredients to pep up some old fashioned dishes. Here's a great way he serves traditional tomato sauce with spaghetti.


Ingredients:

Spaghetti
Olive oil
140g Italian salami in slices - cut in strips
2 garlic cloves - finely chopped
1 whole fennel - cut in half and sliced
2 cans chopped tomatoes (each 400g)
2 hand full bread crumbs
fresh rosmarin
Fennel green


Method:

Add some olive oil to a pan. Put in the garlic and salami strips and gently fry until the salami is crunchy.

Add the fennel slices and simmer at a low temperature with the pan covered for 5 minutes. Pour the chopped tomatoes into the pan and carry on simmering for approx. 25 minutes, until the mixture thickens.

Cook the pasta according to the packet instructions. In another pan heat up some olive oil and toast the bread crumbs until crunchy. Put in the rosmarin - it gives a nice aroma.

When the pasta is done, quickly add it to the sauce in the pan. Mix until the pasta is covered with the sauce. Pour this in a nice big serving bowl or plate and add the bread crumbs and fennel green to the pasta.

Verdict:
Fennel is not everyone's taste, but believe me, this was so delicious that none of my guys even asked what vegetable I used. It was a great way to sneak in something new. Soeri likes to think he is a pasta expert (what 3 year old does not). He looked at me and said "Hey mum ... this you can serve me tomorrow again" and I got a thumbs up sign. Thank you Jamie!

Times like these I wish I could have a taste and smell blog. I guess you will have to prepare this yourself to see just how yummy it really is.
1 comment Continue »

Pizza Meatloaf

| 1 comment
Ripe juicy tomatoes and crunchy bell peppers make this meatloaf a welcome change to the traditional meatloaf served up at most mealtimes. Served with fresh vegetables, even kids will gladly ask for another portion of this fun and nutritious meatloaf


Ingredients:

1 bread roll (from the previous day)
5 tomatoes - sliced
2 yellow and 1 green bell pepper - sliced and de-seeded
2 red onions - sliced
2 garlic cloves - finely chopped
700g beef mince
2 eggs
1 teasp. fresh thyme and oregano
Salt & pepper
100g grated Emmentaler cheese
Chopped fresh basel


Method:

Soak the roll in water until soft, then squeeze out well. Add this to the mince with the finely chopped garlic, eggs, herbs, salt and pepper. Mix well and form into a loaf. Put this on a baking tray and press down gently to flatten.

Pre-heat the oven to 225 °C.

In a pan heat up some olive oil. Fry the onion rings, bell peppers and tomatoes gently until the juices and flavours have blended.

Pour the vegetables onto the meatloaf and press down. Sprinkle the cheese over the top and bake in the oven for approx. 30 minutes.

Take out and add the fresh basel over the top.

Verdict:
I served this with mashed potatoes and green beans. Folks, my two men were so quiet on the dinner table because they were so busy spooning the food. Soeri, didn't even ask what was in the meatloaf, as he usually does, he just ate!
I think I can forget about making any other type od meatloaf from now.
1 comment Continue »