Time for Choka and Click

| 7 comments
Choka Aubergines (01) by MeetaK

This post is dedicated to two incredible ladies. One I would like to think I know well and can say she is the sweetest and extremely interesting person. The other, I did not know until a few weeks ago.

Cynthia

Cynthia of Tastes Like Home is someone I often exchange mails with. We write to each other whenever we miss each other. Sometimes it's like telepathy because it seems like the one or the other always manages to contact the other exactly then when one is thinking of the other. Hope that made sense LOL!

I do not think there are very many people out there who do not know Cynthia. She blogs from the heavenly Barbados and her posts are always filled with the right mixture of spice and nice. I like her sense of humor - she has a way of making me smile or laugh just when I need it the most.

When the lovely Zu of Zlamushka's Spicy Kitchen decided to feature Tastes Like Home in her event Tried & Tested, I knew exactly what I wanted to make. At the beginning of the year Cynthia wrote a great article The Essence of Choka and I instantly fell in love with the variety of chokas displayed in that post.

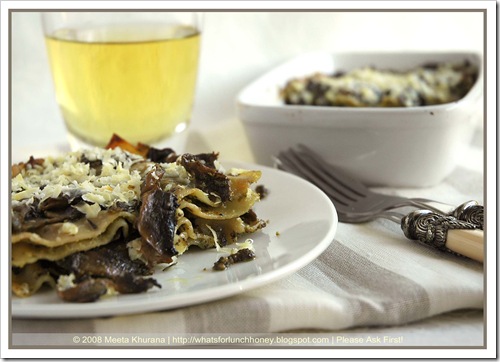
Choka is referred to the actual method of making the dish. Basically a choka is roasting, pounding and grinding an ingredient till the consistency is just right. My favorite choka in Cynthia's post was the one made of aubergines. Besides the fact that I love aubergines, the idea of roasting and mashing the aubergines for this particular choka was similar to a popular Indian dish called "Baigan Ka Bharta".

I probably served the aubergine choka in the most unconventional of ways and Cynthia is probably having a culture shock, but it tasted damn good. I made a Caribbean style chicken marinated in buttermilk and mango chutney, then grilled on a barbecue. This was served with a spicy guacamole and tortillas. The aubergine choka highlighted the other flavors with it's rustic roasted flavors so perfectly.

Cynthia - thank you for being you and thank you for your wonderful recipes.

Briana

I am going to be honest. Until the day Bee of Jugalbandi contacted me, I had no idea who Bri was. Bee told me her story. I was touched and visited her blog Figs with Bri, almost trying to remedy my ignorance of not being aware of such a strong and caring person. Briana was diagnosed with breast cancer two and half years ago. A mastectomy, chemotherapy and two years of good health later, the worst nightmare came true - the cancer is back. It has metastasized to her lungs, her lymph nodes and several areas in her bones and is at Stage IV. At the age of 15, Bri lost her 41-year old mother to the disease. Now, she has chosen to fight the disease with all her might. More about it here.

Bri is focusing on healing and is going through intensive chemo and other treatments. Unfortunately, her health insurance does not cover holistic alternatives which she would like to try. Both Bri and her husband Marc have enough to deal with at  the moment in addition to worrying about her medical bills.

The Click team, together with Jugalbandi have organized a special fundraiser with June's edition of CLICK. With the help of many generous bloggers, a spectacular variety of prizes are being offered as part of the fundraiser.

CLICK is a monthly photography workshop hosted by Jugalbandi. This month’s theme is: YELLOW for Bri. Yellow is the color of hope. Through the work of the LiveStrong Foundation, it has also come to signify the fight against cancer.

After viewing the list, you may make your donation HERE. Your donation can be made securely through credit card or Pay Pal and goes directly to Bri’s account.

The deadline for all CLICK entries is June 30, 2008. The fundraiser itself will extend until July 15, 2008.

The target amount that needs to be collected is US $12,000. We appeal to all our fellow bloggers and readers to help us achieve this. Bri deserves a chance to explore all options, even if her insurance company thinks otherwise.

You can support this campaign by donating to the fundraiser, by participating in CLICK and by publicizing this campaign.

I am helping by donating a prize too. My prize is an A4 poster sized picture of any one of the two pictures, Crimson Beetroot and Luscious Figs. So, please get involved and help us fight with Bri - because every little bit counts.


Aubergine Choka by Cynthia of Tastes Like Home

Printable version of recipe here.

Choka Aubergines (02) by MeetaK


Ingredients

1½ pounds eggplant
4 large cloves of garlic, sliced (average 1 clove garlic per eggplant)
Hot pepper to taste, minced
Salt to taste
1 - 2 tablespoons oil
3 green onions sliced thinly (white and green parts)
1 large tomato, fire roasted (optional)'

Equipment

1 pair tongs
1 table knife
1 food processor or mortar and pestle
1 fork
1 medium bowl

Method

1. Take a sharp knife and make a number of deep incisions into the eggplants

2. Fill each slit with a slice of garlic (be sure to push it right in)

3. On the open medium-flame of your gas burner or outdoor grill, place the eggplant to roast, turning to ensure that it is roasted and cooked through all over. (You can roast all the eggplants at the same time - 1 on each burner) The cooking time and process would vary depending on the size of the eggplant. The skin should be completely charred, blackened. The tongs are very useful in this step

4. To roast the tomato, place on an open medium-low flame and let roast slowly; turn it to ensure that it’s roasted all around

5. Remove the eggplants and tomatoes from the flames and let cool until you can handle

6. With the help of a table knife, carefully remove the charred skin of the eggplant and tomato. It’s okay if bits of the charred skin are in the mixture, so don’t worry if you do not get it absolutely clean

7. Repeat the process until all the eggplants have been skinned

8. Now this stage you can do this 1 of three ways: with a food processor, in a mortar with pestle or with a fork. In the food processor, add the flesh of the roasted eggplant and tomato and give a couple of whirls. You can let the food processor go for a little longer if you like your choka smooth, some people like it to have a slight chunky texture

9. If you are using a fork, then simply mash the eggplants and tomatoes thoroughly

10. With a mortar and pestle, pound/grind both ingredients to your desired texture

11. In a bowl, combine the whirled/mashed/ground eggplant-tomato mixture, hot pepper, salt to taste, oil and green onions, mixing thoroughly until incorporated

12. Serve with roti or rice


Verdict

Unlike the Indian distant relative of this dish - the choka is not flavored with too many spices, leaving you to enjoy the whole aroma of delectable roasted aubergines. It's fresh, simple and full of flavor. I roasted the aubergines on a charcoal grill, which added to that gorgeous flavor. This recipe comes highly recommended from me.

Enjoy!


All photographs and written content on What's For Lunch, Honey? © 2006-2008 Meeta Khurana unless otherwise indicated. | All rights reserved | Please Ask First

7 comments Continue »

The Opera Cake

| 90 comments
Daring Bakers Challenge May 2008
Opera Cake (01) by MeetaK

Oh the woes of an eager beaver Daring Baker. This month's challenge was rather messed up for me. The funny thing was, I actually found each component of the challenge simple enough and did not even know I was messing up until it was too late.

I decided to tackle the challenge this month very early on in the month. I had the weekend to myself and thought it would be the perfect opportunity to come face to face with the Opera Cake. However, what I did not know, that very weekend I decided to make the cake, a slight error in the ingredients would be discovered in the all new Daring Bakers forum and corrected. How I wish it was possible to sound alarms for the over 1000 Daring Bakers - I am imagining something along the lines of a fire alarm. When a fire breaks out the firemen and women are alerted by a shrill alarm. Something like that should be given to each DB - just in case.

This month's challenge was selected by our gorgeous founders Ivonne and Lis with co-hosts and DB newbies Fran and Shea. They wanted something melodic and challenged us with the grand Opera Cake. As I read the ever so long instructions my knees began to go weak. The four ladies decided to honor Barbara's LiveSTRONG efforts and dedicate the challenge to the cause. As LiveSTRONG is in May this year the fantastic girls decided to keep the Opera cake in simple whites and yellows calling it A Taste of Light!

Traditionally the Opera cake is flavored with the the darker colors of chocolate and coffee. It's how I always enjoyed the cake. I admit I was a bit disappointed that these flavors were to be substituted for other lighter colored flavors. But I liked the idea and soon decided on my flavors and colors.

What is an Opera cake?

It's an elegant French dessert made up of five elements:

  • a jaconde - which is the cake layer
  • a syrup to be drizzled over the cake
  • a buttercream that fills the cake layers adding additional layers to the cake
  • a ganache or a mousse
  • a glaze to cover the top layer

It did not take long for me to settle with my flavors. I wanted to keep the cake in different shades of white and decided on a coconut and lime combination.

I added coconut cream to the syrup, lime zest to the buttercream and a splash of Batida de Coco. Yummy I can tell you! So where did I go wrong. It was the buttercream. I had never made buttercream quite in this fashion before. I also made the buttercream according to the ingredient amounts given initially. Then someone discovered a typo and after that things got very confusing. It was too late for me though because my buttercream was completed and in the refrigerator waiting to thicken. But it did not - not even after 4 hours in the fridge! I was running out of time and had to finish the cake.

Let's cut the long story short. As my buttercream was in the fridge I took a break and visited the DB forum. By then the news of typos and changing ingredient amounts was full blown. Well I had to laugh when I pulled out the buttercream and tried to spread it - nope it was more like pouring it. No surprise that it soon ran down the sides.

Well I quickly assembled the cake relieved to get it over and done with. In the end there was a very thin layer of buttercream, the rest I scooped off the pan. Shame! It was not as knee rattling as I expected it to be. Each component was quite easy to follow. It also tasted fantastic. I loved the white mousse and the harmony of lime and coconut.


The Opera Cake
from Dorie Greenspan’s Paris Sweets and Tish Boyle and Timothy Moriarty’s Chocolate Passion 

Printable version of recipe here.

For the joconde
(Note:  The joconde can be made up to 1 day in advance and kept wrapped at room temperate)

What you’ll need:

  • 2  12½ x 15½-inch (31 x 39-cm) jelly-roll pans (Note:  If you do not have jelly-roll pans this size, do not fear! You can use different-sized jelly-roll pans like 10 x 15-inches.)
  • a few tablespoons of melted butter (in addition to what’s called for in the ingredients’ list) and a brush (to grease the pans)
  • parchment paper
  • a whisk and a paddle attachment for a stand mixer or for a handheld mixer
  • two mixing bowls (you can make do with one but it’s preferable to have two)
Opera Cake (05) by MeetaK

Ingredients:
6 large egg whites, at room temperature
2 tbsp. (30 grams) granulated sugar
2 cups (225 grams) ground blanched almonds
(Note:  If you do not want to use almond meal, you can use another nut meal like hazelnut. You can buy almond meal in bulk food stores or health food stores, or you can make it at home by grinding almonds in the food processor with a tablespoon or two of the flour that you would use in the cake. The reason you need the flour is to prevent the almonds from turning oily or pasty in the processor. You will need about 2 cups of blanched almonds to create enough almond meal for this cake.)
2 cups icing sugar, sifted
6 large eggs
½ cup (70 grams) all-purpose flour
3 tbsp. (1½ ounces; 45 grams) unsalted butter, melted and cooled

Preparation

Divide the oven into thirds by positioning a rack in the upper third of the oven and the lower third of the oven.
Preheat the oven to 425◦F. (220◦C). 
Line two 12½ x 15½- inch (31 x 39-cm) jelly-roll pans with parchment paper and brush with melted butter.

In the bowl of a stand mixer fitted with the whisk attachment (or using a handheld mixer), beat the egg whites until they form soft peaks. Add the granulated sugar and beat until the peaks are stiff and glossy. If you do not have another mixer bowl, gently scrape the meringue into another bowl and set aside.
If you only have one bowl, wash it after removing the egg whites or if you have a second bowl, use that one. Attach the paddle attachment to the stand mixer (or using a handheld mixer again) and beat the almonds, icing sugar and eggs on medium speed until light and voluminous, about 3 minutes.

Add the flour and beat on low speed until the flour is just combined (be very careful not to overmix here!!!).

Using a rubber spatula, gently fold the meringue into the almond mixture and then fold in the melted butter. Divide the batter between the pans and spread it evenly to cover the entire surface of each pan.

Bake the cake layers until they are lightly browned and just springy to the touch. This could take anywhere from 5 to 9 minutes depending on your oven. Place one jelly-roll pan in the middle of the oven and the second jelly-roll pan in the bottom third of the oven.

Put the pans on a heatproof counter and run a sharp knife along the edges of the cake to loosen it from the pan. Cover each with a sheet of parchment or wax paper, turn the pans over, and unmold.

Carefully peel away the parchment, then turn the parchment over and use it to cover the cakes. Let the cakes cool to room temperature.

For the syrup
(Note:  The syrup can be made up to 1 week in advance and kept covered in the refrigerator.)

What you’ll need:

  • a small saucepan

Ingredients:
½ cup (125 grams) water
⅓ cup (65 grams) granulated sugar
1 to 2 tbsp. of the flavouring of your choice (i.e., vanilla extract, almond extract, cognac, limoncello, coconut cream, honey etc.)

Stir all the syrup ingredients together in the saucepan and bring to a boil.
Remove from the heat and let cool to room temperature.


Opera Cake (06) by MeetaK


For the buttercream
(Note:  The buttercream can be made up to 1 month in advance and packed in an airtight container. If made way in advance, you can freeze the buttercream. Alternatively you can refrigerate it for up to 4 days after making it. To use the buttercream simply bring it to room temperature and then beat it briefly to restore its consistency.)

What you’ll need:

  • a small saucepan
  • a candy or instant-read thermometer
  • a stand mixer or handheld mixer
  • a bowl and a whisk attachment
  • rubber spatula

Ingredients:
1 cup (100 grams) granulated sugar
¼ cup (60 grams) water
seeds of one vanilla bean (split a vanilla bean down the middle and scrape out the seeds) or 1 tbsp. pure vanilla extract (Note:  If you are flavouring your buttercream and do not want to use the vanilla, you do not have to. Vanilla will often enhance other flavours but if you want an intense, one-flavoured buttercream, then by all means leave it out!)
1 large egg
1 large egg yolk
1¾ sticks (7 ounces; 200 grams) unsalted butter, at room temperature
flavouring of your choice (a tablespoon of an extract, a few tablespoons of melted white chocolate, citrus zest, etc.)

Combine the sugar, water and vanilla bean seeds or extract in a small saucepan and warm over medium heat just until the sugar dissolves. Continue to cook, without stirring, until the syrup reaches 225◦F (107◦C) on a candy or instant-read thermometer. Once it reaches that temperature, remove the syrup from the heat.
[*Note:  Original recipe indicates a temperature of 255◦F (124◦C), however, when testing the recipe it was found that this was too high so it was heated to 225◦F and it worked fine]

While the syrup is heating, begin whisking the egg and egg yolk at high speed in the bowl of your mixer using the whisk attachment. Whisk them until they are pale and foamy.

When the sugar syrup reaches the correct temperature and you remove it from the heat, reduce the mixer speed to low speed and begin slowly (very slowly) pouring the syrup down the side of the bowl being very careful not to splatter the syrup into the path of the whisk attachment. Some of the syrup will spin onto the sides of the bowl but don’t worry about this and don’t try to stir it into the mixture as it will harden!

Raise the speed to medium-high and continue beating until the eggs are thick and satiny and the mixture is cool to the touch (about 5 minutes or so).

While the egg mixture is beating, place the softened butter in a bowl and mash it with a spatula until you have a soft creamy mass. With the mixer on medium speed, begin adding in two-tablespoon chunks. When all the butter has been incorporated, raise the mixer speed to high and beat until the buttercream is thick and shiny.

At this point add in your flavouring and beat for an additional minute or so.

Refrigerate the buttercream, stirring it often, until it’s set enough (firm enough) to spread when topped with a layer of cake (about 20 minutes).

For the white chocolate ganache/mousse (this step is optional)
(Note:  The mousse can be made ahead and refrigerated until you’re ready to use it.)

What you’ll need:

  • a small saucepan
  • a mixer or handheld mixer


Ingredients:
7 ounces white chocolate
1 cup plus 3 tbsp. heavy cream (35% cream)
1 tbsp. liquer of your choice (Bailey’s, Amaretto, etc.)

Melt the white chocolate and the 3 tbsp. of heavy cream in a small saucepan.

Stir to ensure that it’s smooth and that the chocolate is melted. Add the tablespoon of liqueur to the chocolate and stir. Set aside to cool completely.

In the bowl of a stand mixer, whip the remaining 1 cup of heavy cream until soft peaks form. Gently fold the whipped cream into the cooled chocolate to form a mousse. If it’s too thin, refrigerate it for a bit until it’s spreadable.

If you’re not going to use it right away, refrigerate until you’re ready to use.

For the glaze
(Note:  It’s best to make the glaze right when you’re ready to finish the cake.)

What you’ll need:

  • a small saucepan or double boiler

Ingredients:
14 ounces white chocolate, coarsely chopped
½ cup heavy cream (35% cream)

Melt the white chocolate with the heavy cream. Whisk the mixture gently until smooth. Let cool for 10 minutes and then pour over the chilled cake.  Using a long metal cake spatula, smooth out into an even layer.

Place the cake into the refrigerator for 30 minutes to set.

Opera Cake (02) by MeetaK


Assembling the Opéra Cake
(Note:  The finished cake should be served slightly chilled. It can be kept in the refrigerator for up to 1 day).

Line a baking sheet with parchment or wax paper. Working with one sheet of cake at a time, cut and trim each sheet so that you have two pieces (from each cake so you’ll have four pieces in total):  one 10-inch (25-cm) square and one 10 x 5-inch (25 x 12½-cm) rectangle.

Step A (if using buttercream only and not making the ganache/mousse):
Place one square of cake on the baking sheet and moisten it gently with the flavoured syrup. Spread about one-third of the buttercream over this layer.
Top with the two rectangular pieces of cake, placing them side by side to form a square. Moisten these pieces with the flavoured syrup.
Spread another third of the buttercream on the cake and then top with the third square of joconde. Use the remaining syrup to wet the joconde. Spread the remaining buttercream on top of the final layer of joconde and then refrigerate until very firm (at least half an hour).

Make the glaze and after it has cooled, pour/spread it over the top of the chilled cake. Refrigerate the cake again to set the glaze.

Serve the cake slightly chilled. This recipe will yield approximately 20 servings.

Step B (if making the ganache/mousse):
Place one square of cake on the baking sheet and moisten it gently with the flavoured syrup. Spread about three-quarters of the buttercream over this layer.
Top with the two rectangular pieces of cake, placing them side by side to form a square. Moisten these pieces with the flavoured syrup.
Spread the remaining buttercream on the cake and then top with the third square of joconde. Use the remaining syrup to wet the joconde and then refrigerate until very firm (at least half an hour).

Prepare the ganache/mousse (if you haven’t already) and then spread it on the top of the last layer of the joconde. Refrigerate for at least two to three hours to give the ganache/mousse the opportunity to firm up.

Make the glaze and after it has cooled, pour/spread it over the top of the chilled cake. Refrigerate the cake again to set the glaze.

Serve the cake slightly chilled. This recipe will yield approximately 20 servings.


Verdict

Although it did not go right for me, the cake still tasted fabulous. I took some of it to work for my new colleagues and told them about the Daring Bakers. They loved the cake and I was quite happy to bring back an empty cake box. Now they are looking forward to the challenges each month - just as much as I do. Lime and coconut was completely a gorgeous flavor combination. It added the perfect touch of tropical zest. My favorite element was the white chocolate mousse. I was happy that I had a bit leftover and made another dessert creation out of it. I'll share that with you in a few days.

Would I make this again?

Yes definitely - this time I will be going with the original flavors of chocolate and coffee. I will also be making the buttercream differently. LOL!

What did I learn from this challenge?

The method for the butterceam was totally new to me. I have never actually worked with adding a heated syrup into the butter, but it was interesting. I might give the method another go, but it was too much work, while other methods of making buttercream give better results.

Thank you to Ivonne, Lis, Fran and Shea. I liked this challenge - confusing and all! Hugs to you four.

I'd also like to send special birthday wishes to Mansi with this cake. From one Gemini to another ;-)


All photographs and written content on What's For Lunch, Honey? © 2006-2008 Meeta Khurana unless otherwise indicated. | All rights reserved | Please Ask First

90 comments Continue »

Spring Impressions

| 19 comments

Spring 2008 03 framed

If I look back exactly a year ago the colors of Spring and Summer 2007 were faded in their colors. Not as bright and vivid as I usually experience my favorite season. On Friday 23rd it was my grandma's first death anniversary. Last year it was my mum who called and gave me the news about her passing away. Saying I felt numb is an understatement.

Although I had not seen her in a while I felt the incredible void she left. For a person who normally bounces back from the downs and tristful episodes life hands her, I felt myself slipping deeper into a pit of melancholy. Sounds dramatic, I know but I experienced the second half of 2007 without any luster, flavor and spirit. I blogged, but it's easy to hide your feelings behind a notebook. Blogging became a bit of my escape, because no one really saw how badly I was feeling.

Spring came and went, Summer blew past - I was questioning so many things in my life and feeling guilty for not being able to do so many things with my grandma. My job was dragging me down, working from home was taking it's toll. I was not going out as often as I liked to and shutting myself away.

Towards the end of the summer I took a serious step - I decided to make a change in my job. Without really having anything else I simply decided to take a break to get my thoughts, feelings and spirit into perspective. It was not easy. I am moody and Tom got the worse of it. One minute I was doing OK the next minute I was crying - Tom stood by me and tried in his own way to guide me out of the pit. Sometimes I refused the help and simply was happy bathing in self-pity and misery.

I have a few really great friends who did their best to help me. DR, IW, AK are just a few of my girlfriends who lent me a shoulder for support or to cry on, tried to bring me back on track. All with the aim to get me back to the bubbly person I normally am. I mean my nickname is "Champagne Bubbles" - given to me by a dear friend's older sister way back in high school. One person in particular surprised me with his support - an old buddy from the Doha College who believed in me and supported me with each mail he sent. KJ - surprised me with unexpected warmth and support. Thanks people!

Spring 2008 01a framed

I did eventually get back to the bubbly side of life. I like it here much better. I have a new job I am really enjoying with real life colleagues and real discussions. Spring is here again and I am experiencing it in it's fullest glory. I am experiencing the colors and the flavors again to such an extent it's like I am trying to make up for the time I missed last year.

Spring 2008 04 framed

So, I wanted to share the colors and flavors of 2008 that I am living to the fullest this year. Lilacs, runculus, poppies - brighter and more colorful. Tomatoes, raspberries, rhubarb - sweeter and more aromatic.

Spring 2008 02 framed

Just in case - there is someone out there who needs a little color and flavor in their life right now. Hope this makes you smile today!

Thanks to all my blogger friends who, in their own way, support and motivate me. To all my readers who give me a place to come and simply feel good here - thanks for your kind comments and warm compliments every day.


All photographs and written content on What's For Lunch, Honey? © 2006-2008 Meeta Khurana unless otherwise indicated. | All rights reserved | Please Ask First

19 comments Continue »

Citrus Craving: Lime Brûlée

| 40 comments
Lime Creme Brulee (02) by MeetaK

I am cashing in on my promise to you all. Remember I had promised to share that perfect dessert I got a chance to make in the pastry kitchen on my last trip to Dubai? Here it is - well a part of it. See the dessert was a trio, a trio of crème brûlée and this was just one of the flavors - lime.

I know I am a tease. You know I am a tease, so you should also know by now that my playful teasing games are really worth it in the end.

I promised you a exquisite dessert and I am delivering you one third of it. But as you can see this one third is a perfect whole dessert in it's own. I actually splashed out on a new kitchen appliance just for this series of crème brûlée - a new Chefflamme Food Torch!

A creamy and citrusy lime crème brûlée. It really does not get better than that. OK - it does - when you have three incredibly flavored crème brûlées to indulge in.

I decided to go with the lime crème brûlée first for many reasons. First being I am currently totally in love with lemony/limey flavored desserts. There is something refreshing about experiencing that tangy, tart yet sweet on your tongue. How can I describe it best? Let me try!

Tangy so that your face is just on the verge of scrunching up but the sweetness hinders that real scrunch yet the tartness makes your tongue pop into a burst of flavors literally making your mouth water.

Ever experience that when enjoying a citrus dessert or cake? If you have no idea what I am on about well now you have the perfect opportunity to try it out for yourself. This dessert is all what I described above and a little bit more. The smooth cream and the crack of the sugary caramel takes the experience up another level.

My second reason to go with the lime flavored crème brûlée was simply because Helen chose the Citrus theme for this month's Sugar High Friday. Like her my affinity for citrus flavored desserts and sweets runs right next to my chocolate craze. So, there was no way I was going to miss out on this one.

I love limes more than anything. They lend a wonderful aroma to any dish. I find the zest zestier and the juice more refreshing than lemons. On many occasions I will substitute limes with lemons.

Limes

Limes 01 by MeetaK 


Limes are the smallest of the citrus family and their flavor is stronger and more tart than lemons. Generally limes are either round or oval in shape and often have a bright green to dark green colored skin. Limes are picked when they are still green and before they completely mature. As they do mature you will notice they turn more yellowish. This color also indicates that they have lost their fresh tart flavor.

There are several varieties of limes available. Sweet or sour, oval or round, seeds or seedless - all have one thing in common, they are a powerhouse of vitamin C.

Limes are often used not only in sweet dishes but are commonly used to add a zest to savory dishes too. Limes can be used similarly to lemons, but as they are stronger in flavor, smaller amounts are required. Lime juice and zest enhances the flavors of fruits, vegetables and salads and add a fresh tart flavor to baked goods and desserts. Limes are also often used in several popular cocktails like mojitos or caipirinha.

You can already see what fun limes can be and how versatile they are. But did you know this:

  • The high content of vitamin C in limes provides health related benefits.
  • Lemons and limes were used back in the 18th century on British Navy ships to prevent and treat scurvy among the sailors.
  • Limes are used as an ingredient in suntan products, cosmetics, perfumes and other beauty products.
  • Lime juice is also used as a cleaning agent.

Limes are available throughout the year, their peak season however, is May through October. Key limes are not readily available as the Tahitian limes. They are often only found seasonally or in specialty markets.

Selecting and Storing

When shopping for limes select those that are bright green in color and have a shine to their skin. But be careful as often they have been coated with wax, which also gives them a shine. They should feel firm and heavy for their size, because heavy limes will produce the most juice. Select limes with thin skins and avoid the thicker skinned fruit, which is an indication of less flesh and juice.

Also avoid limes that are pale green and are showing signs of yellowing, which indicates the limes are getting close to being fully ripe. Fully ripe limes have lost their acidity and will be bland in flavor compared to bright green tart limes. Select those that are fairly smooth skinned, free of blemishes and do not have soft or hard spots. If the limes have small brown spots it does not indicate that there is a lose of juiciness or flavor. However, if the limes are mostly brown in color, that may be an indication of scald, which will cause the fruit to have a moldy flavor. Avoid limes with shriveled skin or that feel spongy, which is a sign of old fruit that will have lost a lot of its juiciness.

Limes perish the quickest from all of the citrus fruits. Therefore, it is important that they are stored properly. Fresh limes can be stored at room temperature for up to a week if kept out of the direct sunlight. If they are not going to be used within a week, place them in a plastic bag and store them in the refrigerator where they will stay fresh for 2 weeks. After this period, they may not be spoiled but they will begin to lose their tart flavor. If limes have been cut open, wrap them tightly in plastic wrap and store in the refrigerator for 4 to 5 days.

If you have leftover fresh squeezed juice, you can store it in airtight containers in the refrigerator for up to 5 days. Lime juice and zest can be stored for longer period of time by freezing them. Whole limes cannot be frozen.

To freeze lime zest, place the grated zest in an airtight freezer bag or container and store in the freezer.

My favorite tip: to freeze lime juice pour into ice cube trays until solid, then place in airtight freezer bags or containers and store in the freezer.

There are several varieties of limes some more readily available than others.

Key Limes - are often referred to as the true lime. It is smaller and rounder than the more common Persian limes and is yellowish green in color. Key limes have a more acidic flavor than the Tahitian varieties of limes. A well use for key limes is the popular key lime pie. Key limes are generally about the size of a golf ball or smaller. They are grown in Florida and are not always available, generally found in specialty markets and some supermarkets. They are also referred to as Mexican or West Indian limes.

Palestine Sweet Limes - are a sweet variety lime and have a yellow rind that contains aromatic oil. It lacks acidity and contains very few seeds. Although the flesh is very juicy it however, lacks in taste due to the absence of any acidity. This lime is popular in the Middle East and India.

Tahitian Bearss Lime - is a Tahitian lime that is slightly smaller but similar to the Tahitian Persian lime. It is greenish yellow when ripe but is harvested to be sold when it is still green because the acidity level is higher, which provides a better flavor. It is oval in shape and seedless. Tahitian limes have a fairly thin rind and their flesh is pale green and juicy.

Tahitian Persian Lime - is also a Tahitian variety lime that is slightly larger than Tahitian Bearss lime. When ripe it is greenish yellow in color but, just like the Bearss Lime, it is harvested to be sold when it is still green as the acidity level is higher, which provides better flavor. This variety is found most commonly in food stores.

For this crème brûlée use the freshest limes you can find. If you get your hands on Key limes use them for wonderful tart flavor. I used the zest of fresh organic Tahitian Persian Limes and was very pleased with the results.

The recipe I got from the pastry chef was for about a thousand! Not surprising - so I had to do a bit of math to reduce it to a portion of 4. Furthermore, when making desserts in a large kitchens some ingredients are very different to those available in normal supermarkets. I readjusted those ingredients and used fresh items available to most of us. I hope that when you try this dessert you too will be blown away like I was.


Ingredients
Printable version of recipe here.

Lime Creme Brulee (04) by MeetaK

50 ml fresh milk
300g heavy whipping cream
Zest of 2-3 organic limes
100g + 40g fine brown sugar
4 egg yolks


Method

In a saucepan bring the milk, cream and lime zest to a boil. Remove from heat and allow to steep for about 20-30 minutes.

Whisk together the egg yolks with 100g fine brown sugar. Add a few tablespoons of the warm cream mixture to temper the eggs, whisking all along. Once the eggs have warmed to the same temperature, pour the cream mixture in a stead stream into the eggs. Set aside.

Heat the oven to 150 degrees C. Prepare your ramekin or crème brûlée forms by placing them in a larger ovenproof dish. Bring a tea kettle filled with water to a boil and pour into the ovenproof dish so that the water level just reaches about 3/4 of the forms.

You can either pour the cream-egg mixture straight into the forms with the lime zest or strain the liquid beforehand. This depends on your own personal taste. I prefer straining the liquid for extra smoothness.

Place the entire dish into the oven and bake for approx. 45 minutes. Take out and place in the refrigerator overnight. The overnight resting period was highly recommended by the pastry chef. I agree completely as I too learned that one achieves better results with the crème brûlée when it has had a resting period in the fridge.

Shortly before serving sprinkle 40g brown sugar over the cream and using a gas torch caramelize the sugar. If you do not have a gas torch then heat the grill of your oven and place the forms as close to the hot wires as you can. Keep a close eye on them and take them out as soon as the sugar melts and begins to caramelize. I recommend the gas torch and it gives the best results. Crème brûlées are served cold and by placing them in the oven causes the cream to heat up again.

Allow the sugar to turn hard and serve.

For more tips on how to make the perfect crème brûlée check out my Cooking School edition of Crème brûlées. You will not only find another crème brûlée variety but also detailed step by step instructions of how to make the perfect crème brûlée. Furthermore, there are plenty of useful tips for those who are venturing into brûléeing for the first time.


Verdict

Lime Creme Brulee (03) by MeetaK

The first time I tasted the lime brûlée at the hotel my dad works at, it was an explosive experience. Once I got my hands on the recipe I could hardly wait to make it. At home I had to deviate slightly from the original recipe, but the results I got were equally exquisite. Creamy with just the right amount of zesty flavor. This is the perfect type of refreshing dessert after a summery barbeque. Now please do not say I do not keep my promises. The other two flavors will follow soon - I promise! LOL!

Sending this to Helen with all my hugs and best wishes for her birthday!

You might enjoy these zesty citrus creations too:

Lemon Meringue Pie 05 framed
Lemon Meringue Pie
Lime Bars 02 framed
Lime Bars
Lime Kisses 01
Lime Kisses
Orange Cake 03 framed
Orange Cake


All photographs and written content on What's For Lunch, Honey? © 2006-2008 Meeta Khurana unless otherwise indicated. | All rights reserved | Please Ask First

40 comments Continue »

Soul Food: Ricotta Pesto & Mushroom Lasagne

| 31 comments
Lasagne Mushroom Pesto (01a) by MeetaK

At the beginning of the year the lovely Nupur from One Hot Stove, who regularly contributes to the Daily Tiffin wrote a very motivating article about The Simple Life. The main essence of the post was voluntarily simplifying your life by downsizing on materialistic ideals.

The article really motivated me and made me persevere a road I was trying to follow for a while already. Even if it was by no means to an extent that would be considered as simple living, I was trying to simplify many aspects of my life. However, I am failing in one department.  

I have a shoe and handbag fetish. I have a huge problem going past shoe stores without peeking into shop windows. Normally, this leads into peeking inside the store, which leads into trying on a pair of shoes and ultimately me walking out of the store - with a pair of sinfully expensive Italian leather shoes.

Why do you need another pair of shoes? To this question I can give you a 100 reasons within a matter of minutes. I have trained myself well - so well that I believe all the reasons myself!

Last summer I bought a pair of gorgeous Italian beige leather stilettos - very high, very pointed and very elegant. I've only worn them once. That was until this week! I decided to wear them to work with a pair of pinstriped beige trousers. The outfit really looked great and I thought to myself that these shoes will be my summer hit this year.

Change of subject

Weimar is a gorgeous town. It's quaint elegance mixes cultural history with modern art in perfect harmony. It's a town where Schiller, Goethe, Van de Velde and Gropius all helped to shape it into what it is today. The inner core of the town in a pedestrian zone and the streets are paved with old cobblestones, that on a normal day adds to the flair of Weimar.

On this day however, the cobblestones do not add flair but bring dismay.

You see, cobblestone streets are the worst enemies of gorgeous stilettos. On this day, mine in particular!

On this day the cobblestones brutally massacred one of my stilettos! I was extremely pissed to say the least. Every dark cloud has a silver lining - or so they say. Because as I turned around I noticed I was right in front of my favorite shoe shop - the same where I had bought the stilettos I was now holding in my hands. My luck had not run out, the store owner saw what happened and offered to send the stilettos to their factory in Italy so that they could repair the damage and if not, I was told, they would make sure I would get a new pair - for free! "Anything for our best customer!" No way! Me? Is that an honorable title to have?

I was so ecstatic about my stilettos getting repaired that I was very easily persuaded to try on their latest summer collection. I obliged. And I walked out of the store - with a pair of lovely leather ballerinas. Perfect for the cobblestone streets of Weimar!

There is certainly no downsizing with this recipe. It's perfect for days like this, where you need comfort but also a reason to celebrate. The lasagne takes the simple pesto alla Genovese a step further and adds creamy ricotta. A mushroom mix lend the entire dish a lovely earthy flavor bringing everything together so perfectly that you'll be begging for more.


Ingredients
Printable version of recipe here.

Lasagne Mushroom Pesto (03) by MeetaK

500g fresh lasagne, homemade or store bought
Salt and pepper

For the Mushrooms
100g dried Porcini mushrooms
950 g fresh mixed mushrooms, portobellos, shitake etc., thinly sliced
1 onion, finely chopped
4 garlic cloves, finely chopped
Handful flat-leaf parsley, chopped
2-3 sprigs of thyme, chopped
2-3 tablespoons olive oil
4 tablespoons butter
300 ml vegetable stock

For Ricotta Basil Pesto
150g fresh basil leaves
135g pine nuts 3 garlic cloves
170ml olive oil
6 tablespoons butter, room temperature
250g fresh ricotta
30g + extra Parmesan cheese, grated


Method

Lasagne Mushroom Pesto (02) by MeetaK

Preheat the oven to 180 degrees C. Butter a lasagne baking dish.

Soak the dried Porcini mushrooms in warm water for approx. 20 minutes. Drain and squeeze the access liquid from the mushrooms well, reserving the liquid. Coarsely chop the mushrooms. In a large pan heat half of the oil and all of the butter until foaming. Now add the onions and garlic, sautéing until fragrant. Add the mushrooms and sauté for 4-5 minutes on high heat until tender. Stir in the herbs and cook for a further 2-3 minutes. Pour in the stock and the Porcini soaking liquid. Bring to a boil, reduce the heat and simmer for 5-6 minutes until the sauce thickens. Salt and pepper to taste. Remove from heat and allow to cool.

To make the pesto, add the basil, garlic, pine nuts and salt into a food processor and pulse finely. Gradually beat in the olive oil, butter and parmesan cheese and blend until the mixture turns creamy. Transfer to a large bowl and stir in the ricotta until incorporated.

To assemble the lasagne, line the prepared dish with a layer of fresh lasagne sheets. Cover with a layer of ricotta basil pesto. Cover this with more pasta sheets, then layer with the mushrooms, layer with lasagne sheets. Repeat this process until all the ingredients have been used up, finishing with a final layer of mushrooms.

Sprinkle with additional grated parmesan and dot with butter flakes. Cover the dish with aluminum foil and bake for 20-25 minutes. Uncover the dish then bake for a further 20-25 minutes until the top is golden.

Allow to stand for a few minutes before serving. Serve with a tossed green salad.


Verdict

Lasagne Mushroom Pesto (04) by MeetaK

This makes me almost forget shoes. Because I have left them piled in front of the door and have slipped into my comfy flip flops. The lasagne offers comfort and is perfect soul food. The basil pesto highlighted with the creaminess of ricotta layered with pasta and wild mushrooms bring out a delicious palette of flavors and aromas. Both Tom and Soeren dug into the lasagne with hearty fervor. I relished each spoonful - wriggling my toes with satisfaction.  

19 - 25 May is National Vegetarian Week in the UK and once again, Abby of Eat The Right Stuff is celebrating the event by getting all of us to contribute to her event Vegetables Beautiful Vegetables. Last year I created a wonderfully caramelized vegetable tart and this year I am coming over with a huge portion of the lasagne. Hope to see you all there!

You might enjoy these vegetable creations too:

VegPotPie 02
Ricotta Vegetable Pot Pies
Bulgur Mixed Veg and Feta 02
Bulgur with Vegetables & Feta
AsparagusLunch01
Roasted Asparagus with Poached Eggs, Sauce Hollandaise and Potatoes


All photographs and written content on What's For Lunch, Honey? © 2006-2008 Meeta Khurana unless otherwise indicated. | All rights reserved | Please Ask First

31 comments Continue »

Click: Vivid Legumes

| 15 comments
Vivid Legumes (02) by MeetaK

If truth be told I took this picture a little while back. Before I knew the theme for Click this month would be Beans and Lentils. I wanted to experiment with a few new flavors and was thinking of greens and legumes. At my organic store I chanced upon a colorful bag filled with everything I was looking for.

There were different types of lentils, chickpeas and beans. I could hardly wait to get back home and start taking pictures. Like someone possessed I set up my shot. Sometimes things all come together perfectly. This was one of those days. My photo shoot of the beans and lentils went perfectly and I was pleased with the first set of photos.

I was excited to finally get in the kitchen and start my experimenting. Normally, the experiments are filled with trials and errors, this day though everything harmonized like magic. I admit the combination of ingredients and spices I used that day were unusual but it worked. And yes the recipe will be coming soon, I promise.

For now enjoy the colorful moments dried beans and lentils can bring with my "Vivid Legumes"

Details

  • Camera: Nikon D70s
  • Lens: Nikkor 18-70mm
  • Tripod: Bilora 1211
  • Focal Length: 70 mm
  • Exposure Time: 1/60s
  • Aperture: f/4.5
  • Lighting: Natural from right using a bounce on the left.

This month I am back in the judging seat sharing the honor with a few other grand bloggers. We are all looking forward to you photographs so start clicking.


All photographs and written content on What's For Lunch, Honey? © 2006-2008 Meeta Khurana unless otherwise indicated. | All rights reserved | Please Ask First

15 comments Continue »

Flavors: Black Bean Chili with Saffron Rice and Papaya Guacamole

| 19 comments
Black Bean Chilli (01) by MeetaK

This is not any ordinary rice and beans dish. It looks like it at first sight, but there is a whole lot of excellent flavor hidden below each dish.

Although my family and I eat meat, if you looked at our meal plan for an entire week, I would say it is 75 - 80% vegetarian. Yes, I do believe that eating vegetarian is healthier and keeps you fitter. I do not need a study to tell me I am right or wrong because I see the effects it has on my family.

The last 12 months I have been consciously cooking more vegetarian food, at times even dabbling into vegan meals and I see the results. My husband says he feels better – more energy and simply “lighter”. I see exuberance in Soeren’s face and his high spirits are all signs that show me, the slight change in our diets is working for the positive. Personally, I have lost a bit of weight, despite all the desserts I make and hardly visiting the gym (don’t ask!). I feel my skin glow and energized throughout the day.

So why have we not decided to turn 100% vegetarian? Well simply because we enjoy seafood and poultry. I also believe within limits, the “right” kind of meats adds to a healthy diet. We occasionally each beef and hardly any pork, because there is nothing like a good thick steak from time to time.

Cooking a vegetarian meal is not challenging at all. I have been enjoying experimenting with nutrition, flavors and ingredients to make sure that the vegetarian meals I serve are fun, healthy and delectable.

All three of us really love chili con carne. A spicy stew Tex-Mex stew made of ground beef, tomatoes and spices. So, I took on a challenge to experiment with a vegetarian version of the chili. I did try vegetarian “crumbles” made of soya protein. They tasted good but it was an easy trade – crumbles instead of beef. I wanted to work on the recipe more. I consulted a few other recipes in books, on the web and discussed it with a few old chefs of the trade.

The final outcome is so fantastic that I would not even say it is based on the original chili. I used dried black beans for this chili. Black beans originate from Mexico and taste light and a tad bit sweeter than other beans. Great for a chili. It’s a perfect dish in itself. Paired with saffron rice and a papaya salsa, it’s like the threesome was just meant to be. Like I said – a lot more than Beans & Rice!

Interesting Reads:


Ingredients
Printable version of recipe here.

Black Bean Chilli (03) by MeetaK

For the Black Bean Chili
200g black beans, soaked overnight
2 onions, chopped
2 garlic cloves, chopped
450ml canned cocktail tomatoes
2 tablespoons olive oil
1 teaspoon cumin powder
1 teaspoon paprika powder
1 bay leaf
1/2 teaspoon dried chili flakes
1 tablespoon lime juice
Salt and Pepper

For the Saffron Rice
250g Basmati rice, washed
1 teaspoon saffron strands
1/2 lime, zest and juice
2 tablespoons Ghee or clarified butter
1/2 teaspoon salt

For the Papaya Guacamole

Black Bean Chilli Papaya Guacamole (01) by MeetaK

240g papaya, cubed
1/2 red chili, finely chopped
2 tablespoon lime juice
1 garlic clove, finely chopped
1 tablespoon coriander leaves, finely chopped
1 tablespoon olive oil
1/2 teaspoon Dijon mustard
Salt and Pepper


Method

For the Black Bean Chili

Either using a pressure cooker or a pot with water, cook the beans until soft.

In a separate saucepan heat the oil and sauté the onions and garlic until transparent. Add the spices - cumin, paprika, bay leaf, and chili flakes, and continue to sauté for a another minute or so.

Pour in the cocktail tomatoes with juice, salt and pepper. Allow the mixture to simmer for approx. 10 minutes until reduced, then add the beans. Simmer for a further 15 minutes. Finally drizzle with lime juice.

For the Saffron Rice

Black Bean Chilli (04) by MeetaK

In a large saucepan bring approx. 600 ml water with salt, saffron strands and lime juice and zest to a rolling boil. Allow to steep for 5 to 10 minutes.

In a heavy pan heat the ghee and add the rice. Cook for a good minute, then pour in the saffron water and bring to a boil. Covered, simmer for 10 minutes or until the rice is cooked.

For the Papaya Guacamole

Using the back of a fork gently mash the papaya cubes. Add all the other ingredients and mix well. Salt and pepper to taste.

Serve in small individual bowls.


Verdict

There are a lot of flavors coming together here, but they all harmonize so perfectly with each other. The entire meal leans very heavily on the Mexican cuisine with a hint of Indian aromas. We loved the slight sharp chili with the fruity papaya guacamole. It's a fantastic alternative to the regular chili for sure.

More Mexican fiestas on WFLH:

DSC02737 Tuna Tacos
DSC_0076 Chiles Rellenos
Quesadilla04 Cheese Quesadillas with Two Salsas


I'd like to send this one over to Culinary Bazaar who is celebrating the Mexican cuisine. Hope you like this one DK!


All photographs and written content on What's For Lunch, Honey? © 2006-2008 Meeta Khurana unless otherwise indicated. | All rights reserved | Please Ask First

19 comments Continue »

Cooking School: Spaghetti Alla Bolognese

| 25 comments
SpaghettiBolognese 02 framed

I love classic pastas dishes. There is something totally satisfying about an Italian pasta dish prepared in the traditional way. When I am in the kitchen preparing such a dish, I try to imagine I am in the midst of a large Italian family. The buzz of the ceiling fan, the background music of cheerful Italian pop, the shouts of the children playing soccer on the cobblestone streets outside, the full bodied aroma of a huge pot of freshly prepared pasta and sauce are all images and sounds that entice my imagination.

One of the most classical pasta dishes has got to be Spaghetti alla Bolognese. It also happens to be the most favorite pasta dish in our household. I like spending time over the bolognese, because after all if prepared with love and care this sauce is really unbeatable.

The bolognese sauce, also known as ragu, is basically a meat based sauce, which originates from the city of Bologna. It incorporates ground beef, chunky vegetables, pancetta, and tomato paste to give a thick delectable sauce. Traditionally, the bolognese was served with fresh flat pasta, similar to the tagliatelle, over the years however spaghetti became the popular pasta dish which was served with this sauce.

The best bolognese I have eaten was, surprisingly not in Italy! It was actually at the Sheraton in Doha, Qatar. The chef was a humorous Swiss guy. I literally grew up on the stuff, when I would dig into a huge plateful of pasta bolognese at least once a week. When I finally got around to training in the kitchen of the Sheraton at the age of 19, I was lucky enough that the Chef was still around. My first day with the chef was memorable. He had me cutting vegetables in the tiniest of cubes for the whole day. I was irritated because all I wanted to do was make that bolognese. The next day he winked at me and put a huge sack of onions and garlic in front of me. I have never cried and cursed so much in my life. On the fourth day, he finally took me under his wing and showed me how to make the prized bolognese.

I have worked on this recipe over the years. Not really changing very much, just a sprinkling here and a hint there. But as I write this recipe for you, I am looking at the old Sheraton Doha letterhead, where I wrote the recipe down that day during my lunch break. And as if it were a seal of approval, there is a huge stain of the bolognese at the bottom.

The bolognese ragu can be varied in several ways. If you do not like beef use ground chicken. Add a handful porcini mushrooms to the sauce for a wonderful earthy flavor. For a vegetarian ragu, I have used vegetarian “ground beef” crumbles made of soya protein. These can be found in almost any grocery or organic stores. Whatever is used the basic method of preparation remains the same. I guarantee you a thick ragu for your pasta that will have you licking the plates clean.


Monthly Mingle 21 - Appetizers & Hors'Doeuvres

Appetizers&Hors'Doevres June 2008 250px 
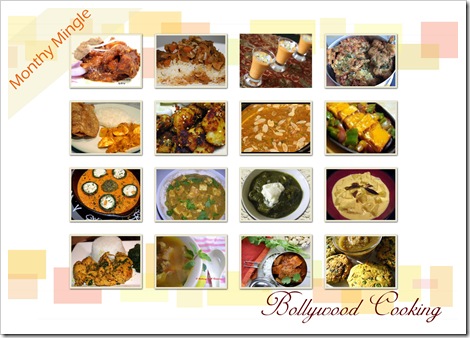
The Monthly  Mingle is traveling this month again. This time to sunny California at Mansi's Fun & Food. Mansi has chosen a great theme - Appetizers and Hors'Doeuvres. If you love entertaining then you cannot miss this mingle.

For this monthly mingle, we'd like you to share some fancy vegetarian appetizers. Cook something that's pretty to look at and tasty to bite in, something that looks good on a plate and is irresistible to your guests!

Here's how it works:

1. All entries must be vegetarian (no meat or seafood); eggs and cheese is allowed
2. It can be sweet or savoury, as long as it is petit and crudite, fitting to be an Hors'Doeuvres. Anything that is bite-sized or individual serving-size is acceptable.
3. Entries must be received by June 9th at the latest.


4. Email your

  • your name
  • your location
  • the name of your blog and its url
  • the name of your dish and a link to the relevant post
  • a copy of the main photo of your dish 200px wide

to mansibshah[at]gmail[dot]com
5. Please include a link-back to Mansi's post and/or to this blog to encourage more readers to join in the fun.
6. Feel free to use the logo above
7. Older entries on blogs can be accepted only if they are republished in the month of May with a link-back to this announcement.


Ingredients
Printable version of recipe here.

SpaghettiBolognese 01 framed

2 onions, finely chopped
1 garlic, finely chopped
1 medium sized carrot, finely chopped
1 leek, finely chopped
50g pancetta, finely chopped
3 springs each - thyme, oregano and basil, finely chopped
2 tablespoons extra virgin olive oil
400g ground beef - not too lean or else the ragu will get too dry
2-3 tablespoons tomato paste
1/8 liter stock - vegetable or beef
Salt and pepper
Nutmeg, ground
1 bay leaf
1-2 cloves
425 ml can of tomatoes

Additional:

400g fresh pasta - spaghetti or tagliatelle
40g parmesan cheese, grated


Method

SpaghettiBolognese 05 framed

In a large heavy pan heat the oil and sauté the ground beef, breaking up the beef with a spatula - approx. 5 minutes. Add the pancetta, onions, garlic and vegetables into the pan and continue to sauté for a further few minutes. Salt and pepper to taste. 

Mix in the tomato paste and cook for a minute. Pour in the stock and add the bay leaf, cloves, thyme and canned tomatoes including the juice. Bring everything to a rolling boil then reduce heat and simmer for 30-45 minutes, stirring occasionally.

Cook pasta according to the instructions on the packet.

Add the basil and oregano to the ragu, which should have nicely thickened by now.

Remove from heat. Put the pasta in a large bowl and pour the ragu over the pasta. Toss well. Serve in deep plates with a good sprinkling of parmesan cheese.

Tip:

  • Make a double portion of this ragu and use it to make a scrumptious lasagne.
  • Buying pasta that is a bit rough will help the ragu to coat it well. Look out on the packet for pasta that is formed in copper forms. Pasta produced in such forms is the traditional way pasta is made. Pasta made in plastic forms produces a smoother pasta which causes the sauce to simply slide off.


Verdict

SpaghettiBolognese 03 framed

Nothing could bring bigger smiles all around the dinner table. This sauce has a perfect balance of spices, herbs and vegetables. It's not too tomato-ey but rather chunky.  It's perfect when you have a lot of friends around for game night. I normally make three to four different types of pastas to serve with this sauce for variety. Thanks Chef Z. for teaching me how to make this great ragu. I hope you all enjoy it as much as we do!

More pasta dishes on WFLH:

CaramelizedCherryGnocchi 05
Caramelized Homegrown Tomatoes on Homemade Gnocchi
ShrimpAsparagusPasta01
Pasta with Shrimps and Asparagus
DSC_0020
Spaghetti con gamberetti e rucola


All photographs and written content on What's For Lunch, Honey? © 2006-2008 Meeta Khurana unless otherwise indicated. | All rights reserved | Please Ask First

25 comments Continue »

Monthly Mingle 20: Bollywood Cooking Roundup

| 32 comments
BC-1

I think this is my favorite Monthly Mingle roundup to date. I was really excited to take a look at each entry as they came in and was totally impressed by all your creations. This month's theme was complete with glamour, stars, gloss and glitter. My challenge to you was to create a dish fit for the red carpet. In Bollywood Cooking I was looking for grand Indian dishes and you all left me starry eyed with your extravagant creations.

We had 36 entries in total. I was especially looking forward to the dishes my non-Indian readers would prepare. From my Indian readers I was expecting dishes that would take Indian food up a notch to the heights of luxury. All of you did not let me down. This is a page to bookmark for sure, because never will you find a list of more exquisite Indian dishes anywhere.

Each entry also has a chance to win this spectacular cookbook by the lovely Bulbul Mankani. We'll be browsing your blogs and scoring the dishes in the next few days. So, stay tuned for that.

Now without any delay, I am proud to present Bollywood Cooking!

  1. Foodfreak: Bengali Mustard Chicken
  2. Lisa's Kitchen: Baked Paneer and Chickpea Cutlets
  3. Cooking 4 All Seasons: Mutton Soup
  4. Peal of East: Chenna poda
  5. Dil Se...: Vegetable biryani
  6. Tasty Recipes: Mutter Paneer
  7. Ranji's Kitchen Corner: Badami Mushroom
  8. What's Cooking: Mughlai Palak Malai Kofta
  9. Spices Corner: Kerela Chicken Curry
  10. Ahaar: Kadai Chicken Curry
  11. Cook with Love: Palak Mushroom
  12. My Food Blog: Vegetarian Biryani
  13. HomeMadeS: Bombay Lamb Curry & Rice Khir
  14. Jugalbandi: Pineapple Fried Rice
  15. Asankhana: Badam Murg/Almond Chicken
  16. Bombay's Foodie: Alu Chole Biryani

    BC-2

  17. A Cracking Good Egg: Rawa Idli & Coconut Chutney
  18. Mike's Table: Egg Curry
  19. Ruth's Kitchen Experiments: Coconut Sweets
  20. Morsels & Musings: Pineapple Pulisseri
  21. Fun & Food: Tandoori Paneer Tikka with Mango Chutney
  22. Introducing Ashley: Spicy Chicken Curry & Naan
  23. Tastebuds: Gajar Ka Halwa
  24. Green Gourmet Giraffe Blog: Roasted Vegetable Vindaloo
  25. Laws of the Kitchen: Date & Coconut Burfi
  26. Evolving Tastes: Mango Rabdi
  27. Enjoying Indian Food: Dimple Kapadia's Bhutta Curry
  28. My Kitchen Treats: Chilli Chicken
  29. As Dear As Salt: Raungi ki Rasewali Subzi
  30. Makan Makanyuk: Gobhi Curry, Rice Pilaf Onion Pakoras
  31. Cooking with Rinku: Chicken Boti Kabab
  32. Cooking From A to Z: Pav Bhaji

    BC-3

  33. Passionate about Baking & Beyond: Lamb Curry
  34. Food-n-More: Kesar Rasmalai
  35. Saffron Trail: Ajwaini Arbi ke Tikkey
  36. What's For Lunch, Honey?: Aachari Alu - Potatoes in Mango Chutney Sauce

  37. Updates:

  38. Iyengar's Kitchen: Masala Potato Hindustani


Now wasn't that the most mouthwatering trip you've ever had through Bollywood? Well soon we'll be announcing the grand winner!

If I've missed your entry, please forgive me, then drop me an email at blogmeeta@gmail.com. I'll update the post as soon as I can.


All photographs and written content on What's For Lunch, Honey? © 2006-2008 Meeta Khurana unless otherwise indicated. | All rights reserved | Please Ask First


32 comments Continue »