by MeetaK")
It's challenges like this I truly love. Flaky pastry filled with a sensual filling of chocolate pastry cream and tart raspberries. This month the adorable Kelly of Sass & Veracity and brilliant Ben of What's Cooking? got us turning and flipping over a buttery layer of Danish pastry.
I have to say this - I am glad that I have been in the Daring Baker group for over a year now, because if I was not I would have been doing one of my Voodoo dances I normally save for these kinds of challenges!
I remember my second challenge had me completely stressed. Who remembers the Gateau Saint Honoré? This challenge had me biting my finger nails and hitting my head against my trusted rolling pin for deciding to join a baking group. My second challenge, and I had to conquer 3 (out of 4) tough components that makes up the great Gateau! All 3 of which I had never made prior to that challenge!
Yes - puff pastry was one of those components. Looking back I kind of giggle now - because anyone who has made their own puff pastry will nod their heads in agreement when I say - one never goes back to the store-bought stuff. Homemade puff pastry is a lot of work - but it is so rewarding that even the best store-bought pastry cannot compete.
Since that challenge, I do often make my own puff pastry. I make huge batches and freeze them and am always surprised how fast it goes. Knowing that there is lovely homemade puff pastry in the freezer only makes me want to make more delicious pastries with it. It's great to have around - defrost overnight, smother with Nutella or jam in the morning and bake for a few minutes and we have a lovely crispy breakfast or snack for Soeren's lunchbox.
When this month's challenge was announced, surprisingly I was not phased out! Kelly and Ben chose the Danish Braid from from Sherry Yard’s The Secrets of Baking.
Danish dough belongs to the family of butter-laminated or layered dough, with puff pastry being the ultimate. While the Danish dough is sweet and is yeast-leavened, puff pastry is not. The process of making Danish dough is less complex than that of puff pastry, but equally as important to achieve best results, and a great starting place to begin to learn about laminated doughs in general. Danish dough is extremely versatile, and once made can be used for a variety of baked goods. The possibilities are endless.
The guidelines for the challenge were quite easy:
- Use the recipe as written to make Danish dough and create at least one Danish Braid. The recipe will make two full braids unless we chose to make only half the dough.
- We were to fill the Danish Braid with the apple filling provided by Kelly and Ben and/or any other filling as long as it was something we made ourselves from scratch.
 by MeetaK")
We had a few choices to modify the recipe:
- The dough ingredients include ground cardamom and orange zest. Cardamom is traditional in Scandinavian breads, but if it was cost prohibitive, or if there were dietary restrictions, we could leave it out or replace it with something else. We could omit the orange zest or choose another type of citrus to flavor the dough.
- The method or style of our braid was our choice. We could vary the width of the dough strips, type of edging, or angle of cuts.
- Often, a glaze, nuts, or sugar are used as toppings. We could choose to use any or all of these, or others we found interesting.
- We could use one or more fillings such as fresh berries, pastry cream, preserves or jams, curds.
- If there’s a way to try something savory with the extra dough, then why not?
For my braids I chose to make a rich chocolate pastry cream using the recipe from my sugar daddy ;-) and paired it with the fruity freshness of raspberries. The pastry cream is something I make very often. It's simply exquisite and a breeze to whip up. Often I will make the pastry cream as a dessert and serve it as the world's best chocolate pudding! And when I do - I am the World's best mummy!
I left out the orange zest in the dough but kept the cardamom, as I find chocolate and raspberries pair well with cardamom. You will find the recipe here for the chocolate pastry cream as I made it to fill my braid, however, I have also included the recipe for the original filling - Apple filling. This way if you do decide to make the full amount of the dough you can give both fillings try.
You will be seeing plenty of Danish braids with several unique and excellent filling ideas today. So I hope you enjoy the Daring Bakers June challenge across the blogesphere.
Danish Braid
from Sherry Yard's The Secret of Baking
Printable version of recipe here.
Terminology:
- Laminated dough – is layered dough created by sandwiching butter between layers of dough
- Detrempe – ball of dough
- Beurrage – butter block
- Turn – each “fold & roll” of the dough produces a single turn in a 3-step process where the dough is folded exactly like a business letter in 3 columns. Each single turn creates 3 layers with this method.
 by MeetaK")
DANISH DOUGH
Makes 2-1/2 pounds dough
Ingredients
For the dough (Detrempe)
1 ounce fresh yeast or 1 tablespoon active dry yeast
1/2 cup whole milk
1/3 cup sugar
Zest of 1 orange, finely grated
3/4 teaspoon ground cardamom
1-1/2 teaspoons vanilla extract
1/2 vanilla bean, split and scraped
2 large eggs, chilled
1/4 cup fresh orange juice
3-1/4 cups all-purpose flour
1 teaspoon salt
For the butter block (Beurrage)
1/2 pound (2 sticks) cold unsalted butter
1/4 cup all-purpose flour
Dough
Using a standing mixer: Combine yeast and milk in the bowl of a mixer fitted with the paddle attachment and mix on low speed. Slowly add sugar, orange zest, cardamom, vanilla extract, vanilla seeds, eggs, and orange juice. Mix well.
Change to the dough hook and add the salt with the flour, 1 cup at a time, increasing speed to medium as the flour is incorporated. Knead the dough for about 5 minutes, or until smooth. You may need to add a little more flour if it is sticky. Transfer dough to a lightly floured baking sheet and cover with plastic wrap. Refrigerate for 30 minutes.
Without a standing mixer: Combine yeast and milk in a bowl with a hand mixer on low speed or a whisk. Add sugar, orange zest, cardamom, vanilla extract, vanilla seeds, eggs, and orange juice and mix well. Sift flour and salt on your working surface and make a fountain. Make sure that the “walls” of your fountain are thick and even. Pour the liquid in the middle of the fountain.
With your fingertips, mix the liquid and the flour starting from the middle of the fountain, slowly working towards the edges. When the ingredients have been incorporated start kneading the dough with the heel of your hands until it becomes smooth and easy to work with, around 5 to 7 minutes. You might need to add more flour if the dough is sticky.
Butter Block
Combine butter and flour in the bowl of a mixer fitted with a paddle attachment and beat on medium speed for 1 minute. Scrape down the sides of the bowl and the paddle and then beat for 1 minute more, or until smooth and lump free. Set aside at room temperature.
After the detrempe has chilled 30 minutes, turn it out onto a lightly floured surface. Roll the dough into a rectangle approximately 18 x 13 inches and ¼ inch thick. The dough may be sticky, so keep dusting it lightly with flour. Spread the butter evenly over the center and right thirds of the dough. Fold the left edge of the detrempe to the right, covering half of the butter. Fold the right third of the rectangle over the center third. The first turn has now been completed. Mark the dough by poking it with your finger to keep track of your turns, or use a sticky and keep a tally. Place the dough on a baking sheet, wrap it in plastic wrap, and refrigerate for 30 minutes.
Place the dough lengthwise on a floured work surface. The open ends should be to your right and left. Roll the dough into another approximately 13 x 18 inch, ¼-inch-thick rectangle. Again, fold the left third of the rectangle over the center third and the right third over the center third. No additional butter will be added as it is already in the dough. The second turn has now been completed. Refrigerate the dough for 30 minutes.
Roll out, turn, and refrigerate the dough two more times, for a total of four single turns. Make sure you are keeping track of your turns. Refrigerate the dough after the final turn for at least 5 hours or overnight. The Danish dough is now ready to be used.
Storing: If you will not be using the dough within 24 hours, freeze it. To do this, roll the dough out to about 1 inch in thickness, wrap tightly in plastic wrap, and freeze. Defrost the dough slowly in the refrigerator for easiest handling. Danish dough will keep in the freezer for up to 1 month.
FILLING
 by MeetaK")
Chocolate Pastry Cream & Raspberries
Chocolate pastry cream adapted from Chocolate Desserts by Pierre Hermé's written by Dorie Greenspan
Makes 900 g of pastry cream
Ingredients
2 cups whole milk
4 large egg yolks
6 tablespoons sugar
3 tablespoons cornstarch, sifted
200 g bittersweet chocolate, melted
40 g unsalted butter, at room temperature
250 g fresh raspberries
Preparation
Fill a large bowl with cold water and ice cubes. Set aside a smaller bowl that will fit inside the ice bath and hold the pastry cream. Also set aside a fine meshed strainer.
In a small saucepan bring the milk to the boil. In the meantime, whisk the egg yolks, sugar and cornstarch together in another medium sized saucepan.
Once the milk is hot you will need to temper the egg mixture by adding tablespoonfuls of the milk to the egg mixture, whisking all the while. Still whisking, once the egg mixture starts to warm up, slowly pour in the rest of the milk.
Strain the mixture into the saucepan and heat over a medium heat. Whisking vigorously, without stopping, bring the mixture to a boil. Keep the mixture at a boil - whisking with all your might - for 1 to 2 minutes.
Still over the heat, whisk in the melted chocolate. Remove from heat and scrape the pastry cream into the small bowl.
The pastry cream should be thick, smooth and without any lumps.
Set the bowl holding the pastry cream in the ice bath, stirring frequently to keep the mixture smooth. Cool the pastry cream to 60 degrees C, then remove from the once bath and stir in the butter in three or four additions. Return the cream to the ice bath and leave it there until it has completely cooled.
Storing: Covered tightly with plastic wrap and pressing the plastic against the cream's surface to create and airtight seal, the pastry cream will remain fresh in the refrigerator for 2 days.
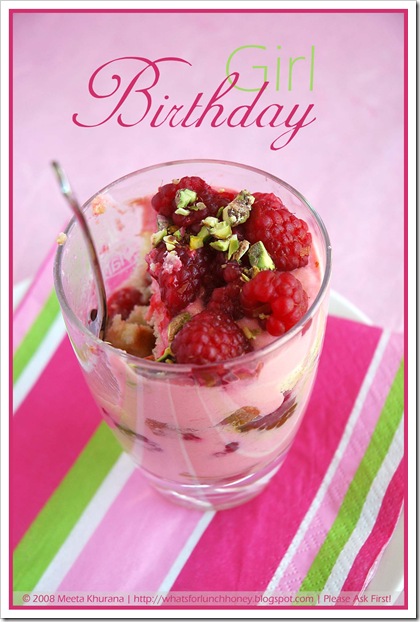
Leftovers: Use the rest as a dessert on it's own scattered with fresh raspberries and pistachios. Or use it to make other chocolate pastries.
Apple Filling
Makes enough for two braids
Ingredients
4 Fuji or other apples, peeled, cored, and cut into ¼-inch pieces
1/2 cup sugar
1 tsp. ground cinnamon
1/2 vanilla bean, split and scraped
1/4 cup fresh lemon juice
4 tablespoons unsalted butter
Toss all ingredients except butter in a large bowl. Melt the butter in a sauté pan over medium heat until slightly nutty in color, about 6 - 8 minutes. Then add the apple mixture and sauté until apples are softened and caramelized, 10 to 15 minutes.
If you’ve chosen Fujis, the apples will be caramelized, but have still retained their shape. Pour the cooked apples onto a baking sheet to cool completely before forming the braid. (If making ahead, cool to room temperature, seal, and refrigerate.) They will cool faster when spread in a thin layer over the surface of the sheet.
Storing: After they have cooled, the filling can be stored in the refrigerator for up to 3 days.
Leftovers: The filling can be used as an ice cream topping, for muffins, cheesecake, or other pastries.
Assembling the Danish Braid
Makes enough for 2 large braids
 by MeetaK")
Ingredients
1 recipe Danish Dough (see above)
2 cups filling, chocolate pastry cream or apple filling (see above)
For the egg wash: 1 large egg, plus 1 large egg yolk
Line a baking sheet with a silicone mat or parchment paper. On a lightly floured surface, roll the Danish Dough into a 15 x 20-inch rectangle, ¼ inch thick. If the dough seems elastic and shrinks back when rolled, let it rest for a few minutes, then roll again. Place the dough on the baking sheet.
Along one long side of the pastry make parallel, 5-inch-long cuts with a knife or rolling pastry wheel, each about 1 inch apart. Repeat on the opposite side, making sure to line up the cuts with those you’ve already made.
Spoon the filling you’ve chosen to fill your braid down the center of the rectangle. If using the chocolate pastry cream scatter the raspberries over the pastry cream.
Starting with the top and bottom “flaps”, fold the top flap down over the filling to cover. Next, fold the bottom “flap” up to cover filling. This helps keep the braid neat and helps to hold in the filling. Now begin folding the cut side strips of dough over the filling, alternating first left, then right, left, right, until finished. Trim any excess dough and tuck in the ends.
Whisk together the whole egg and yolk in a bowl and with a pastry brush, lightly coat the braid. I scattered my braids with hazelnut brittle and coarse sugar.
Proofing and Baking
Spray or brush cooking oil onto a piece of plastic wrap, and place over the braid. Proof at room temperature or, if possible, in a controlled 35 degree C environment for about 2 hours, or until doubled in volume and light to the touch.
Near the end of proofing, preheat oven to 200 degrees C. Position a rack in the center of the oven.
Bake for 10 minutes, then rotate the pan so that the side of the braid previously in the back of the oven is now in the front. Lower the oven temperature to 180 degrees C, and bake about 15-20 minutes more, or until golden brown. Cool and serve the braid either still warm from the oven or at room temperature.
Storing: The cooled braid can be wrapped airtight and stored in the refrigerator for up to 2 days, or freeze for 1 month.
Verdict
 by MeetaK")
Like I said at the very beginning of this post - I love these kind of challenges. The dough was quite easy to make, even though it looks tedious it's not. If you've made puff pastry before you should have no trouble with this. For those who have never made puffy pastry, this dough is a great and simple way to acquaint yourself with the layered type of doughs. We loved the chocolate raspberry filling in this and I was quite surprised how fast both the braids disappeared.
Would I make this again?
Yes, I am actually thinking this might replace the puff pastry in some of the recipes in my kitchen. As I found it a breeze to whip up and always need dough on hand for Soeren's lunch boxes or when he has friends over, this dough will certainly be made in larger batches. As the dough is sweetened and contains flavoring it is not versatile for savory fillings.
What did I learn from this challenge?
I've never made Danish pastry before and was surprised at how easy it was. I liked the fact that it makes a nice easy and quick alternative the puff pastry.
A huge thanks to both Kelly and Ben for the great challenge this month!
All photographs and written content on What's For Lunch, Honey? © 2006-2008 Meeta Khurana unless otherwise indicated. | All rights reserved | Please Ask First
 by MeetaK")
 by MeetaK")
 Diptych by MeetaK")
 by MeetaK")


 The
The  by MeetaK")
 by MeetaK")
 by MeetaK")
 by MeetaK")


 by MeetaK")
 by MeetaK")
 by MeetaK")
 by MeetaK")
 by MeetaK")
 by MeetaK")


 by MeetaK")
 by MeetaK")
 by MeetaK")
 by MeetaK")
 by MeetaK")
 by MeetaK")
 by MeetaK")


 by MeetaK")
 by MeetaK")
 by MeetaK")
 by MeetaK")