Danish Braid: Chocolate & Raspberries

| 63 comments
Daring Bakers Challenge June 2008
 
Chocolate Raspberry Danish Braid (01) by MeetaK


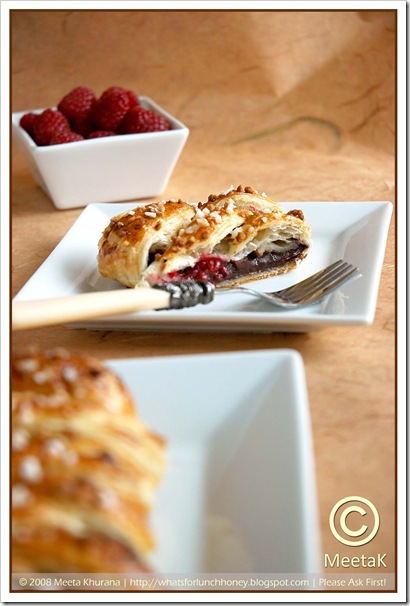
It's challenges like this I truly love. Flaky pastry filled with a sensual filling of chocolate pastry cream and tart raspberries. This month the adorable Kelly of Sass & Veracity and brilliant Ben of What's Cooking? got us turning and flipping over a buttery layer of Danish pastry.

I have to say this - I am glad that I have been in the Daring Baker group for over a year now, because if I was not I would have been doing one of my Voodoo dances I normally save for these kinds of challenges!

I remember my second challenge had me completely stressed. Who remembers the Gateau Saint Honoré? This challenge had me biting my finger nails and hitting my head against my trusted rolling pin for deciding to join a baking group. My second challenge, and I had to conquer 3 (out of 4) tough components that makes up the great Gateau! All 3 of which I had never made prior to that challenge!

Yes - puff pastry was one of those components. Looking back I kind of giggle now - because anyone who has made their own puff pastry will nod their heads in agreement when I say - one never goes back to the store-bought stuff. Homemade puff pastry is a lot of work - but it is so rewarding that even the best store-bought pastry cannot compete.

Since that challenge, I do often make my own puff pastry. I make huge batches and freeze them and am always surprised how fast it goes. Knowing that there is lovely homemade puff pastry in the freezer only makes me want to make more delicious pastries with it. It's great to have around - defrost overnight, smother with Nutella or jam in the morning and bake for a few minutes and we have a lovely crispy breakfast or snack for Soeren's lunchbox.

When this month's challenge was announced, surprisingly I was not phased out! Kelly and Ben chose the Danish Braid from from Sherry Yard’s The Secrets of Baking.

Danish dough belongs to the family of butter-laminated or layered dough, with puff pastry being the ultimate.  While the Danish dough is sweet and is yeast-leavened, puff pastry is not. The process of making Danish dough is less complex than that of puff pastry, but equally as important to achieve best results, and a great starting place to begin to learn about laminated doughs in general. Danish dough is extremely versatile, and once made can be used for a variety of baked goods. The possibilities are endless.

The guidelines for the challenge were quite easy:

  • Use the recipe as written to make Danish dough and create at least one Danish Braid.  The recipe will make two full braids unless we chose to make only half the dough.
  • We were to fill the Danish Braid with the apple filling provided by Kelly and Ben and/or any other filling as long as it was something we made ourselves from scratch. 
Chocolate Raspberry Danish Braid (04) by MeetaK

We had a few choices to modify the recipe:

  • The dough ingredients include ground cardamom and orange zest.  Cardamom is traditional in Scandinavian breads, but if it was cost prohibitive, or if there were dietary restrictions, we could leave it out or replace it with something else.  We could omit the orange zest or choose another type of citrus to flavor the dough.
  • The method or style of our braid was our choice.  We could vary the width of the dough strips, type of edging, or angle of cuts.
  • Often, a glaze, nuts, or sugar are used as toppings.  We could choose to use any or all of these, or others we found interesting.
  • We could use one or more fillings such as fresh berries, pastry cream, preserves or jams, curds.
  • If there’s a way to try something savory with the extra dough, then why not?

For my braids I chose to make a rich chocolate pastry cream using the recipe from my sugar daddy ;-) and paired it with the fruity freshness of raspberries. The pastry cream is something I make very often. It's simply exquisite and a breeze to whip up. Often I will make the pastry cream as a dessert and serve it as the world's best chocolate pudding! And when I do - I am the World's best mummy!

I left out the orange zest in the dough but kept the cardamom, as I find chocolate and raspberries pair well with cardamom. You will find the recipe here for the chocolate pastry cream as I made it to fill my braid, however, I have also included the recipe for the original filling - Apple filling. This way if you do decide to make the full amount of the dough you can give both fillings try.

You will be seeing plenty of Danish braids with several unique and excellent filling ideas today. So I hope you enjoy the Daring Bakers June challenge across the blogesphere.


Danish Braid
from Sherry Yard's The Secret of Baking

Printable version of recipe here.

Terminology:

  • Laminated dough – is layered dough created by sandwiching butter between layers of dough
  • Detrempe – ball of dough
  • Beurrage – butter block
  • Turn – each “fold & roll” of the dough produces a single turn in a 3-step process where the dough is folded exactly like a business letter in 3 columns.  Each single turn creates 3 layers with this method.
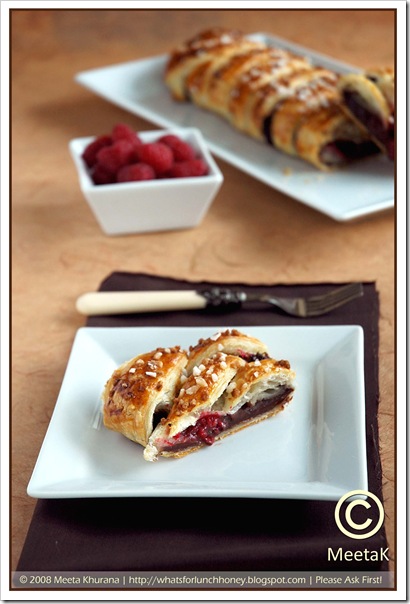
Chocolate Raspberry Danish Braid (03) by MeetaK 

DANISH DOUGH
Makes 2-1/2 pounds dough

Ingredients

For the dough (Detrempe)
1 ounce fresh yeast or 1 tablespoon active dry yeast
1/2 cup whole milk
1/3 cup sugar
Zest of 1 orange, finely grated
3/4 teaspoon ground cardamom
1-1/2 teaspoons vanilla extract
1/2 vanilla bean, split and scraped
2 large eggs, chilled
1/4 cup fresh orange juice
3-1/4 cups all-purpose flour
1 teaspoon salt
For the butter block (Beurrage)
1/2 pound (2 sticks) cold unsalted butter
1/4 cup all-purpose flour

Dough
Using a standing mixer:
Combine yeast and milk in the bowl of a mixer fitted with the paddle attachment and mix on low speed.  Slowly add sugar, orange zest, cardamom, vanilla extract, vanilla seeds, eggs, and orange juice.  Mix well. 

Change to the dough hook and add the salt with the flour, 1 cup at a time, increasing speed to medium as the flour is incorporated.  Knead the dough for about 5 minutes, or until smooth.  You may need to add a little more flour if it is sticky.  Transfer dough to a lightly floured baking sheet and cover with plastic wrap. Refrigerate for 30 minutes.

Without a standing mixer:  Combine yeast and milk in a bowl with a hand mixer on low speed or a whisk.  Add sugar, orange zest, cardamom, vanilla extract, vanilla seeds, eggs, and orange juice and mix well.  Sift flour and salt on your working surface and make a fountain.  Make sure that the “walls” of your fountain are thick and even.  Pour the liquid in the middle of the fountain. 

With your fingertips, mix the liquid and the flour starting from the middle of the fountain, slowly working towards the edges.  When the ingredients have been incorporated start kneading the dough with the heel of your hands until it becomes smooth and easy to work with, around 5 to 7 minutes.  You might need to add more flour if the dough is sticky.

Butter Block
Combine butter and flour in the bowl of a mixer fitted with a paddle attachment and beat on medium speed for 1 minute.  Scrape down the sides of the bowl and the paddle and then beat for 1 minute more, or until smooth and lump free.  Set aside at room temperature.

After the detrempe has chilled 30 minutes, turn it out onto a lightly floured surface.  Roll the dough into a rectangle approximately 18 x 13 inches and ¼ inch thick.  The dough may be sticky, so keep dusting it lightly with flour.  Spread the butter evenly over the center and right thirds of the dough.  Fold the left edge of the detrempe to the right, covering half of the butter.  Fold the right third of the rectangle over the center third.  The first turn has now been completed.  Mark the dough by poking it with your finger to keep track of your turns, or use a sticky and keep a tally.  Place the dough on a baking sheet, wrap it in plastic wrap, and refrigerate for 30 minutes.

Place the dough lengthwise on a floured work surface.  The open ends should be to your right and left.  Roll the dough into another approximately 13 x 18 inch, ¼-inch-thick rectangle.  Again, fold the left third of the rectangle over the center third and the right third over the center third.  No additional butter will be added as it is already in the dough. The second turn has now been completed.  Refrigerate the dough for 30 minutes.

Roll out, turn, and refrigerate the dough two more times, for a total of four single turns.  Make sure you are keeping track of your turns.  Refrigerate the dough after the final turn for at least 5 hours or overnight.  The Danish dough is now ready to be used. 

Storing: If you will not be using the dough within 24 hours, freeze it.  To do this, roll the dough out to about 1 inch in thickness, wrap tightly in plastic wrap, and freeze.  Defrost the dough slowly in the refrigerator for easiest handling.  Danish dough will keep in the freezer for up to 1 month.

FILLING
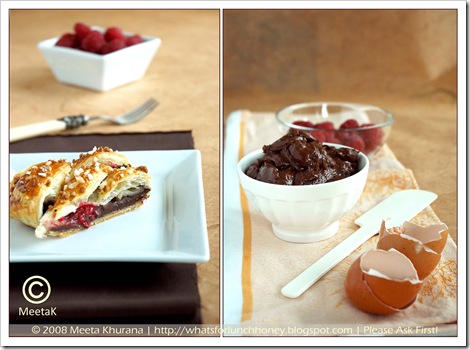
Chocolate Raspberry Danish Braid Diptych (01) by MeetaK

Chocolate Pastry Cream & Raspberries
Chocolate pastry cream adapted from Chocolate Desserts by Pierre Hermé's written by Dorie Greenspan

Makes 900 g of pastry cream

Ingredients

2 cups whole milk
4 large egg yolks
6 tablespoons sugar
3 tablespoons cornstarch, sifted
200 g bittersweet chocolate, melted
40 g unsalted butter, at room temperature
250 g fresh raspberries

Preparation

Fill a large bowl with cold water and ice cubes. Set aside a smaller bowl that will fit inside the ice bath and hold the pastry cream. Also set aside a fine meshed strainer.

In a small saucepan bring the milk to the boil. In the meantime, whisk the egg yolks, sugar and cornstarch together in another medium sized saucepan.

Once the milk is hot you will need to temper the egg mixture by adding tablespoonfuls of the milk to the egg mixture, whisking all the while. Still whisking, once the egg mixture starts to warm up, slowly pour in the rest of the milk.

Strain the mixture into the saucepan and heat over a medium heat. Whisking vigorously, without stopping, bring the mixture to a boil. Keep the mixture at a boil - whisking with all your might - for 1 to 2 minutes.

Still over the heat, whisk in the melted chocolate. Remove from heat and scrape the pastry cream into the small bowl.

The pastry cream should be thick, smooth and without any lumps.

Set the bowl holding the pastry cream in the ice bath, stirring frequently to keep the mixture smooth. Cool the pastry cream to 60 degrees C, then remove from the once bath and stir in the butter in three or four additions. Return the cream to the ice bath and leave it there until it has completely cooled.

Storing: Covered tightly with plastic wrap and pressing the plastic against the cream's surface to create and airtight seal, the pastry cream will remain fresh in the refrigerator for 2 days.

Leftovers: Use the rest as a dessert on it's own scattered with fresh raspberries and pistachios. Or use it to make other chocolate pastries.

Apple Filling
Makes enough for two braids

Ingredients
4 Fuji or other apples, peeled, cored, and cut into ¼-inch pieces
1/2 cup sugar
1 tsp. ground cinnamon
1/2 vanilla bean, split and scraped
1/4 cup fresh lemon juice
4 tablespoons unsalted butter

Toss all ingredients except butter in a large bowl.  Melt the butter in a sauté pan over medium heat until slightly nutty in color, about 6 - 8 minutes.  Then add the apple mixture and sauté until apples are softened and caramelized, 10 to 15 minutes. 

If you’ve chosen Fujis, the apples will be caramelized, but have still retained their shape. Pour the cooked apples onto a baking sheet to cool completely before forming the braid.  (If making ahead, cool to room temperature, seal, and refrigerate.) They will cool faster when spread in a thin layer over the surface of the sheet. 

Storing: After they have cooled, the filling can be stored in the refrigerator for up to 3 days. 

Leftovers: The filling can be used as an ice cream topping, for muffins, cheesecake, or other pastries.

Assembling the Danish Braid
Makes enough for 2 large braids
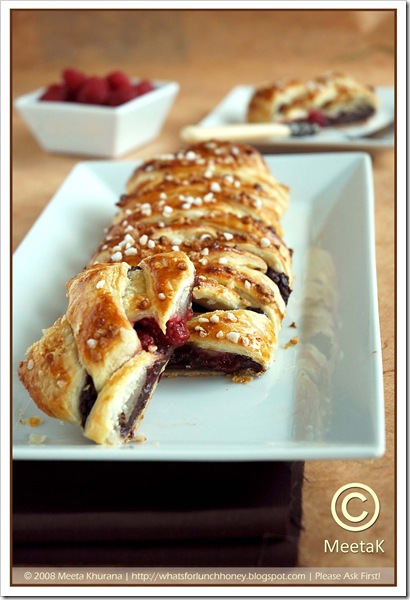
 Chocolate Raspberry Danish Braid (02) by MeetaK


Ingredients
1 recipe Danish Dough (see above)
2 cups filling, chocolate pastry cream or apple filling (see above)
For the egg wash:  1 large egg, plus 1 large egg yolk

Line a baking sheet with a silicone mat or parchment paper.  On a lightly floured  surface, roll the Danish Dough into a 15 x 20-inch rectangle, ¼ inch thick.  If the dough seems elastic and shrinks back when rolled, let it rest for a few minutes, then roll again.  Place the dough on the baking sheet.

Along one long side of the pastry make parallel, 5-inch-long cuts with a knife or rolling pastry wheel, each about 1 inch apart.  Repeat on the opposite side, making sure to line up the cuts with those you’ve already made.

Spoon the filling you’ve chosen to fill your braid down the center of the rectangle.  If using the chocolate pastry cream scatter the raspberries over the pastry cream.

Starting with the top and bottom “flaps”, fold the top flap down over the filling to cover.  Next, fold the bottom “flap” up to cover filling.  This helps keep the braid neat and helps to hold in the filling. Now begin folding the cut side strips of dough over the filling, alternating first left, then right, left, right, until finished.  Trim any excess dough and tuck in the ends.

Whisk together the whole egg and yolk in a bowl and with a pastry brush, lightly coat the braid. I scattered my braids with hazelnut brittle and coarse sugar.

Proofing and Baking
Spray or brush cooking oil  onto a piece of plastic wrap, and place over the braid.  Proof at room temperature or, if possible, in a controlled 35 degree C environment for about 2 hours, or until doubled in volume and light to the touch.

Near the end of proofing, preheat oven to 200 degrees C.  Position a rack in the center of the oven.

Bake for 10 minutes, then rotate the pan so that the side of the braid previously in the back of the oven is now in the front. Lower the oven temperature to 180 degrees C, and bake about 15-20 minutes more, or until golden brown.  Cool and serve the braid either still warm from the oven or at room temperature.

Storing: The cooled braid can be wrapped airtight and stored in the refrigerator for up to 2 days, or freeze for 1 month.


Verdict
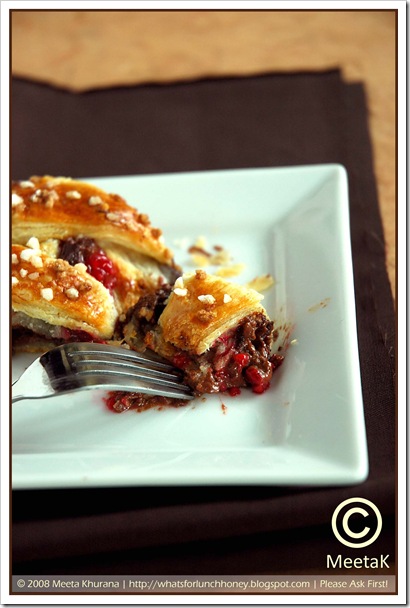
Chocolate Raspberry Danish Braid (05) by MeetaK

Like I said at the very beginning of this post - I love these kind of challenges. The dough was quite easy to make, even though it looks tedious it's not. If you've made puff pastry before you should have no trouble with this. For those who have never made puffy pastry, this dough is a great and simple way to acquaint yourself with the layered type of doughs. We loved the chocolate raspberry filling in this and I was quite surprised how fast both the braids disappeared.

Would I make this again?

Yes, I am actually thinking this might replace the puff pastry in some of the recipes in my kitchen. As I found it a breeze to whip up and always need dough on hand for Soeren's lunch boxes or when he has friends over, this dough will certainly be made in larger batches. As the dough is sweetened and contains flavoring it is not versatile for savory fillings.

What did I learn from this challenge?

I've never made Danish pastry before and was surprised at how easy it was. I liked the fact that it makes a nice easy and quick alternative the puff pastry.

A huge thanks to both Kelly and Ben for the great challenge this month!


All photographs and written content on What's For Lunch, Honey? © 2006-2008 Meeta Khurana unless otherwise indicated. | All rights reserved | Please Ask First

63 comments Continue »

Butter Oil! What the heck is it?

| 22 comments
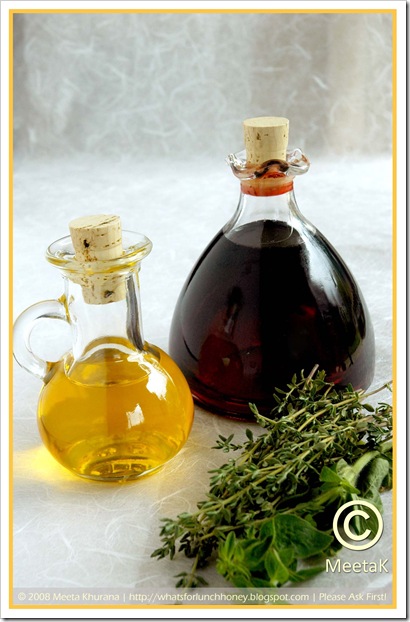
Butter Oil Raspberry Balsamic Vinegar (01) by MeetaK

My last post "the best Caponata Sandwiches ever" raised a few questions about the type of oil I used. It was a delicious butter oil, which I got, along with the raspberry balsamic vinegar, from a dear friend for my birthday.

I was surprised that so many of you were unsure what butter oil is, but as I researched it I realized that it is an insider's tip and it's popularity has only just started in Europe. So, what is butter oil?

Butter oil is a wonderful delicate oil made of canola, however by no means to be mistaken for the canola oil one buys in a supermarket. Butter oil is only available in a few delicatessen stores or can be bought online here in Germany. This oil was primarily developed for clinics and the gastronomy and has no cholesterol. Furthermore, it does not have such a large quotient of saturated fats like butter, in fact butter oil has over 60% unsaturated fats and 10% omega-3 fats, making it extremely healthy.

You can pretty much replace all the oils and fats in your kitchen with this oil. One can use it to bake, roast, for salads or even on bread instead of butter or margarine.

You can clearly smell and taste the buttery aroma. The oil is produced by adding a synthetic blend of naturally identical flavoring substances. Of course, one can simply enjoy the healthy advantages of the inexpensive canola oil, which is available as a refined, neutral tasting and authentic cooking oil in every supermarket. However, for an exquisite butter aroma to top your elegant dishes or for health purposes, butter oil is unbeatable.

Note: The difference between the North American and European canola is, that the European canola is not genetically modified. The European Union has banned the importation of genetically manipulated crops like canola, and it has not adopted the new name "canola" to be used for rapeseed oils.

I was unable to find much reference to butter oil or refined canola oil in the US. My research was mostly done through websites and documents in the library I found in German. So, I am leaving this as an open post. If anyone has reference or knows where to find butter oil in your home country, or simply has more information on it, leave your comments in the comments section of this post.

Look forward to your views.


Technorati Tags: ,,,,


All photographs and written content on What's For Lunch, Honey? © 2006-2008 Meeta Khurana unless otherwise indicated. | All rights reserved | Please Ask First
22 comments Continue »

Flavors: The Best Caponata Sandwiches Ever

| 34 comments
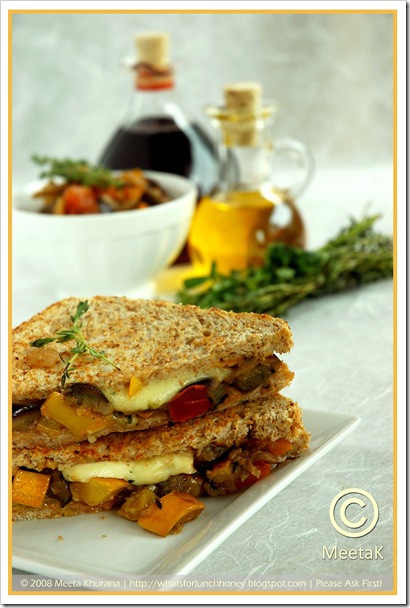
Caponata Sandwiches (01) by MeetaK

This morning as I opened the double patio windows I was greeted by a fresh warm breeze. There was something in the air – the freshness of the damp rain from the previous night, the warmth, the fragrance of subtle summer flowers, that took me back to a vacation in Bombay.

I was about 16 and we were vacationing in Bombay (back then it was still Bombay). The monsoons had hit the city and although there was chaos in the city below, sitting in my aunt’s balcony overlooking the blue ocean across Juhu Beach, I could not help but find pure pleasure. After every downpour the air felt crisp and clean. Almost as if Mother Nature was wiping the slate clean, allowing us to start each day with a new and rejuvenating spirit.

What I loved the most was the way the air felt and smelled early in the mornings, before the city turned into it’s chaotic hustle and bustle and before the air became humid and sticky. The morning air was just a bit damp and slightly misty from the water evaporating into the warm air. The breeze, although warm, was cool enough to be invigorating. Then there was that fresh fragrance, a mixture of salty sea and sweet flowers.

It was that same air I experienced this morning in Weimar – thousands of kilometers away from Bombay and years later. But just this one small experience took me back to so many happy and crazy memories, raising my spirits and giving me my buzz for the day.

What was your buzz today?

Well if you haven’t had a buzz yet, I’ve got the perfect thing for you. These sandwiches!

The idea of stuffing the gorgeous mixture of eggplant caponata into a sandwich came from the lovely Nupur of One Hot Stove. It was last August when I read her post “Alone in the Kitchen!” It amused me and I instantly ordered the book she reviewed. As I scrolled down, I read the recipe attached to her post and fell in love with the sandwiches.

I have made several versions of the typical eggplant-tomato combination, which is found in several world cuisines. But never did I ever think of adding it to a sandwich.

This month Zu of Zlamushka's Spicy Kitchen is featuring One Hot Stove in her Tried & Tasted. I do not think there is anyone who has not heard of Nupur’s wonderful blog. She has a way about her that makes me sit up and think. I enjoy her writing and I love the fact that she is a caring person to those around her and to the environment she lives in. Currently, she is my “Knitting Queen” and often shares her lovely projects with us. I am thoroughly enjoying seeing each of her project. I do not knit - I probably never will either but I love her enthusiasm for this hobby. 

Nupur in your honour – caponata sandwiches my way!

I made a few changes to Nupur’s original recipe. As one of my men does not like capers and the other does not want raisins in savory food, I omitted both. Instead I added a yellow zucchini and a small bulb of fennel. To this I also threw in a small handful of olives. Instead of the balsamic vinegar I used lovely raspberry balsamic vinegar, which added the slight sweetness raisins would have. Finally, I drizzled the whole mixture with delicate butter oil; I got as a present for my birthday. Oh the fragrance! It was incredible and the sandwiches – they were gone before I was able to take decent pictures. I did manage a few though and I hope you enjoy them as much as we did!


Ingredients
Printable version of recipe here.

Caponata Ingredients (01) Diptych by MeetaK

100 ml olive oil
1 fennel bulb, diced
1 medium aubergine, cut into cubes
1 orange bell pepper, cut into cubes
1 yellow zucchini, cut into cubes
2-3 ripe tomatoes, diced
1 medium red onion, roughly chopped
2 garlic cloves, finely chopped
Handful each fresh thyme and oregano, chopped
50 - 100g olives, chopped
Salt and pepper
Good splash of raspberry balsamic vinegar
Good drizzle of butter oil
Mozzarella cheese, sliced
Slices of whole wheat toast


Method

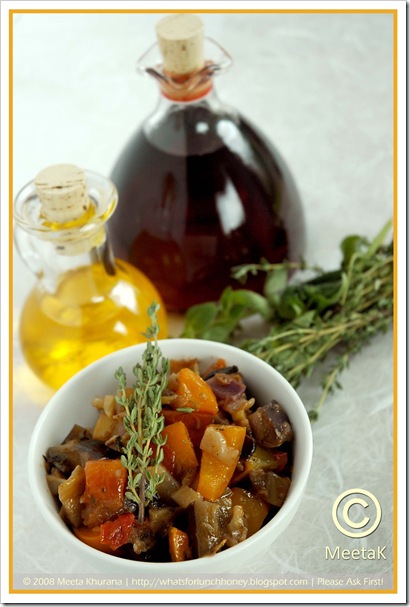
Caponata (01) by MeetaK

Heat up the olive oil in a large pan. Sauté the garlic and onions until translucent and fragrant. Add the aubergine and sauté for about 2 minutes, until just starting to soften. Throw in the bell pepper and zucchini and continue to cook until vegetables are tender but still crisp, approx. 2-3 minutes. Add the fennel, sauté till just tender. Then finally add the diced tomatoes with all the juices and the herbs. Mix well and season with salt and pepper to taste.

Simmer until the vegetables begin to release their aromas and the flavors blend with each other. The mixture will start to thicken, about 20 minutes. Stir often so that the vegetables do not stick to the pan.

Add the raspberry balsamic vinegar and olives, check seasoning. Keep warm.

On a chopping board lay out the slices of toast bead and layer a few slices of mozzarella on one side. Just before you spoon the caponata drizzle it with a good shot of the exquisite butter oil.

Spoon a few tablespoons of the caponata on one side of the toast bread and close the sandwich with the other. Press down gently.

Re-heat the pan you made the caponata in and toast the sandwiches for 3-5 minutes on low heat on each side until the cheese starts to melt.

Serve warm.


Verdict

These were so good. A perfect combination of healthy vegetables in a sandwich - my kind of fast food. These are perfect for snacks, a light lunch or picnics. Soeren loved the cheesy soft vegetables sandwiched in the bread and demanded to save one for his lunchbox. The tiny but very exquisite touch was the addition of raspberry balsamic vinegar and the decadent drizzling of the butter oil towards the end. Both have a fantastic flavor and highlighted the aromas of the vegetables perfectly. Tangy and butterlicious!

You might enjoy these great vegetable ideas too:

OrientalVegies02
Warm Oriental Vegetable Salad
CaramelizedVegieTart03
Caramelized Vegetable Tart
Ratatouille o6
Ratatouille Provençal


Aubergine recipes from around the blogs:

Nami Nami's wonderful Armenian Aubergine Stew

Mostly Eating's aromatic Aubergine, courgette and tomato stew with quinoa and feta

Ammalu's Kitchen's flavorful Aubergine Tomato Gratin

Zlamushka's Spicy Kitchen's spicy Sichuan Aubergine


Reminder!

MM Mango Mania July 2008-250px The Monthly Mingle is in full swing this month with Mango Mania. I am enjoying your fantastic ideas and creations. Hope the rest of you will join us experimenting with this lovely fruit.

Joining the party is easy. Create a mango dish and post it on your blog by July 14 and send it on over to me. You will find more details here.

Deadline: 14 July 2008


All photographs and written content on What's For Lunch, Honey? © 2006-2008 Meeta Khurana unless otherwise indicated. | All rights reserved | Please Ask First

34 comments Continue »

Bombay Chowpatty: Vegetable Paneer Frankies with Mango Chutney

| 37 comments

Bollywood Cooking - Indian Street Food

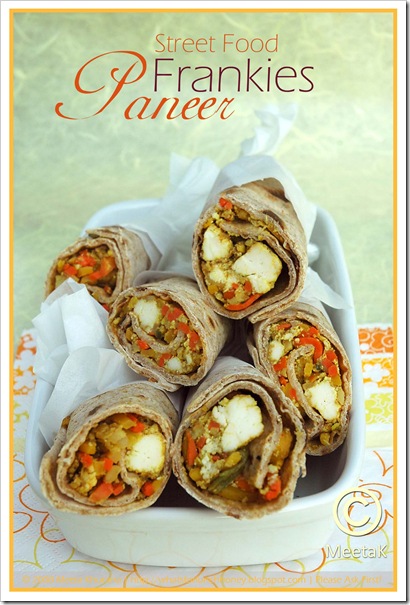
Paneer Frankies (01a) by MeetaK


I think it would be safe to say that the most authentic of Indian cuisines is the huge array of lip smacking street food. For just a few rupees one can purchase hot, fresh and simply delectable snacks sold by vendors from myriad makeshift or portable stalls.

Street food in India is extremely popular, mainly because they are available at half the price compared to any restaurant food. Be it take-out food, junk food, snacks, or fast food - all are synonymous with street food and all of these can be purchased on any foot path, beach-side or road corner.

The street food in India is a fusion of various flavors, stimulating the taste buds of not only the locals but also the tourists visiting the country. You will find these portable stalls in every locality and neighborhood in any Indian metropolitan city. The snacks are prepared right there in front of your eyes, tempting you visually and with the wonderful spicy aromas. In fact some of the vendors gain such a reputation for their snacks that people will journey far to experience the food from a specific vendor.

Indian street food varies from region to region. Depending where you are in India, you will be offered such a huge selection of scrumptious snacks, each prepared more temptingly then the other.

The quintessential North Indian snack found almost everywhere is Chaat - a common name for all tangy, spicy and not all that nutritious delicacies. The tangy flavor comes from the use of lemon, pomegranate seeds, black salt and tamarind. An all time favorite, made of crispy small pancakes, salted and sprinkled with a variety of masala powders, splashed with yogurt and drenched in different chutneys. My mouth is watering just thinking about this. There is a fruity version of the chaat too - prepared with seasonal fruits, especially guavas, bananas, apples and papayas. I remember enjoy bowlfuls of this when I visited my grandparents in Delhi during summer break.

The Eastern part of India offers a potato patty dipped in a flour batter and deep fried. They are served with chutneys, raw onions and cucumber slices.

Traveling to the West, the Vada Pav is one of the most favorite and cheapest snacks found in the sophisticated metropolis Mumbai. Also known as the "poor man's burger" it is a sensational mashed potato patty, spiced with green chilies, gingers and other spices, then dipped is a batter made of herbs and gram flour. Finally it is sandwiched between soft buns and drizzled with hot and sweet chutneys. Simply irresistible. One of my favorites from this region is the Bhelpuri. Puffed rice served with a spicy mixture of chopped potatoes, onion, coriander leaves, green chilies and tomatoes, then topped with sweet
chutney, a dash of lime juice, sprinkled with rock salt, normal salt and a hint of red chili powder. Drooling yet?

In the south you will find several thattukadas, which are covered carts or vans with stoves and utensils. Here you can indulge in some of the most delicious dosas, a light rice-flour crispy pancake fired in coconut oil and served with a spicy potato filling and coconut chutney.

There are so many types of street foods that the space in this post is just not enough. Warm samosas with a hot masala chai, sweet dripping jalebis. The list is long!

These popular types of street food have to be eaten fresh and as soon as they are prepared. Each region offers it's own local flavor making it unique. Locals and even foreigners love to gorge on them, making the road side eateries a class in itself. So much so, Indian street food has become world famous.

The popularity of Indian street food outside India has drastically gained over the years. There are many restaurants in several cities around the world that specialize simply in Indian street food. Dubai is one such city.

It's where I find all my favorite snacks that I used to eat when I was vacationing in India. Memories are almost always attached to each dish. However, what I enjoy the most is seeing my son gorging down the same snacks I used to and still enjoy. Jalebis are his sweet favorite - but when it comes to savory, the Bombay Frankies are unbeatable.

Frankies are the essence of Bombay street food. They are the Indian version of wraps if you will have it. During lunch time in Bombay - college kids will rush in hordes to their local food stall and indulge in one or several types of Frankies. What's so great about them is that they are so versatile and can be filled with anything you like. They are delicious, kid-friendly and perfect for a snack. Serve them with any kind of chutney to add a extra taste-level.

My Frankies are made with paneer and an array of vegetables. I spice mine with a mix of cumin powder, chaat masala and turmeric. Fresh ginger and garlic give a wonderful fragrance. Finally a dollop of fresh, homemade mango chutney tops off a perfect Frankie.

If you want a bit of the Indian street food in your kitchen this is one snack your family will love.


Ingredients
Printable version of recipe here.

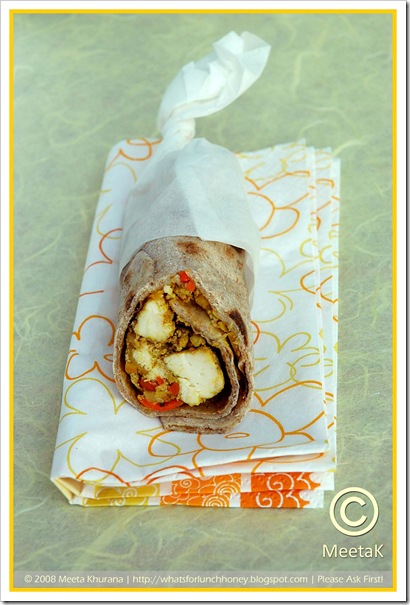
Paneer Frankies (02) by MeetaK

For the Frankies

4-6 chapatis (you can also use whole wheat tortillas if you do not have fresh chapatis at hand)
1 medium red onion, thinly sliced
2 garlic cloves, minced
1 inch piece ginger, minced
2-3 green chilies, finely chopped
1/2 teaspoon turmeric
1 teaspoon cumin powder
1 teaspoon chaat masala
1/4 teaspoon red chili powder
juice of 1/2 lime
Salt and pepper
3 tablespoon canola oil
500g paneer, cubed. You'll find find step by step instructions to make paneer here.
250g mixed vegetables, julienne
Handful coriander leaves
1 egg, beaten

Heat 2 tablespoons oil in a large wok. When hot, add the onions and stir fry until transparent. Mix in the garlic, ginger and green chilies and sauté for another minute or so. Now add all of the spices. Cook for approx. 4-5 minutes, then add the vegetables and give it a good toss. Now add the paneer cubes and gently stir.

Drizzle the lime juice and sprinkle the coriander leaves. Mix well.

Assembling the Frankies

In a large skillet heat up a tiny drop of the remaining oil. Place the chapati (or tortilla) to heat through. Add a a little bit of water to the egg. Generously brush the egg wash onto the chapati and flip. Cook for 1-2 minutes, brushing with the egg wash on this side. Flip again and cook for another 1-2 minutes.

Place the chapati on a chopping board. Add a few tablespoons of the paneer filling and roll, similarly to a wrap. Repeat the process for all of the chapatis and filing.

Serve with mango chutney.

Ingredients


For the Spicy Mango Chutney

6-7 ripe mangoes, cut into chunks
200-250 ml white vinegar
Juice and zest of 4 limes
2 cups sugar
10 whole cloves
15-20 red peppercorns
1 large red onion, finely chopped
1 teaspoon red chili flakes
1 1/2 teaspoon coarse salt
2 tablespoons ginger, minced

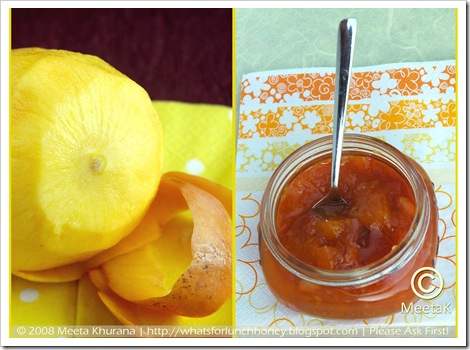
Mango Chutney Diptych (01) by MeetaK

In a sauce pan add the vinegar, red onion, chili flakes, peppercorns, cloves, salt and sugar and bring to a boil over a medium heat. Reduce heat and simmer for approx. 15 minutes.

Add lime zest and juice, ginger and mangoes and stir well. Simmer for approx 40 minutes until the mangoes begin to soften and the mixture thickens. Remove from heat and transfer the chutney immediately into jars.

Refrigerated the chutney will last for up to 4 weeks.


Verdict

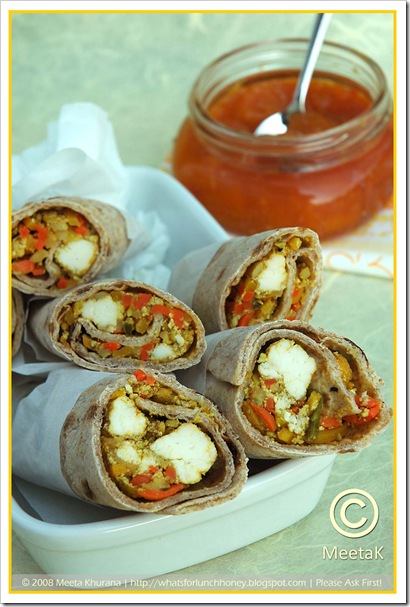
Paneer Frankies (03) by MeetaK

My mum knows my passions. So when I was in Dubai in April she took me to a fantastic street food restaurant. They served a delectable variety of typical Indian street food - all of the ones I mentioned above. But it was the Frankies that caught my eye. They were the right combination of sweet, zesty and spicy.

Back in Germany I created a bit of the street food in my own kitchen. These Frankies are simply superb. I love the combination with the mango chutney. I actually made fresh chapatis especially for these. Soeren found these absolutely delicious and Tom indulged in quite a few of these. Unfortunately no leftovers for later. My advice make several of these, because they'll go like hot cakes - err Frankies.

Hope you enjoyed a tiny peak into Indian street food. With this simple recipe I am sure you too can enjoy a taste of India at home.

You might enjoy these great Indian dishes too:

PooriBhaji04
Poori Bhaji
GajarHalwa 05
Gajar Ka Halwa
Chicken Curry02
Chicken Curry


All photographs and written content on What's For Lunch, Honey? © 2006-2008 Meeta Khurana unless otherwise indicated. | All rights reserved | Please Ask First
37 comments Continue »

Sensational: Strawberry Panna Cotta with Balsamic Red Wine Syrup

| 46 comments
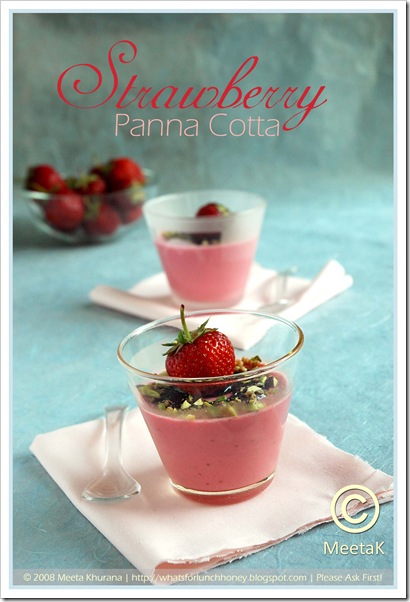
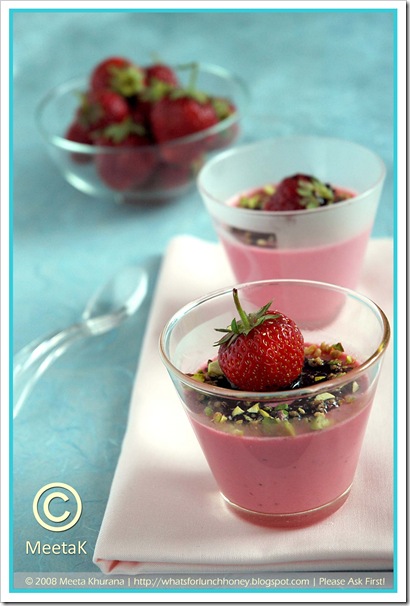
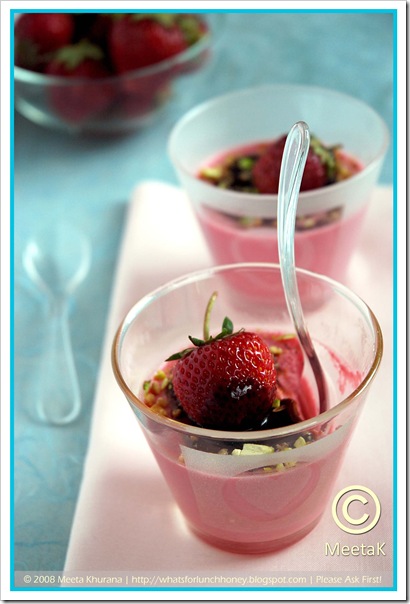
Strawberry Panna Cotta (01) by MeetaK 

I always get assigned the dessert! And if I am really honest with myself, in the kitchen I prefer cooking rather than dessert making or baking!

But I always get assigned the dessert.

Once or twice a month my girlfriends and I get together for a girlie evening. If we all got together at once we'd be about 8 or 10! A lot of women - but all 10 of us in one place rarely ever happens as the one or other can't make it for several reasons (kids, husband, work etc.). So, often we get together in groups of fours to sixes. We really have fun together and do a variety of things. The movies then cocktails, or dinner at a restaurant then cocktails, or just cocktails. Sometimes one of the girlfriends will invite us over to her place and we cook and then have cocktails - you get the picture!

There's always a lot of giggling, gossiping and bitching. Oh I just love these evenings. I always come back with my spirits high and in a giddy mood (yes those cocktails!) On the occasions when we are invited over to dinner, we all pitch in. A potluck. The hostess makes the main course and the rest of us get assigned different things. One will bring a salad, the other the munchies, the other wine alcohol for the cocktails - I always get assigned the dessert.

Baking/desserts requires high concentration - exact measurements and perfect temperatures. I do enjoy creating such creations, but cooking is more my forte. I like being able to simply play around with ingredients - free-style. Precise measurements are not required and improvising is desired. I love that.

Having said that - it's the dessert and the baking that gives me a buzz. There is a great feeling of satisfaction when I have completed an intricate dessert or a tricky cake, incomparable to anything else. I've also noticed that it's the dessert or the cake that almost always steals the show!

Honestly? I love the attention.

On the weekend, one of my best girlfriends, AK, was having a belated birthday party and requested me to make dessert. She had suggested something chocolatey. "No problem there!" I thought.

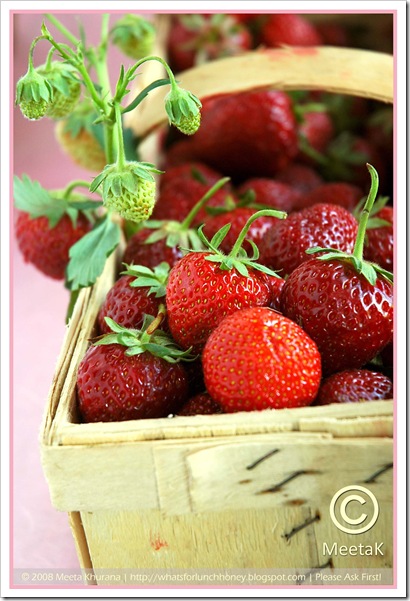
But then Soeren and I went to our local strawberry fields and plucked 3 kilos of these luscious strawberries ...

Strawberry Basket (01) by MeetaK

With these gorgeous, ripe, juicy fruit in my fridge I had to make them the star of my dessert. One of my favorite German cooking magazines is featuring strawberries this month so I had plenty of exciting recipes to choose from.

I went for the panna cotta. Not because of the panna cotta itself, I've made that a few times. What intrigued me in the recipe was the balsamic red wine syrup. The recipe is a breeze to make and produces an exceptional dessert. It's a perfect bring-a-long to any potluck party - a real show stealer.


Ingredients
Printable version of recipe here.

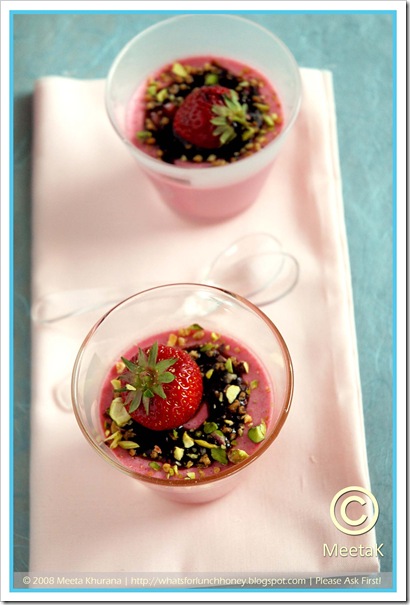
Strawberry Panna Cotta (03) by MeetaK

Serves 4

For the panna cotta

200g ripe strawberries, cut into quarters
250g heavy cream
50g icing sugar
3 sheets gelatin

For the balsamic red wine syrup

100 ml balsamic vinegar
100 ml red wine
50g sugar

Optional

Hazelnut brittle and pistachios, chopped


Method

Strawberry Panna Cotta (02) by MeetaK


For the panna cotta

In a saucepan mix together the strawberries, sugar and cream and on medium heat simmer for approx. 10 minutes.

Soak the gelatin sheets in cold water for 5 minutes.

Using a puréeing machine, purée the strawberry-cream mixture until smooth. If desired, strain the mixture through a sieve. Add the gelatine and stir until dissolved.

Pour into 4 cups or forms and refrigerate overnight.

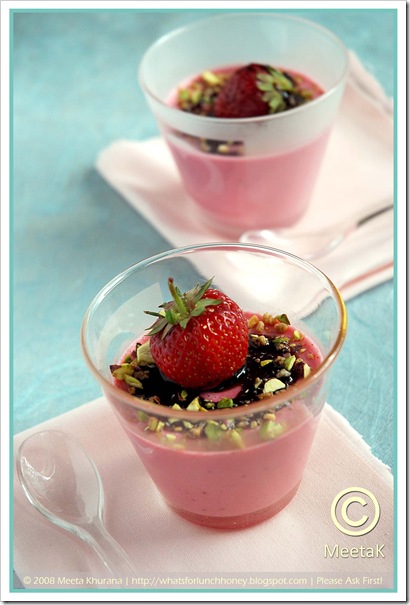
Strawberry Panna Cotta (05) by MeetaK

For the balsamic red wine syrup

Mix together all the ingredients for the syrup in a saucepan and bring to a gentle boil. Reduce heat and simmer until the mixture has reduced to a third, into a thick creamy syrup. Set aside to cool.

Serve the panna cotta drizzled with the syrup and a sprinkling of the nuts, if using.

Enjoy!


Verdict

Strawberry Panna Cotta (06) by MeetaK

Even a chocoholic like me succumbs to a fruity dessert like this. This panna cotta encases all the ripeness and aromas of a fresh strawberry. It smells fantastic and tastes incredible. The combination with the balsamic red wine syrup is unbeatable. An explosion of flavors. My girlfriends enjoyed the dessert to the very last spoon, which was savored with such delicacy. AK could not stop hugging me for making such a special dessert just for her. Yes, AK you mean the world to me - for you nothing but the best.

You might enjoy the creamy desserts on WFLH too:

SaffronCardamomPannaCotta 07 framed
Saffron and Cardamom Panna Cotta
Panna Cotta Sin
Panna Cotta with Blackberries
PersimmonVerrines 04
Persimmon Honey Nut Yogurt Verrines


All photographs and written content on What's For Lunch, Honey? © 2006-2008 Meeta Khurana unless otherwise indicated. | All rights reserved | Please Ask First

46 comments Continue »

Monthly Mingle 23: Mango Mania & Winner of Bollywood Cooking

| 22 comments
MM Mango Mania July 2008-550px

Oh the mango. The queen of fruit! Wouldn't you agree?

There are so many wonderful varieties of this sensational fruit. Pick up a fresh, ripe mango and breath in its sweet aroma. There is nothing quite like it. If you are like me you can hardly wait to cut open the ripe fruit. Behold the vivid yellow/orange color, spoon out the juicy flesh and sit back and experience the aromatic flavors.

This month I am dedicating a whole mingle in the honor of this delicious fruit. Fill your shopping bags with juicy mangoes and create extravagant dishes with the fruit. The selection is huge as mangoes are so versatile. They can be used in savory and sweet dishes. My only request is to use fresh fruit, because only then will you enjoy the full aroma and exceptional tastes of this wonderful fruit.

This month I want you to go mad with Mango Mania. Make cool ice creams, creamy mousses, elegant tarts or hearty breads. Your deadline is July 14, 2008.

Here’s how it works:

  1. Create a dish that fits the theme of “Mango Mania” as described above
  2. Post about it on your blog anytime from now until 14 July(entries must be in English, please).
  3. Link to this post and send the details to me (see below).

Once you’ve posted your dish, send an email with “Mango Mania” in the subject line to: meetasmingle (at) gmail (dot) com by 14 July with the following information:

  • your name
  • your location
  • the name of your blog and its URL
  • the name of your dish and a link to the relevant post
  • a copy of the main photo of your dish 200px wide

I am so looking forward to all your mouthwatering entries.

Now I come to the fantastic part of announcing the lucky winner of the Monthly Mingle Bollywood Cooking. The spectacular roundup was stunning with 37 entries who were competing for the star studded The Bollywood Cookbook by the lovely Bulbul Mankani. But it was not just the book - it was a personalized autographed book by Bulbul herself! After a few hurdles we finally managed to pick out the lovely winner.

I am so glad to announce that the gorgeous Arfi of HomeMades is the one to walk away with the prize. Arfi created a splendor of a feast with a spicy Bombay Lamb Curry and a Pistachio Saffron Almond Kheer. Both Bulbul and I agreed that it was a feast that was fit for a Bollywood Superstar. Arfi the book will be on its way to New Zealand from India. Congratulations!

Mansi has just posted the roundup for the MM 22 - Appetizers & Hors D'Oevres. If you are hosting a party or get together anytime soon this is a page to check out!

If you too would like to guest host the Monthly Mingle in the future drop me an email at blogmeeta [at] gmail [DOT] com (Please not that this email address is different to the one you should send in your entries at.)


All photographs and written content on What's For Lunch, Honey? © 2006-2008 Meeta Khurana unless otherwise indicated. | All rights reserved | Please Ask First

22 comments Continue »

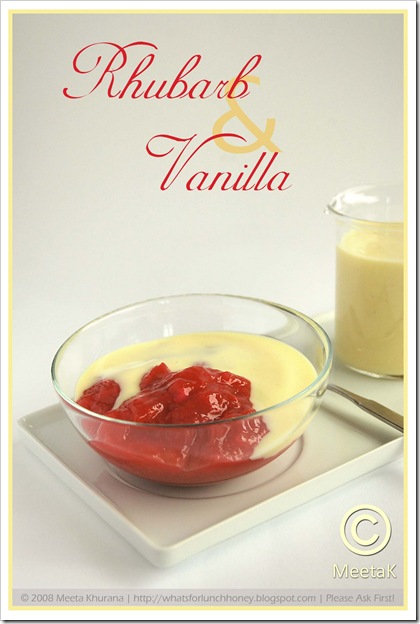
Cooking School: Rhubarb Compote with Vanilla Sauce

| 32 comments
Rhubarb Compote (01) by MeetaK

Rhubarb is in full season right now and I have been enjoying several sweet (some not so sweet) experiments with this wonderful ingredient in my kitchen.

I was not always a rhubarb fan though. I remember getting served some kind of funny looking, greenish, slop that tasted so chemical I was under the impression rhubarb only came in cans!

It was much later that I learned to appreciate the spectacular versatility of rhubarb. I am inquisitive by nature and I am always keen to experiment with fruit and vegetables that I once upon a time did not like. I bring it home to my kitchen and work on recipes – often for several weeks in a row. My two men are great and patient, hardly ever complaining that they’ve been eating one type of ingredient for weeks. Probably because the dishes are prepared so differently they hardly realize! LOL!

This season I have been indulging in 2 particular types of ingredients. Rhubarb is one of them. The farmers at my Farmer’s Market have provided me with several varieties of rhubarb and are educating me about the vegetable.

Rhubarb

Did you know that Rhubarb is in actual fact a vegetable? I will be honest – I did not and thanks to the lovely lady at my favorite organic stall at the Farmer’s Market, I was informed of its origins.

Rhubarb is a vegetable with an incomparable taste, which makes it a favorite in many pies and desserts. It originated in Asia over 2,000 years ago and was initially cultivated for its medicinal qualities. It was not until the 18th century that rhubarb was actually grown for culinary purposes in Britain and America.

Often rhubarb is commonly mistaken to be a fruit but rhubarb is actually a close relative of garden sorrel, and is therefore a member of the vegetable family.

Rhubarb's crisp sour stalks are rich in vitamin C, dietary fibre and calcium. The leaves of rhubarb should never be eaten as they contain toxic levels of oxalic acid.

Rhubarb is in season from April through to September. It can be grown forced which accounts for its availability early in the year when other crops are scarce. Forced rhubarb, which is grown in the dark, has yellowish leaves and usually appears in January. The field-grown variety replaces it around April and is less tender but often more flavorful.

Nowadays Rhubarb is grown in many areas. Greenhouse production allows it to be available throughout much of the year. Rhubarb is ready to be consumed as soon as it is harvested, and freshly cut stalks will be firm and glossy.

Rhubarb (01) by MeetaK

The color of the Rhubarb stalks varies from the commonly associated deep red, through speckled pink, to simply green. The color, which results from the presence of anthocyanins, varies according to both rhubarb variety and production technique. The color is not related to its suitability for cooking. The green-stalked rhubarb is more robust and has a higher yield, and the red-colored stalks are more popular with consumers.

The stalks, which are petioles, may be prepared in a variety of ways. Stewing them will produce a tart sauce that can be eaten with sugar and other stewed fruit or used as filling for pies, tarts, and crumbles. This was the popular way rhubarb was enjoyed, which led to the common term for rhubarb, "pie plant". Rhubarb makes excellent jam and can be easily paired with other fruit like strawberries or apples. It can also be used to make wine and as an ingredient in baked goods.

Selecting & Storing

When buying rhubarb look for fresh crisp, firm, plump stalks with good color. Peel off any stringy covering before use. Stand the stalks in cold water for an hour or so to refresh them before cooking.

Kept in the fridge, fresh rhubarb will stay in reasonable condition for 1-2 weeks. However to enjoy its full flavor eat within three days of purchase. Raw and cooked rhubarb freeze well.

Preparing rhubarb is easy but not everyone knows what to do with it, if they have never worked with the ingredient before. So here are my tips to help you enjoy this vegetable with an identity crisis. Wash and trim both ends of the stalks. Discard the poisonous green leaves. If the rhubarb is a bit stringy, using a sharp knife, peel off the stringy covering. Rhubarb is very tart and requires considerable sweetening.

Rhubarb is incredibly versatile and has many culinary uses. Try it in cakes and desserts, pastries, jams, pickles, conserves, sauces and, of course, wine.

This is currently my favorite way to enjoy rhubarb in its simplest form. Compote is perfect because you can make large batches and use them in several ways. My rhubarb compote was used as a pastry filler, as a sauce for pancakes, in muffins and of course pure with rich vanilla sauce drizzled over the top.

Hope you enjoy your rhubarb season too!

Updated: You'll find all the different types of rhubarb varieties here.


Ingredients
Printable version of recipe here.

Rhubarb Compote (02) by MeetaK

For the Rhubarb Compote

750g rhubarb, cleaned, scraped and cut into larger sized pieces
50-70g + 2 tablespoons sugar
1-2 tablespoons lemon juice
30g cornflour

For the Vanilla Sauce

3 egg yolks
20g sugar
15-20g vanilla sugar
20-30g cornflour (cornstarch)
3/8 liter milk
1 vanilla pod


Method

For the Rhubarb Compote

Place the rhubarb with about 2 tablespoons of sugar in a saucepan. Set aside for approx. 15 minutes until the juices are drawn out. Pour in about 100 ml water and the lemon juice into the sauce pan and bring to a boil. Covered, simmer for 4-5 minutes. In a small cup or bowl mix the cornflour with 6 tablespoons of water to a smooth mixture. Pour into the rhubarb mixture and simmer for a further 3 minutes.

Sprinkle in the 50-70g of sugar. Give it a taste if the compote is still too tart then add another few teaspoons. Set aside to cool completely.

For the Vanilla Sauce

In a bowl, beat the egg yolks with the cornstarch, sugar and vanilla sugar to a smooth paste. Make sure there are no lumps in the mixture. Whisk in the milk.

Split the vanilla pod lengthways and scrape out the seeds. Add the seeds and pod into the egg-milk mixture.

Heat mixture in a pan over a medium heat until the sauce thickens. Do not allow to boil. Remove the vanilla pod and serve either still warm or chilled.


Verdict

Rhubarb Compote (03) by MeetaK

Fruit served in this way is a treat. Soeren always enjoys a good compote with vanilla sauce. They are also simply perfect for the school lunchboxes or a little treat for us mums in between. Tom loves this compote with vanilla ice cream and often serves himself a little portion a little later in the evenings. On the weekends we enjoy the compote with pancakes or waffles. So you see it really is worthwhile making large batches - because even those do not last too long!


All photographs and written content on What's For Lunch, Honey? © 2006-2008 Meeta Khurana unless otherwise indicated. | All rights reserved | Please Ask First
32 comments Continue »

Mediterranean Flair: Couscous Salad

| 18 comments
Coucous Salad (01) by MeetaK

One of the things I do at my work is organize events. Parties, workshops, seminars, lunches etc. It's actually the part I love the most. My first major event I planned was the opening of a new unit at the university for which I am a part of - the Research Training Group. Especially created to develop the engineering faculty in their different fields. It's a big thing for the university as the group is being funded with a lot of money.

As you can imagine the party was to be on a large scale too. In the process of the last weeks I met a lovely French lady who I hired to cater for the gala dinner last Friday. She and her husband run a gorgeous new French Bistro here in Weimar. The minute I met her we hit it on so well. I knew from day one that I wanted her to cater for our event. We spent hours discussing our food obsessions and passions and what started out as work has turned into a lovely friendship. She is in her mid 50s and a charming lady full of zest and spirit.  The funny thing was we both complemented each other so well. She knew in an instance what I had in mind and I could relate to all her suggestions. Each tiny detail was perfectly organized - right down to the decorations. I wanted something summery in the Provence feeling, natural and not over the top, she brought a car load of lavender, lime and baskets of fresh fruit. The food was elegant but light the desserts spectacular.

One thing we both realized was our penchant for the Mediterranean kitchen. She said it's what she too grew up on as France is heavily influenced by the cuisine of Algeria and Morocco, so there too we found our similarities. We both agreed couscous in any way was something we could have anytime and everywhere. To mark our new found friendship she wanted to make a statement and suggested a couscous salad for the buffet. I agreed instantly.

Funny how things are - I was planning a couscous salad the minute Mansi announced the theme to this month's Monthly Mingle - Appetizers and Hors D'oeuvres. So I too am dedicating this to Elizabeth - a new friend!


Ingredients
Printable version of recipe here.

Coucous Salad (02) by MeetaK


200g couscous
1 cucumber, chopped
1 medium red onion, finely chopped
1-2 cloves garlic, finely chopped (optional)
1 large ripe tomato, de-seeded and chopped
1 red or yellow bell pepper, chopped
1 large bunch mint, chopped
1 large bunch flat leaved parsley
Zest and juice of 1 lime
2-3 tablespoons olive oil
Sprinkling of sumac
Salt and pepper


Method

Cook the couscous according to the instructions on the packet. Set aside to cool.

In the meantime toss the vegetables with the herbs and the garlic, if using, in a large bowl. Add the juice and zest of the lime and olive oil. Mix well to incorporate all the ingredients. Finally add the couscous and gently fold in. Salt and pepper to taste. Taste the salad and add more lime juice or oil according to your taste.

Set aside for at least half an hour in the fridge to cool and for all the flavors to infuse with each other. Serve with a good sprinkling of sumac and garlic pita bread or in a large bowl for your party buffet. 


Verdict

Coucous Salad (03) by MeetaK

Couscous in any way! I love it and the fact that it is one healthy grain is an added benefit. Making a salad like this for a party, a get-together or a barbecue is ideal because it's so easy to put together and can be made an evening in advance. A different type of salad that everyone will love. It can be varied in several ways. I often like adding some red lentils to the whole salad for a lovely texture, or crispy sautéed onions on top.

The gala dinner was a hit - the sad thing was the Professor (one of my two bosses) thanked me, for all the perfect organization and helping to make the opening such a success, in front of the big time guests attending the event - and I missed the speech because I was busy setting up the buffet! Thanks to Tom and several friends (who all work at the university) I was told many times what was said. I was in seventh heaven!

I would also like to send this entry to Siri of Siri's Corner who is hosting this months session of A Worldly Epicurean's Delight (A.W.E.D)created by the lovely Dhivya. This month's theme Middle Eastern Cuisine. How can I miss that!

More couscous ideas you might enjoy on WFLH:

Chickpea Tajine Coconut Couscous 01 framed
Chickpea Pumpkin Tajine With Coconut Couscous & Coconut Chutney
ArabianChicken03
Spicy Arabian Chicken with Couscous

I have almost 1000 posts in my reader that I need to catch up on, there are several mails I need to answer and I know I have a challenge to execute and plan! But folks you'll excuse me for just a bit longer - summer and soccer has gripped Europe and after Germany's win over Poland last night the party is on! I miss you all!


All photographs and written content on What's For Lunch, Honey? © 2006-2008 Meeta Khurana unless otherwise indicated. | All rights reserved | Please Ask First

18 comments Continue »

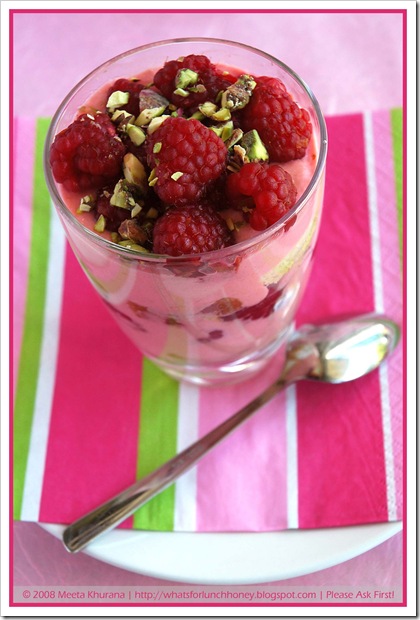
Pretty In Pink: Rhubarb Raspberry Trifle

| 39 comments
Raspberry Rhubarb Trifle (04) by MeetaK

So, I am now 36! WOW!

Have I reached the top of the hill and am I on the climb down on the other side? It's what everyone says, "After 35 you are on the slide down!" I don't know about you, but I do not feel like I am sliding down any hill! Not right now.

I remember at the age of 18/19 I could not wait to hit 30! I am not weird - hear my logic first. See for me 30 was that magical age. Finished with studying and university, settled in a job and earning money, enjoying life. That was how I drew my picture.

At 30 all what I had expected to have came true and even more! See at 30 I was 6 months pregnant, had found the man I loved, was excelling in my career and earning good money. No hassles and fuss - just fun and the good life. At 30 Soeren came in my life and made me confront a new aspect in my life, made me go to new extremes and challenged me in an entirely different role. I have loved every single day of the 6 years and cherished each new lesson I learned.

So now I am 36! I feel stronger and somehow more mature, something only experience gathered over the years can bring. No not old - mature. It's like I know if I hold my hand in the fire it will get burnt - if you will allow the comparison. My life is very fulfilled - sure I have my downs and have my battles to fight but it's not those tough fights and battles, we all had when we were younger. Those fights or battles where we thought the world would come to a halt. These fights and battles always have a solution. I know I can find them because the years have taught me where to look for the solution. So, even after the initial fear or panic - I know I will get through my downs.

My ups? Oh I have those everyday. I love those ups and enjoy them to the limit. I am young at heart and can laugh at myself - something I think is very important. I can be the clown, be the best girlfriend or the teacher. And everyday I am more - I am a car mechanic when my sons Hot Wheels break down. I am a cook in a fine restaurant. I am a high class society lady, or a girlie. I can be the business woman, or just a slob on my couch. How can I not look forward to each new day? Getting older is fun and worth every day - and if you look into the mirror you too will see so much more.

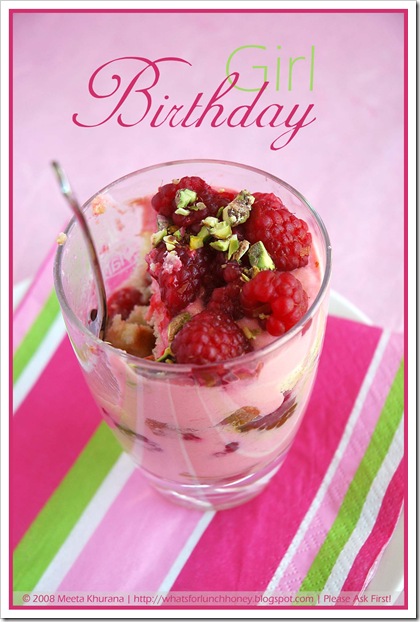
I know you all are looking forward to my celebration dessert. A lovely layered sweet sin in pink. Creamy quark flavored with fresh rhubarb, on top of lemony pound cake and topped off with tart raspberries. A delicious way to celebrate the day - birthday or no birthday. 

Thank you to everyone who left me so many lovely birthday wishes. I was overwhelmed by all your kind words and affection. It's good to know you are there - makes each day just a tiny bit better. ;-)


Ingredients
Printable version of recipe here.

Raspberry Rhubarb Trifle (01) by MeetaK

500g Rhubarb, cleaned and cut into 1 cm pieces
150g sugar
750g fresh raspberries
Zest of 1 lemon, preferably an organic lemon
4 tablespoons Gran Marnier
250g quark
4 slices lemon pound cake

Optional: Pistachios, chopped


Method

Raspberry Rhubarb Trifle (02) by MeetaK

In a large saucepan bring water to a boil. Add the rhubarb add the rhubarb slices and allow in to boil for a minute or two. Drain and allow to drip. Place rhubarb and 100g sugar in a food processor and purée until smooth. Set aside.

In a separate bowl mix together raspberries lemon zest, 50g sugar and 2 tablespoons Gran Marnier together gently, making sure not to squish the raspberries.

In another bowl fold the rhubarb purée with the quark. Cut the lemon pound cake slices in cubes and drizzle with the remaining Gran Marnier.

Now assemble the trifle in tall glasses by placing a few cake cubes at the bottom of the glass, layer with a generous dollop of rhubarb-quark, then a few raspberries. Repeat, finishing off with a few raspberries on the top.

Keep refrigerated for at least an hour so that the flavors can infuse with each other. Serve cold sprinkled with a few pistachios.

Note: If you are unable to find quark, substitute with natural sour cream mixed with whipped cream. Although it will not bring out the typical quark flavor it does a pretty good job. You can also use mascarpone cheese for this. It will be slightly richer than quark but certainly a delicious option.


Verdict

Raspberry Rhubarb Trifle (03b) by MeetaK

Although strawberries are rhubarb's true partner because of their sweetness, I opted for tarter raspberries. A fantastic pair and for me the hottest combination this summer. I loved the creaminess with the rhubarb sweetened with sugar. Raspberries macerated in the Gran Marnier brings out a fantastic full bodied aroma of the fruit. Simply delicious. Pretty in pink and perfect for any party.

I'd like to dedicate this to all my gorgeous Gemini twins who are celebrating their birthdays this month. Let's rock this party!


All photographs and written content on What's For Lunch, Honey? © 2006-2008 Meeta Khurana unless otherwise indicated. | All rights reserved | Please Ask First

39 comments Continue »

A Birthday Girl's Indulgence

| 51 comments
RaspberryRhubarbTrifle 03 framed

How does this birthday girl indulge? Pretty in pink - of course!


All photographs and written content on What's For Lunch, Honey? © 2006-2008 Meeta Khurana unless otherwise indicated. | All rights reserved | Please Ask First

51 comments Continue »