Showing posts with label Cooking School. Show all posts

Chamomile and Saffron Crème Caramel

| 36 comments
Chamomile Saffron Cream Caramel-by Meeta K. Wolf-5 

As a child of the 80s, the crème caramel was the epitome of all desserts for me. As a daughter of an hotelier I spent a lot of the 80s giving into the gentle jiggling charm of this dessert. Somewhere into the 90s the dessert disappeared from its pedestal of fame. Apparently the crème caramel had occupied a huge amount of space on restaurant menus around the world for a large part of the 20th century and probably had to make room for the liquid nitrogen dessert trends that took the 2000s over by storm. Or how about the fusion of any two ingredients possible – cronut or cruffin anyone? 

36 comments Continue »

Cooking School: Crêpes Suzette

| 23 comments
Crepe Suzette 4

The year is 1895 at the height of the Belle Epoche, a time filled with great optimism in France. Paris boasts of its newest acquirement, the Eiffel Tower, lighting the blue touch paper in this “beautiful era”, where science and the arts are seeing a period of development and innovation. The rich and famous celebrate this age buoyantly, traveling in their fancy cars and rejoicing with good food, wine and champagne.

23 comments Continue »

Classic: Königsberger Klopse - German Meatballs in a Creamy Caper Sauce

| 46 comments

Königsberger Klöpse_0007-WM

I’ve sung the song of my love for meatballs often and earlier this year took you on a world tour of meatballs. Here I am again with more meatballs for you. This time with a classic German recipe that has a long tradition and history.

Before moving to Germany I was never the one to indulge in boiled meat. I liked my meat seared and then simmered in liquid but the idea of raw meat boiling in stock or water just made a cold shower run up my spine. The only time I would ever eat cooked meat was chicken in a chicken soup.

46 comments Continue »

Cooking School: Bouillabaisse with a Red Pepper Rouille

| 26 comments

Bouillabaisse (0458) by Meeta K. Wolff

I complain of it sometimes but truth be told I am guilty of it too. Trying to be faster than the fast-paced life we are living in. A touch and go world in need of more information in 140 characters. Our lives are ruled by news tickers, coffee-on-the-go and internet shopping. Apps organize our day, keep us “in touch” and connected, while we are constantly on the move
Anything that will make us faster, better and achieve more - in what seems to be less time than we had before. 

26 comments Continue »

Cooking School: German Lentil and Sausage Stew

| 44 comments

 German Lentil Stew (0007) by Meeta K. Wolff 

Sometimes I think German cuisine is very inadequately underestimated. Fact is, there is a lot more to German food that sausages and beer. Until relatively recently the various regions of Germany were independent and autonomous communities. Prior to the national unification in 1871, Germany was divided into many kingdoms and principalities, each with distinct customs, distinct dialects and of course distinct culinary specialities.  

44 comments Continue »

Cooking School: Beef Stroganoff

| 22 comments

BeefStroganoff_0003-CR  

The desires of our culinary cravings is ostensibly so dependent on the weather outside. It was just a mere few weeks that I was preparing leafy green salads with strawberries or raspberries and delicious summery tarts with tomatoes and crumblings of goat cheese. Now as the weather turns from the warmth of summer to a rather undesirable cold and wet prelude to Autumn, my appetite seems to long for heartier and more robust meals. But my body is not there yet! 

22 comments Continue »

Cooking School: South African Bobotie

| 31 comments

Bobotie (01) by MeetaK  

The cuisine of South Africa is a melting pot of flavors, aromas and ingredients brought to the country by the several cultural groups that have co-existed together over the past 350 years. Each cultural group made their impact on South African cuisine, making it vibrant and colorful. It’s not much of a surprise that the cuisine of South Africa is called “rainbow cuisine”

31 comments Continue »

Cooking School: Almond and Pink Praline Spekulatius

| 42 comments

Almond Pink Praline Speculaas Spekulatius (01) by MeetaK 

Coming down from the high of the Food Blogger Connect in London last weekend has been hard. It came and went so fast flashing past in an evanescent moment that all I have left are smiling, laughing pictures branded in my memory forever.

42 comments Continue »

Cooking School: Falafel with a Tahini-Yogurt Sauce and a Minty Tabouleh

| 60 comments
Falafel ( 02) by MeetaK 
There are many reasons why I love going to visit my parents in Dubai - the main one, of course, is seeing my parents and brother! But also on the top of my list is the food - the Arabic food to be exact. Regulars to my blog will know that I have lived a larger part of my younger years in the Persian Gulf countries and literally grew up on good Lebanese, Egyptian and Syrian cuisine. Thanks to the large expatriate community in these countries we had several friends from these countries who often spoilt us with their large mezzes and delicious dishes.

60 comments Continue »

Cooking School: 5 Ways to Make Homemade Dulce De Leche

| 61 comments

Dulce De Leche (01) by MeetaK

Dulce De Leche - that sinfully good and deliciously decadent thick syrup from Latin America probably makes a lot of Foodie hearts beat faster. I've had it on my mind for quite a few weeks and as I had the week off last week I finally got the chance to make it.

61 comments Continue »

Cooking School: Fresh Homemade Lemon Curd

| 43 comments
Lemon Curd (04) by MeetaK

Something sweet and sour for this session of Cooking School - a delicious creamy lemon curd. At this time of year when citrus fruits are plentiful I often cannot resist the plethora of flavors and recipes one can create with lemons, limes, oranges, grapefruits, tangerines, satsumas and co.

One absolute must is a lemon curd - a rich, tart spread made with lemons and although one can use other citrus fruits like limes or oranges to make curds, lemons are the all time favorite. Why is lemon curd a must for me? Because from this as a basis I can make literally dozens of exciting creations. Having said that, I am giving you a heads up - go get your lemons and make this lemon curd - as later this week I will be sharing a great recipe, which uses lemon curd in a exciting and refreshing way.

43 comments Continue »

Cooking School: Tarte d'Alsace - Elsässer Flammkuchen

| 35 comments
Flammkuchen (01) by MeetaK

When I first moved to Germany I lived in the southern part of the country - in Baden Württemberg. A lovely state, very much influenced by it's bordering countries France, Switzerland and Italy. The weather is always slightly warmer there and it seems to me that the people are just a little more relaxed. In terms of cuisine, due to it's geographical location Baden Württemberg is wine country and boasts of a range of regional culinary specialties as diverse as the areas from where they originate.

35 comments Continue »

A German Christmas and Zimtsterne - Cinnamon Stars

| 33 comments

Cooking School: Classic Zimtsterne - Cinnamon Stars

Zimtsterne (01) by MeetaK

The countdown to Christmas, here in Germany, starts with the beginning of Advent. Soeren especially loves this time of year. For him the magic of Christmas chimes in on the first of December with the opening of the first door on his Advent’s calendar.

33 comments Continue »

Thanksgiving Menu Planner: Turkey Roulade with Cranberry Mushroom stuffing, Marsala-Cider Gravy and Roasted Jerusalem Artichoke, Kohlrabi and Butternut Squash

| 36 comments
Roasted Turkey Roulade (02) by MeetaK

"Don’t stress over Holiday meals!“
„Plan ahead!“

How often have you heard these wise comments from people or websites that offer you good advice? If I had a penny for every time I heard this I would be sitting in Barbados sipping on Mojitos all day long!

The fact is many of us do begin to stress as the Holidays near. Every year I am “taken by surprise” that Thanksgiving or Christmas is just around the corner. Go take a look at your calendar – 2 weeks till Thanksgiving, 6 weeks till Christmas!

Oh I am sorry I did not mean to create mass panic!

One of the main aspects of the Holidays are the meals, which become the center of everyone’s attention. It’s after all where everyone gathers around one table to enjoy a leisurely few hours of discussion and getting re-connected again. It’s where over turkey, gravy, vegetables and dessert people eat more than they tend to, because everything tastes so much better. Food is the star on such occasions. We’ve all realized that over the years. That explains why we fret over a menu, trying to plan a meticulous meal that will suit everyone’s likings and tastes.

And that is exactly where the stress and the panic begins.

In this respect I am really glad to have had opportunity to train as a hotel management trainee in a big luxury class hotel. Everyday I was confronted with a new challenging task – be it the planning of an Arab wedding of a thousand guests, a Fashion show or an exclusive dinner party – it always revolved on the topic of food.

I still use several things I learned back then in my current job. Here I am in charge of planning several events and once again – food is the main topic. Over the years I have refined my talent for planning a menu and organizing an event. It works for me at home and the same idea has worked on larger scaled events too. Therefore, I wanted to share these ideas with you. I am hoping that the pointers I propose will be something you can integrate into your menu planning for Thanksgiving and/or Christmas. However, these ideas are not only limited to Thanksgiving or Christmas but can be used to plan several types of events.

Focus On One Course or One Dish

That was it! I can actually stop my post right here because this is the main “wisdom” I wanted to share with you for this article. This is my “magic wand” for each event I have planned, am planning and will plan in the future!

Depending on the type of dinner you are having, direct your focus to one course or one dish. If you are having a more informal buffet-style, pick one main dish to feature. If your event is a more formal sit-down style dinner then focus on one course.

I normally divide a piece of paper in four sections:

  • Appetizers
  • Entrées
  • Sides
  • Desserts

Generally we all have a rough idea of one or two things we would like to make. It might be that turkey roulade you saw at WFLH or that dessert you saw in your favorite magazine, my point here is to decide which course is getting your attention.

Once you have decided on the course or the dish, you will notice the rest just comes together quite easily. This is not a wise-ass comment from me but something you are already doing instinctively but might not have noticed it.

Example: You have a dessert you really want to make. So you place this as your first item in the dessert section. This is now your main focus. Now you simply select a few other dishes or courses on the basis of flavor combination. You place two ideas for a main course on the Entrée section, then you go back to the dessert to check how these dishes will complement your dessert.

Are you looking for contrasts in flavors and textures? Do you want a harmony of similar herbs/spices all throughout your meal? You will soon realize that by answering a few simple questions your decision will quickly fall on one of the selected entrée dishes. Once you have that you work in the same way to tackle the next section in your menu.

Main Course

For me it is normally the entrée that often gets the main focus. So, on my sheet of paper I will limit myself to writing down a maximum of two possibilities in the entrée section. Not more. Even for a buffet, where having two main dishes is not uncommon, it is advisable to limit yourself only to the two ideas.

If I am having a larger gathering I might want to make sure that the choice I made is feasible. What I mean here is: if I am having a sit-down dinner for 15 guests, what makes more sense?

  1. Serving individual filet steaks where I need to pay perfect attention to each steak or
  2. is it more feasible to go for a roast beef, where I can let the oven to do the job and all I need to do is cut up a piece for each guest.

In this case I would go for option number two. While the roast beef is in the oven I can give my attention to other items.

Now that you have decided what your main course will be you will instinctively start filling out the gaps in the other sections.

Sides

Let’s take this turkey roulade for example: being a poultry dish having a slightly “sweeter” and delicate side is perfectly OK. For a roast beef on the other hand you might decide on something more robust. So you see you have already narrowed down this section.

Once again the rule is write down only a few ideas in this section. Too many ideas will only overwhelm you. I normally serve an absolute max. of three to four sides at my sit-down dinners, including the potato/rice/pasta side.

Look for sides that can be prepared ahead of time. It really will make your life easier. My side in this post of roasted thyme Jerusalem artichoke, kohlrabi and butternut squash was all cut on the previous evening. I even tossed the veggies in oil and thyme, then placed each individual vegetable in separate Ziploc bags and stored them in the fridge, saving the time it takes to cut the vegetables on the day of the dinner.

The vegetables were then placed in the oven for 25-30 minutes with the turkey roulade. Perfect!

Starters or Appetizers

One question you really need to consider here is how are you planning to serve your appetizer? Do you want to make several types of small nibbles and serve them informally so that your guests can still their initial hunger? Or do you prefer to have a starter as a formal course of your meal?

Once again this depends entirely on the atmosphere you are aiming for. My Thanksgiving/Christmas dinners are usually more on the formal side. It’s important for me as a hostess to use each course to sit down and:

  1. get connected with my guests,
  2. come back down and have a break in between the courses,
  3. feed myself!

During the whole year I generally host informal gatherings, so Thanksgiving/Christmas is a time where we all love dressing up and enjoy the atmosphere in an elegant surrounding.

My starter course is often a part of the sit-down dinner and keeping with the time of year, I normally serve a soup. I use seasonal ingredients like squash/pumpkin, root vegetables or mushrooms for my soup. Furthermore, I find that a warm soup is a wonderful and satisfying way to kick off a dinner.

Go back to the main focus of your meal, then decide what would suit your menu best. If your meal is heavier and richer as a whole, you might want to aim for a lighter salad, maybe even a combination of a “hot-cold” salad.

For such formal sit-down dinners where I have one dish for the starter course, I always make sure it is vegetarian. The reason is simple: I have a lot of friends who are vegetarians!

Considering Each Food Issue

Uncle Sam does not eat mushrooms, Aunt Jane is gluten intolerant, Cousin Meghan is a vegetarian – does this sound familiar? As hosts or hostesses we need to consider each guest’s “food issue”. For those planning a menu it’s not an easy task to come up with an innovative menu, which takes each family member’s specific needs into account as well.

My trick is easy. It’s something I have picked up over the years, by observing my vegetarian friends. I do not fret about creating an extra vegetarian entrée for them!

I make certain that my starter/appetizers are entirely vegetarian, the sides I select are primarily vegetarian and together they are versatile and creative enough to satisfy a vegetarian appetite.

In the same way analyze your guest list and try to incorporate their food issues within your menu - without any “extras”.

My friends actually told me they feel so comfortable with this because it’s all so subtle. They do not feel “different” because they have a specific dietary restriction.

I normally like making a tart, pot pie or gratin. In smaller portions they make great sides, but for my vegetarian guests in larger portions a great main.

Desserts

For me the queen of the meal and just like any queen she needs to be sophisticated and elegant.

For some reason I like selecting the dessert at the end. “Keeping the best till the last” or like the "cherry on the cake", selecting a dessert for my menu is always my favorite part. And if I am honest, it is also the part of the menu that often gets me sidetracked. There are so many delicious things to make and I often wish I could serve them all in one dinner.

Once I have re-focused, I go through the same steps as above - checking against the rest of my menu and the flavor combinations.

Having said that however, you can be more flexible and even playful with the selection of your dessert. There are not many rules here - just keeping in mind the body of your entire meal. By this I mean if your meal was very rich and heavy – serving a lighter and fluffy dessert instead of a heavy layer cake will bring more points.

Many of you are probably already planning your menus in this fashion without even knowing it. For you, I am hoping that reading this article will help you to reinforce the method more consciously.

For those of you who were stressing and not getting the whole menu planning thing quite right, I hope that the suggestions here will help you to refine your talents further.

Fact is you do not need to be a rocket scientist to plan a party, dinner or buffet. You just need a piece of paper, a pen and a focus on ONE dish or course!

With this post I am kicking off a series of posts all revolving around the Thanksgiving dinner I will be preparing. As I mentioned I normally start off with the main course. Therefore, the featured recipes here are for the stuffed Turkey roulade and one of my selected vegetable sides. Next week I will focus on the starter and dessert and share the recipes for both with you.

I would also like to put together a list of different menu ideas for you using recipes from What’s For Lunch, Honey? So look out for that next week too.

Now I hope you are hungry!

Turkey Roulade with Cranberry Mushroom Stuffing

This is a fantastic alternative to a whole Turkey. To be honest, I actually prefer a succulent turkey breast to a whole turkey. A turkey roulade is a manageable dish to prepare, it's uncomplicated with regards to cooking time as it does not take hours to make and best of all you can prepare the roulade ahead of time, simply cooking it a good hour before you are ready to eat. Roasting the turkey breast at high heat seals the juices, guaranteeing a tender and succulent cut of meat. The lovely thing about this turkey roulade is that by stuffing it with cranberries I can easily omit the cranberry sauce and concentrate on another side dish. I use the pan juices, refining it with Marsala wine and cider to give a beautiful gravy.

Roasted Turkey Roulade (01) by MeetaK

Recipe: Turkey Roulade with Cranberry Mushroom Stuffing & Marsala-Cider Gravy

Ingredients
Printable version of recipe here.

2 1/2kg boneless turkey breast with skin, butterflied (see notes below)
500g Crimini mushrooms, finely chopped
400g dried cranberries
120g parsnip, diced
150g onions, finely chopped
2 garlic cloves, finely chopped
Handful of sage leaves, chopped
60g butter
20g butter, melted
Canola oil
Salt and pepper
120 ml Marsala wine
400 ml unfiltered apple cider 
1 bay leaf
2-3 whole cloves  
1 tablespoon cornstarch

You'll also need: kitchen twine, heavy duty foil

Method

Making the stuffing

In a large skillet heat some of the butter and sauté the onion, garlic and diced parsnip until fragrant. Add some of the sage, reserving some for later, a pinch of salt and some pepper. Stir occasionally, then add the mushrooms the remaining butter and continue to sauté until the mushrooms have softened.

Add the cranberries and sauté for another 3 to 4 minutes. Transfer to a bowl and set aside.

Notes: The stuffing can be prepared a day advance and stored in the refrigerator in an air-tight container.

Making the Turkey

Place an oven rack in the oven and pre-heat the oven to 230 degrees C.

Once you have butterflied your turkey breast (see notes below), arrange the breast with a short side nearest to you, skin side facing down. Sprinkle with salt and pepper.

Spread the stuffing evenly over the turkey breast, leaving about a 2 cm border on all sides. Fold the short side nearest to you over the stuffing, enclosing the stiffing securely. Now roll up the turkey breast tightly.

Place the turkey roulade seam side down, then tie crosswise, at about 2.5 cm intervals, with the kitchen twine.

Brush turkey with melted butter then sprinkle with salt and pepper.

Heat some canola oil in a skillet on high heat. Place the turkey, seam side down, and brown, sealing the juices in. Brown the meat on all sides until the skin is golden and crispy.

Remove the roulade and place in roasting pan. Keep the skillet aside. Roast the turkey roulade, uncovered for about 30 minutes, turning it around about half way through.

Take roasting pan out then pour in the Marsala wine, 250 ml cider, cloves, bay leaf and the remaining sage. Cover roasting pan with heavy-duty foil and continue to roast for another 35 - 45 minutes, or until the juices run clear.

Transfer the turkey roulade to a cutting board, cover with foil and allow to stand for 15 minutes before slicing. This will give you plenty of time to prepare the gravy.

Notes: How to butterfly a turkey breast

  1. Place the turkey breast on a cutting board. Determine which long side is the thickest. Starting on the narrower side and holding knife parallel to the work surface, make a horizontal cut with the knife on the thickest side, about halfway down, to within 2.5 cm of the other side.
  2. Open up the breast as if you were opening a book. Cover the breast with plastic wrap. Pound with a rolling pin or meat mallet to an even 2 cm thickness. Remove plastic wrap.
  3. Spread the stuffing over the breast, leaving a 2 cm border on all sides. Roll the breast up into a cylinder.
  4. Secure the roulade by tying it with kitchen twine..

MAKE AHEAD TIP:

  • Prepare the turkey roulade through to the stuffing. Once rolled you can wrap the roulade in plastic wrap and refrigerate for up to 8 hours.
  • On the morning of your dinner, brush the turkey roulade with the melted butter and brown on high heat in the skillet. Then place in the roasting pan and cover. On the evening, pour in the liquids, spices and herb, then cover with foil and roast for the 35-45 minutes.

Making the Gravy

Using the skillet in which the turkey roulade was browned, heat to high, pour in the juices from the roasting pan, scraping the bottom of the skillet to deglaze it.

Strain the juices through a fine-mesh sieve into a bowl. Skim off fat. then pour back into the skillet. Bring the juices to a boil.

Whisk together the cornstarch and remaining cider, then whisk into boiling sauce and boil until the sauce thickens.

Slice turkey roulade into thin slices and serve with marsala-cider gravy.


Roasted Thyme Jerusalem Artichoke, Kohlrabi and Butternut Squash

I love the several levels of flavors in this side. The contrasts of the earthy notes of the Jerusalem artichoke and kohlrabi against the sweet, nutty aromas of the butternut squash is purely wonderful . The vegetables are crisp and fresh, the thyme adding a wonderful fragrance. Convenience is the main key with this side as you can roast these vegetables right along with the turkey roulade.

Roasted Kohlrabi and Squash (03) by MeetaK

Recipe: Roasted Thyme Jerusalem Artichoke, Kohlrabi and Butternut Squash

Ingredients
Printable version of recipe here.

4 medium kohlrabi, cubed
400g Jerusalem artichokes, cubed
500g butternut squash, cubed
3 tablespoons extra-virgin olive oil
Handful fresh thyme, finely chopped
Salt and freshly cracked pepper

Method

Line a baking sheet with aluminum foil and place in the oven. Pre-heat oven to 230 degrees C.

Put each vegetable separately in three individual bowls. Add one tablespoon olive oil in each bowl, some thyme, salt and pepper and toss the vegetables.

First transfer the kohlrabi to the preheated baking tray and roast for 15-20 minutes. Stirring occasionally.

Then spread the squash and Jerusalem artichokes over the kohlrabi and roast until vegetables are tender, approx. 20-30 minutes.

Once ready, take out and toss the vegetables to combine.

MAKE AHEAD TIP:

  • Prepare the vegetables a day ahead. Cut each vegetable separately and place, separately in Ziploc bags.
  • You can even prepare the vegetables as far as tossing them individually in the oil, then store in Ziploc bags. Store in refrigerator.

Notes: If you are roasting the vegetables along with the turkey roulade, pre-heat the baking tray for 15 minutes while the turkey roasts, then roast vegetables on a rack below the turkey roulade. 


Verdict

Roasted Kohlrabi and Squash (02) by MeetaK

Two dishes perfectly harmonized with each other yet delectable on their own. The turkey offers several wonderful flavor dimensions. Earthy, sweet and rich, the meat itself is tender and succulent, together with the gravy an explosive dish. The vegetables add a great magnitude to the meal and plays off the flavors of the turkey roulade brilliantly.

I hope this little menu planner help will aid you in the future to create a perfect menu for your events with ease and no stress. Next week we'll be counting down to Thanksgiving and I'll share with you recipe ideas for a starter and dessert that would fit in with this meal. So stay tuned for that. I will also present you with several different menu ideas using dishes from WFLH to help you find your favorite menu. So don't panic that Thanksgiving is in two weeks - together we'll find you a perfect menu to dazzle your guests. 

Daily Tiffin Reading Tip:


All photographs and written content on What's For Lunch, Honey? © 2006-2008 Meeta Khurana unless otherwise indicated. | All rights reserved | Please Ask First

36 comments Continue »

Cooking School: Zabaione with Brandied Plums

| 27 comments
Zabaione (01) by MeetaK

Zabaione, Zabaglione, Zabajone or Sabayon. However you choose to call it, the fact remains, that this has got to be one of the most delicate, frothy Italian desserts around. Pronounced tsah-bahl-YOH-nay, this dessert comes in several variations. There is a frozen version or a lighter version with whipped egg whites, or even flavored versions with chocolate or honey. This version however is the authentic one, the way I learned how to make it, while training at the Sheraton pastry kitchen. 

Zabaione is a simple Italian dessert made with egg yolks, sugar and marsala wine and often served warm. These are the three main ingredients that make up a traditional zabaione. At times cream or mascarpone cheese might be added to give it a thicker, creamier consistency. Zabaione is basically a light custard type dish, made by whipping the egg yolks to incorporate large volumes of air, over a warm water bath. The classic version of the zabaione uses raw eggs, however nowadays it is preferred to prepare the dessert over a water bath or a double boiler.

Legend has it that this dessert was created by accident sometime in the 17th Century, when a chef from Turin accidentally tipped a bottle of sweet wine into an egg custard. Today, Sicilian Marsala wine has become the sweet wine of choice when preparing zabaione. Although it is similar to a custard, officially it is a caudle, which in the 16th century used to be a warm drink consisting of wine mixed with sugar, eggs, bread and spices.

It is difficult to define zabaione as it can be used for so many things. Serving it on its own, zabaione is a gorgeous light, but incredibly rich and delectable cream. Together with seasonal fruit it makes an exquisite dessert. Zabaione can also be used to fill tarts and pies or in the summer it can be used to make ice-cream.

There are several different recipes for this dessert. You'll find some with additional flavorings others will use an entirely different method. This recipe is the basic and easiest method of making zabaione. If you have not made this dessert before, you won't be able to go wrong with this recipe.

Zabaione (03) by MeetaK

Tips & Tricks For A Perfect Zabaione

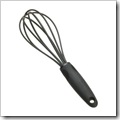
  • In big hotel/restaurant kitchens zabaione is often made in copper bowls. These bowls provide a chemical reaction between the copper and eggs, which increases the stability and structure of the foam. If you do balloonwhisknot have a copper bowl at home, use a stainless-steel bowl instead. It still makes a terrific and creamy zabaione.
  • Whisking is the main motion here. I recommend a simple balloon whisk either out out of  stainless-steel or one made of silicone like I use. It's a simple utensil but I swear it's one of my most precious pieces in the kitchen For making zabaione it provides for the perfect fluffy consistency of the cream. 
  • Instead of a double boiler, use a heatproof bowl over a saucepan filled with simmering water. Make sure the water does not touch the bottom of the bowl, otherwise this may cause the eggs to scramble.
  • For beginners it is advisable to keep the water to a bare simmer. This will take a little longer whisking the zabaione to a creamy froth, but it is also safer as you'll avoid scrambling the eggs at a higher heat.
  • Whisk constantly in a rotating figure-8 pattern. Make sure you make contact with all the inner surfaces of the bowl. In this case, speed is not important but actually making contact with the surfaces is vital.

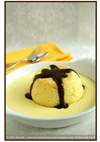
My zabaione is dressed for Fall! I serve it with heavenly brandied plums dripping with gorgeous red-purple sweet syrup. The cinnamon flavored plums complements the creamy and sweet zabaione so well that you'd think they were always meant to be.

Plums are the current featured fruit in my Food Guide. You'll find several helpful and useful tips on storing, selecting and preparing these juicy fruits.

Ingredients
Printable version of recipe here.

The brandied plums

10-15 soft ripe plums, halved, pitted and then quartered
2 tablespoons Muscovado sugar
3-4 tablespoons brandy
1 cinnamon stick

The Zabaione
serves 4

4 large organic eggs yolks
1/4 cup sugar
1/2 cup sweet Sicilian Marsala

Method

The brandied plums

Place a small skillet over a medium heat. Add the plums, sugar, cinnamon stick and brandy and about 2 teaspoons water. Bring to a boil, then reduce to a simmer and cook for about 5 minutes until the fruit softens and begin to release their juices. Remove from heat and spoon into 4 individual glasses or serving bowls. Chill in the refrigerator.

The Zabaione

Fill a saucepan halfway with water and bring to a gentle simmer. Regulate the heat as required to maintain a gentle and constant simmer as you prepare the zabaione.

Place the egg yolks in a round-bottomed stainless-steel (or copper) bowl, which rests comfortably when placed on top of the saucepan.

Whisk the egg yolks with a balloon whisk until they turn pale yellow. Add the sugar , then the Marsala and continue to whisk until incorporated.

Rest the bowl on top of the saucepan, making sure that the water does not touch the underside of the bowl. Constantly whisk the mixture using the figure-8 pattern, until it is foamy and has tripled in volume. The mixture will eventually become soft and creamy - approx. 15 minutes. The consistency is just right when the mixture forms thick ribbons when the whisk is lifted.

Be sure to whisk the entire inner surface of the bowl, clearing the bottom of the bowl with the whisk so that the eggs do not stick to the bottom.

If the mixture starts to separate just remove from heat and transfer to the countertop, whisking all the while.

Zabaione should have the texture of lightly whipped cream. It should be light in texture, yet thick enough to coat a spoon.

Immediately pour the zabaione over the plums. Garnish with a few sugared plums and a sprig of mint. Serve immediately.


Verdict

Zabaione (02) by MeetaK

Pure bliss! This is such an elegant and delicate dessert, which really creates a WOW! effect. The light sweet cream combines so well with the fruity sweetness of the plums, it's almost ethereal. As the warm creamy zabaione meets the cool brandied plums, heaven is created - in your mouth. I love making zabaione when I have spontaneous drop-in guests, then after a light dinner of bread, a variety of cheeses and salad, I will whisk up this simple zabaione with a fruity compote or caramelized fruit using what ever I have. Pears, apples, berries all make great accompaniments to zabaoine.

Dear Abby is celebrating World Egg Day and she asked us to come on over with a dish showing how versatile, delicious and fun eggs are. Abby you know you can count on me for dessert ;-)!

Have a great weekend folks! If you'd like to do a little food reading, besides several posts you might find here ;-) check out my latest article for FoodieView: Greeting Fall with Root Vegetables & Pumpkins!

You might like these recipes using eggs from WFLH:

BostiniCreamPie 01a Bostini Cream Pie
AsparagusLunch03 Poached Eggs with asparagus and sauce hollandaise
Piquant Salmon Egg Roll01 Wasabi Egg Rolls

From around the blogs:

Daily Tiffin Reading Tip:


All photographs and written content on What's For Lunch, Honey? © 2006-2008 Meeta Khurana unless otherwise indicated. | All rights reserved | Please Ask First

27 comments Continue »

Preserving Summer: Jams, Jellies, Chutneys and Relishes

| 43 comments


Cooking School – Preserving 101!

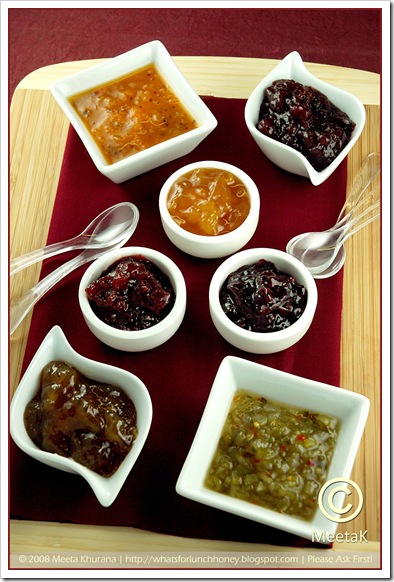
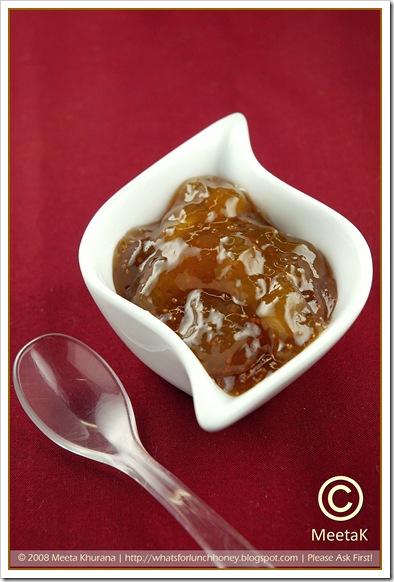
JamsPreservesChutney01 framed 

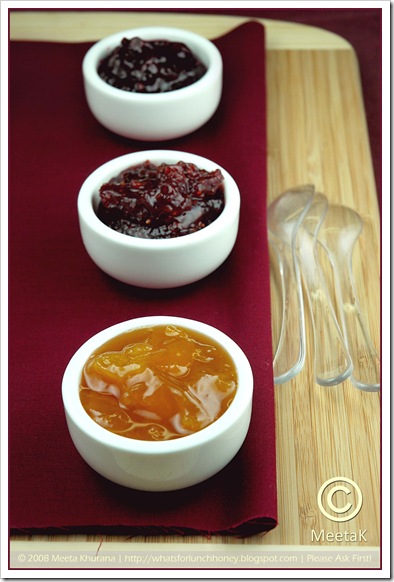
The markets, home gardens and stores are simply bursting with fresh and ripe fruit and vegetables at this time of year. Not only am I getting tons of gorgeous produce in my CSA box each week, I can never resist buying huge loads of colorful, berries, stone fruit or squash from the Farmer’s Markets. To top it all off my mother-in-law and friendly neighbors keep bringing tons of homegrown cucumbers, tomatoes and zucchini harvested from their overflowing gardens. I always have a problem saying no!

So it is not surprising that I have a surplus amount of produce at this time of year. Does this sound familiar to you?

My solution to all this surplus produce is preserving – making jams, jellies, chutneys and preserves is something we have gotten used to doing every year. Although it’s just the three of us, our consumption on these items is rather high.

Every weekend we enjoy long and relaxing breakfasts with warm rolls, organic butter, eggs and homemade jams and preserves. While I am the type who spreads my jam or preserve thinly on my buttered rolls, Tom and Soeren dollop thick layers enjoying the fruity taste. The cooler seasons also has me making more hearty roasts and piquant types of dishes and there is nothing better than having some delicious homemade spicy chutney or a fruity jelly to serve with it. Moreover, giving away colorful jars of jelly and jam as gifts in the holiday season always adds a special touch.

We’ve been doing this every year for the past four years, this year however we were rather creative with a few of our experiments. As I looked into my pantry for that recently made fig and ginger preserve the jars of jams, jellies, preserves and chutney all lined on the rack, gleamed at me. At this moment I was struck with the idea to write this post.

I have often heard some of my friends tell me they have no time to go through the process of making jams or chutneys at home. It’s a lot easier than one thinks. There are however, certain points and tips one has to consider. With this post I hope not only to offer a comprehensive column focusing on preserving and making jams, jellies, chutneys and relishes, I am also going to be sharing several of our favorite recipes.

Jams, Jellies Marmalades, Preserves and Conserves

This is the ideal way to preserve fruit. Sugar is the main ingredient that preserves the delicious summer fruits of choice. Exactly that is what a all of these start with: delicious, succulent and ripe fruit.

Jams are made by crushing or grinding, whole fruit. They usually have a thick consistency due to high pectin content.
Jellies are made using the juices of the fruit. It is much stiffer that a jam and if cut it will hold its shape.
Marmalade is a jelly with pieces of cut fruit in it. Often citrus fruit like oranges, lemon or lime are the basis of a marmalade.
Preserves is usually interchangeable with jam, but it often applies to cooked and gelled whole fruit, which includes a significant portion of the fruit.
Conserves are made using a mixture of fruit, not necessarily fresh, and also contains nuts and citrus fruits.

Chutneys and Relishes

Chutneys originated in India and comes from the East Indian word chatni, which means "strongly spiced," Chutneys are basically condiments which usually consists of a mix of chopped fruits, vinegar, spices and sugar cooked into a chunky spread.
Relishes are hardly cooked and use much less sugar. It is made by coarsely chopping fruit or vegetables, giving it a crunchier bite.

Although both chutneys and relishes are interchangeable, often chutneys are made using fruit and relishes using vegetables.

Sterilizing Your Jars and Lids

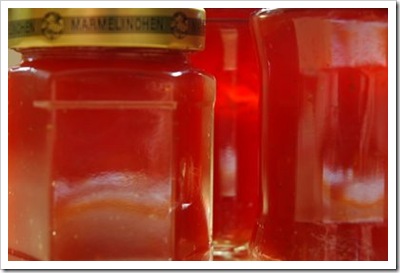
jamjar

Whether you are making a jam, relish, chutney or a marmalade one thing that needs the highest priority before you start is that everything you use, needs to be scrupulously cleaned. The pan, spoons and most importantly the jars should be scrubbed cleaned and wiped dry. Boil jars and lids to sterilize them to prevent bacteria from getting into the jam/chutney and spoiling it.

How To:
Place your empty jars, upright, without lids and open side up in a large clean pot. In a tea kettle bring water to a boil, and then pour enough water in the pot, filling the jars with the hot water. The jars should be covered with water. Bring the water to a boil and continue boiling for 10 minutes. In the meantime lay out clean kitchen towels on your counter. Using tongs take the jars out and allow to drip dry.

Place the lids in the hot water and leave them in the hot, not boiling, water until ready to use.

For best results with your fruity jams or preserves, it’s best to work with approx. 1 to 2 kgs of fruit at a time. Using more than that makes it difficult to handle in a home kitchen and it also becomes difficult to get the jam to set as it does not boil fast enough. With 2 kgs of fruit I often yield approx 6 jars of 450g-sized jars.

Making Of

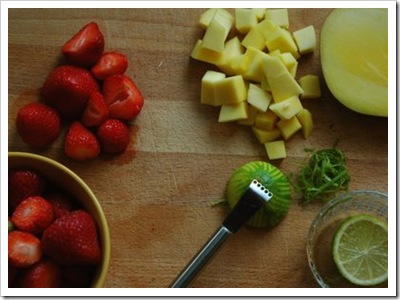
prepjam

Jams, Jellies, Preserves and co. can be made with or without using pectin. Pectin is needed to allow the thickening or gelling of the jam. It is created from a compound, protopectin, during the ripening of fruit and during the cooking of under-ripe fruit. All fruits contain some pectin. Large amounts of pectin can be found in apples, gooseberries, plums and citrus peel. Fruit like rhubarb, blueberries, strawberries or cherries have very little pectin.

If using fruit with little pectin and you do not want to add commercial pectin, the jams, preserves and co. will thicken or gel only if it is combined with other pectin rich fruit or powdered or liquid pectin is incorporated in it.

Jams and co. made without added pectin will require longer cooking time and you might notice a slightly different taste from those with added pectin. They also yield a less finished product.

You will find that most recipes call for powdered or liquid pectin. Purchase pectin fresh every year as old pectin may result in poor gels. When preparing a jam, jelly & co. with powdered or liquid pectin, it is vital to carefully follow the directions accompanying the pectin product. Generally 50-125 ml of liquid or 2 teaspoons of dried pectin to each 450g of fruit is sufficient. The order of combining ingredients depends on the type of pectin used. For successful preparation of pectin-added jams and co., accuracy of timing is very important. Begin counting time when the mixture reaches a full rolling boil.

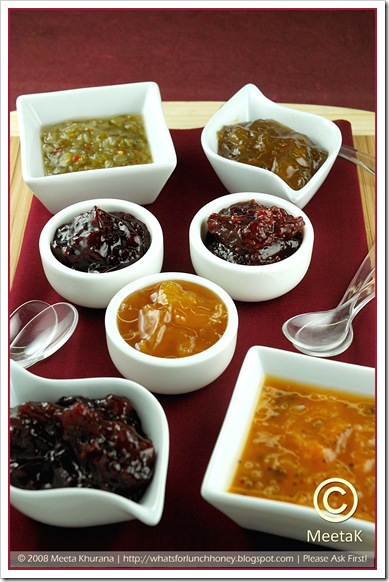
JamsPreservesChutney02 framed

Sugar is another important ingredient in jams and co. You can use any type of white sugar however; I find finer types of sugar dissolve more quickly. I often use gelling sugar, which is specifically used for preserves and contains pectin, in my jams and co. It is very important to make sure that the sugar has dissolved in the simmered fruit before it is brought to the boil. If not the jam may become crystallised and sugary. The amount of sugar needed for gelling basically depends on the amount of pectin present. If you have used fruits with plenty of pectin, use 1½ times the amount of sugar to fruit. If there is just enough pectin, use equal amounts of sugar and fruit.

The easiest way to test the consistency of the jam or jelly is by placing a saucer into the freezer for a few minutes, then spoon about ½ teaspoon full of the jam onto the saucer. Place the saucer back into the freezer for approx. 30 seconds. If the sample is firm to the touch and has your required spreadable texture then it is done. It can now be removed from the heat.

Chutneys and relishes I love them - the best is that the variety seems endless. The combinations and alterations can be varied according to personal taste and the ingredients available. They can be sweet, sour, hot or mild.

One of the big advantages to both chutneys and relishes is that they improve with age. If properly stored they will remain in good condition for several months or years and you will be rewarded with spectacular bursts of new flavor.

Vinegar, spices and sugar are all the things that make chutney or relish nice. As vinegar is the most important ingredient, it is vital that a good quality is used. I love using white wine vinegar, but you can use apple cider or a champagne vinegar too. Although any kind of granulated sugar can be used, I prefer brown or Demerara sugar as it gives the final product a wonderful rich and dark color. However, you can also achieve the darker color by simply cooking the chutney a little longer. Spices really make the chutney or relish nice. Your imagination is required here. Use whole spices rather than powdered. If you just want the flavor of the spice in your chutney then slightly crack or bruise them and tie them in a spice bag. Then cook along with the rest of the ingredients. Finally remove and discard. However, I often prefer having the spices in my chutney and just throw the amounts loose in the pot.

Good chutney is relatively smooth in texture and it will have a rich mellow flavor. The best way to achieve this is to cook it long and slow. Ideally, it should be left to mature for at least three months.

Relish on the other hand is cooked for a lot less and the texture is crunch, with bits of coarsely chopped vegetables.

Whatever you preserve one thing is for sure nothing will satisfy you more than opening a jar of freshly preserved summer! I hope you will find this Preserving 101 helpful and refer to it whenever you require more information. You will find it conveniently in my sidebar category “The Know Hows of Food” under the section “How To…”.

Now if I have gotten you into the mood here are a few of our favorite recipes. 

Recipes

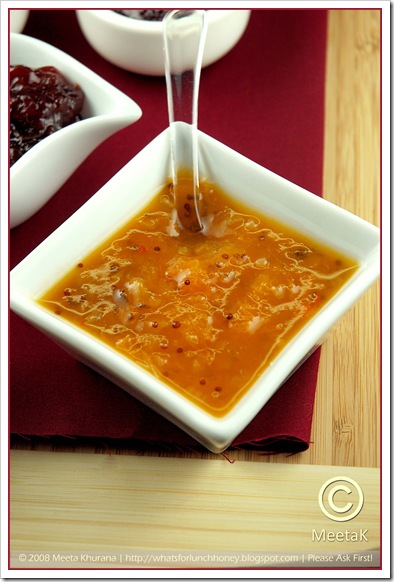
JamsPreservesChutney-ApricotChutney01 framed 

Apricot Chutney

Ingredients
Printable version of recipe here.

(makes 3 200ml jars)

600g ripe apricots
1 red chili, slit in half, seeds removed and finely chopped
3-4 Shallots, finely chopped
1 tablespoon black mustard seeds
1 teaspoon coriander seeds
1/8 l white wine vinegar
100 g Demerara sugar
Salt
1/2 bunch fresh coriander leaves, coarsely chopped


Method

Place the whole apricots in a large pot. In a tea kettle bring water to a boil. Pour over the apricots until they are covered. Allow to sit for 30 seconds to 1 minutes. Then take them out, one at a time, peel, cut in half, remove pit and coarsely chop.

Add all of the remaining ingredients, except for the fresh coriander leaves. Pour in about 100ml of water and bring the entire mixture to a rolling boil. Turn the heat down and simmer for 20 minutes, stirring occasionally. Add the chopped coriander leaves.

Fill the chutney immediately into sterilized jars (as described above) and tightly screw the lids shut. Turn the jars upside down and allow to cool.

Notes:

  • Tastes great to cheese, lamb, and poultry.
  • Will keep in the fridge for 4 weeks
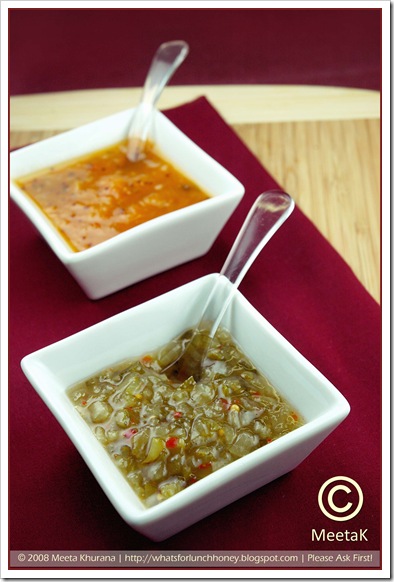
JamsPreservesChutney-Relishi01 framed 

Cucumber Zucchini Relish

Ingredients
Printable version of recipe here.

(makes 4 250ml jars)

2 large cucumbers, very finely chopped
2 large zucchini, very finely chopped
250g onions, very finely chopped
1 garlic clove, mashed
200 ml white wine vinegar
200g Demerara sugar
Salt

Method

Place all the ingredients in a large pot and bring to a boil, stirring regularly. Keep the mixture at a boil, regularly stirring for approx. 10 minutes.

Immediately fill in the relish into the sterilized jars (as described above)and tightly screw the lids shut. Turn the jars upside down and allow to cool.

Notes:

  • Is perfect on burgers, hot dogs, fish and steaks
  • Will keep in the fridge for 4 weeks
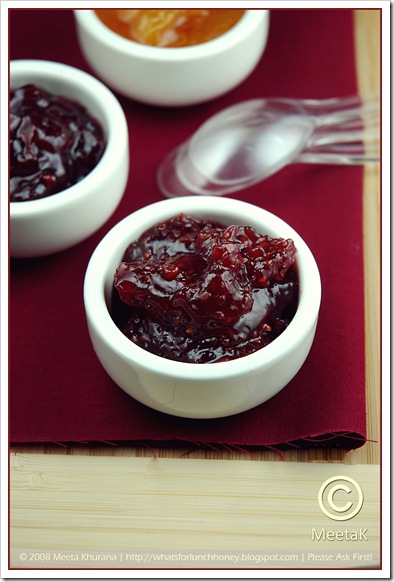
 JamsPreservesChutney-RaspChili01 framed


Spicy Raspberry Jam

Ingredients
Printable version of recipe here.

(makes 5 200 ml jars)

900g raspberries, washed, dripped dry on kitchen towel
2 red chilies, slit in half, seeds removed and very finely chopped
100ml Cassis Liqueur
500g gelling sugar (I used Dr. Oetker's Extra Gelling Sugar 2:1)

Method

Place the raspberries in a large pot, cover with sugar, pour in the cassis liqueur and add the chopped chili. Allow to steep for 15 minutes to release the juices.

Bring the mixture to a boil. Now start timing and keep the mixture at a rolling boil for 3 minutes stirring all the time. Check to see if the mixture gels using the saucer test mentioned above. If not keep at a boil for another minute and then check again.

Fill the jam in sterilized jars (as described above), leaving 3 mm space at the top of the jar, turn upside down and leave for 5 minutes. Then store in your pantry

 JamsPreservesChutney-Mirabelle01 framed


Mirabelle Silver Edge Lavender Preserve

Ingredients
Printable version of recipe here.

(makes 5 200 ml jars)

1 kg mirabelles (or yellow plums), cut in half, pits removed then quartered
2-4 sprigs silver edge lavender, tied tightly into a bouquet garni
500g gelling sugar (I used Dr. Oetker's Extra Gelling Sugar 2:1)

Method

Place the mirabelles in a large pot. Put the lavender bouquet garni into the pot and cover with the sugar. Stir well to coat the fruit with the sugar and to release the juices.

Bring the mixture to a boil under constant stirring. Now start timing and keep the mixture at a boil for a good 3 minutes, constantly stirring and crushing the fruit gently. Remove the bouquet garni and discard.

Check to see if the mixture gels using the saucer test mentioned above. If not keep at a boil for another minute and then check again. Skim off any foam.

Fill the jam in sterilized jars (as described above), leaving 3 mm space at the top of the jar, turn upside down and leave for 5 minutes. Then store in your pantry.

 JamsPreservesChutney-Fig01 framed


Fig Ginger Preserve

Ingredients
Printable version of recipe here.

(makes 5 200ml jars)

950g fresh figs, stems removed and peeled
30g fresh ginger, very finely chopped
5 tablespoons orange juice
500g fine sugar
1 packet (25g) commercial pectin

Method

Place the figs and ginger in a large pot. Pour in the orange juice and mix.  Mix the powdered pectin and sugar and then add to the figs.

Bring the mixture to a boil under constant stirring. Now start timing and keep the mixture at a boil for a good 3 minutes, constantly stirring and crushing the fruit gently

Check to see if the mixture gels using the saucer test mentioned above. If not keep at a boil for another minute and then check again. Skim off any foam.

Fill the jam in sterilized jars (as described above), leaving 3 mm space at the top of the jar, turn upside down and leave for 5 minutes. Then store in your pantry.


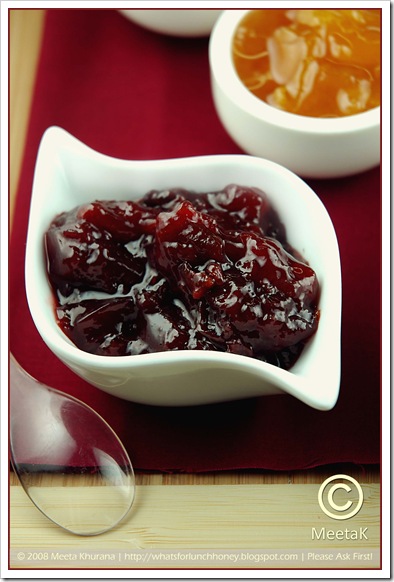
JamsPreservesChutney-Plum01 framed


Plum Cinnamon Preserve

Ingredients
Printable version of recipe here.

(makes approx. 3-4 200 ml jars)

1.3 kg red plums, cut into quarters, pits removed
120 ml water
1 kg sugar
1 stick cinnamon
1 tablespoon lemon juice
85 g commercial pectin

Method

Place plums, cinnamon, lemon juice and water in a large pot and bring to a rolling boil, stirring often. Cover and reduce heat to low and allow the mixture to simmer for 10 minutes, until the fruit softens. Stir often.  

Add the sugar, returning the heat to medium-high and bring back to a boil, stirring constantly. Incorporate the pectin, stirring constantly. Boil for another minute, then remove from heat. Skim off any foam.

Place the cinnamon stick in the jar then fill the jam in sterilized jars (as described above), leaving 3 mm space at the top of the jar, turn upside down and leave for 5 minutes. Then store in your pantry.

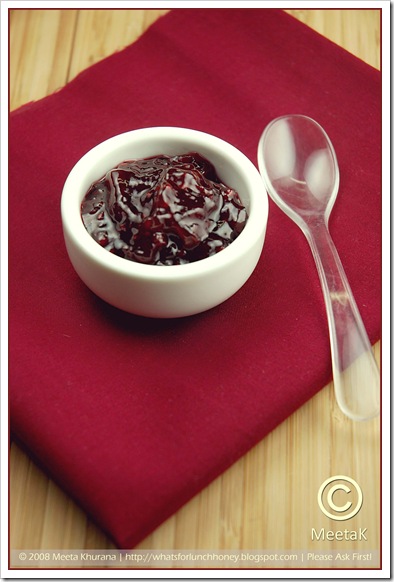
JamsPreservesChutney-RedFruit01 framed


Berry Cherry Jam

Ingredients
Printable version of recipe here.

300g black cherries, halved and pitted
220g blackberries
200g raspberries
1 tablespoon lemon juice
150g sugar
56g natural fruit pectin

Method

In a large pot mix the cherries, berries, lemon juice and pectin. Over a medium heat, bring the mixture to a boil, mashing the fruit with a wooden spoon. Boil for a further minute. Add the sugar and continue cooking, stirring often until the mixture thickens. Remove from heat. Skim off any foam.

Fill the jam in sterilized jars (as described above), leaving 3 mm space at the top of the jar, turn upside down and leave for 5 minutes. Then store in your pantry.


Verdict

It's all about mixing, tasting and experimenting. Jams, jellies, chutneys or relishes. There is not much of a science to it, just a few basic guidelines. You do not need special equipment, just a large pot that you use mainly for your jam/chutney making. You will find these recipes are fairly easy and will offer you a wonderful array of summer flavor throughout the year.


All photographs and written content on What's For Lunch, Honey? © 2006-2008 Meeta Khurana unless otherwise indicated. | All rights reserved | Please Ask First

43 comments Continue »

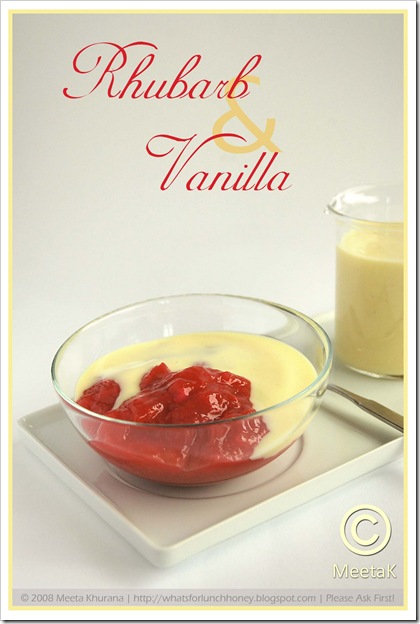
Cooking School: Rhubarb Compote with Vanilla Sauce

| 32 comments
Rhubarb Compote (01) by MeetaK

Rhubarb is in full season right now and I have been enjoying several sweet (some not so sweet) experiments with this wonderful ingredient in my kitchen.

I was not always a rhubarb fan though. I remember getting served some kind of funny looking, greenish, slop that tasted so chemical I was under the impression rhubarb only came in cans!

It was much later that I learned to appreciate the spectacular versatility of rhubarb. I am inquisitive by nature and I am always keen to experiment with fruit and vegetables that I once upon a time did not like. I bring it home to my kitchen and work on recipes – often for several weeks in a row. My two men are great and patient, hardly ever complaining that they’ve been eating one type of ingredient for weeks. Probably because the dishes are prepared so differently they hardly realize! LOL!

This season I have been indulging in 2 particular types of ingredients. Rhubarb is one of them. The farmers at my Farmer’s Market have provided me with several varieties of rhubarb and are educating me about the vegetable.

Rhubarb

Did you know that Rhubarb is in actual fact a vegetable? I will be honest – I did not and thanks to the lovely lady at my favorite organic stall at the Farmer’s Market, I was informed of its origins.

Rhubarb is a vegetable with an incomparable taste, which makes it a favorite in many pies and desserts. It originated in Asia over 2,000 years ago and was initially cultivated for its medicinal qualities. It was not until the 18th century that rhubarb was actually grown for culinary purposes in Britain and America.

Often rhubarb is commonly mistaken to be a fruit but rhubarb is actually a close relative of garden sorrel, and is therefore a member of the vegetable family.

Rhubarb's crisp sour stalks are rich in vitamin C, dietary fibre and calcium. The leaves of rhubarb should never be eaten as they contain toxic levels of oxalic acid.

Rhubarb is in season from April through to September. It can be grown forced which accounts for its availability early in the year when other crops are scarce. Forced rhubarb, which is grown in the dark, has yellowish leaves and usually appears in January. The field-grown variety replaces it around April and is less tender but often more flavorful.

Nowadays Rhubarb is grown in many areas. Greenhouse production allows it to be available throughout much of the year. Rhubarb is ready to be consumed as soon as it is harvested, and freshly cut stalks will be firm and glossy.

Rhubarb (01) by MeetaK

The color of the Rhubarb stalks varies from the commonly associated deep red, through speckled pink, to simply green. The color, which results from the presence of anthocyanins, varies according to both rhubarb variety and production technique. The color is not related to its suitability for cooking. The green-stalked rhubarb is more robust and has a higher yield, and the red-colored stalks are more popular with consumers.

The stalks, which are petioles, may be prepared in a variety of ways. Stewing them will produce a tart sauce that can be eaten with sugar and other stewed fruit or used as filling for pies, tarts, and crumbles. This was the popular way rhubarb was enjoyed, which led to the common term for rhubarb, "pie plant". Rhubarb makes excellent jam and can be easily paired with other fruit like strawberries or apples. It can also be used to make wine and as an ingredient in baked goods.

Selecting & Storing

When buying rhubarb look for fresh crisp, firm, plump stalks with good color. Peel off any stringy covering before use. Stand the stalks in cold water for an hour or so to refresh them before cooking.

Kept in the fridge, fresh rhubarb will stay in reasonable condition for 1-2 weeks. However to enjoy its full flavor eat within three days of purchase. Raw and cooked rhubarb freeze well.

Preparing rhubarb is easy but not everyone knows what to do with it, if they have never worked with the ingredient before. So here are my tips to help you enjoy this vegetable with an identity crisis. Wash and trim both ends of the stalks. Discard the poisonous green leaves. If the rhubarb is a bit stringy, using a sharp knife, peel off the stringy covering. Rhubarb is very tart and requires considerable sweetening.

Rhubarb is incredibly versatile and has many culinary uses. Try it in cakes and desserts, pastries, jams, pickles, conserves, sauces and, of course, wine.

This is currently my favorite way to enjoy rhubarb in its simplest form. Compote is perfect because you can make large batches and use them in several ways. My rhubarb compote was used as a pastry filler, as a sauce for pancakes, in muffins and of course pure with rich vanilla sauce drizzled over the top.

Hope you enjoy your rhubarb season too!

Updated: You'll find all the different types of rhubarb varieties here.


Ingredients
Printable version of recipe here.

Rhubarb Compote (02) by MeetaK

For the Rhubarb Compote

750g rhubarb, cleaned, scraped and cut into larger sized pieces
50-70g + 2 tablespoons sugar
1-2 tablespoons lemon juice
30g cornflour

For the Vanilla Sauce

3 egg yolks
20g sugar
15-20g vanilla sugar
20-30g cornflour (cornstarch)
3/8 liter milk
1 vanilla pod


Method

For the Rhubarb Compote

Place the rhubarb with about 2 tablespoons of sugar in a saucepan. Set aside for approx. 15 minutes until the juices are drawn out. Pour in about 100 ml water and the lemon juice into the sauce pan and bring to a boil. Covered, simmer for 4-5 minutes. In a small cup or bowl mix the cornflour with 6 tablespoons of water to a smooth mixture. Pour into the rhubarb mixture and simmer for a further 3 minutes.

Sprinkle in the 50-70g of sugar. Give it a taste if the compote is still too tart then add another few teaspoons. Set aside to cool completely.

For the Vanilla Sauce

In a bowl, beat the egg yolks with the cornstarch, sugar and vanilla sugar to a smooth paste. Make sure there are no lumps in the mixture. Whisk in the milk.

Split the vanilla pod lengthways and scrape out the seeds. Add the seeds and pod into the egg-milk mixture.

Heat mixture in a pan over a medium heat until the sauce thickens. Do not allow to boil. Remove the vanilla pod and serve either still warm or chilled.


Verdict

Rhubarb Compote (03) by MeetaK

Fruit served in this way is a treat. Soeren always enjoys a good compote with vanilla sauce. They are also simply perfect for the school lunchboxes or a little treat for us mums in between. Tom loves this compote with vanilla ice cream and often serves himself a little portion a little later in the evenings. On the weekends we enjoy the compote with pancakes or waffles. So you see it really is worthwhile making large batches - because even those do not last too long!


All photographs and written content on What's For Lunch, Honey? © 2006-2008 Meeta Khurana unless otherwise indicated. | All rights reserved | Please Ask First

32 comments Continue »

Cooking School: Spaghetti Alla Bolognese

| 25 comments
SpaghettiBolognese 02 framed

I love classic pastas dishes. There is something totally satisfying about an Italian pasta dish prepared in the traditional way. When I am in the kitchen preparing such a dish, I try to imagine I am in the midst of a large Italian family. The buzz of the ceiling fan, the background music of cheerful Italian pop, the shouts of the children playing soccer on the cobblestone streets outside, the full bodied aroma of a huge pot of freshly prepared pasta and sauce are all images and sounds that entice my imagination.

One of the most classical pasta dishes has got to be Spaghetti alla Bolognese. It also happens to be the most favorite pasta dish in our household. I like spending time over the bolognese, because after all if prepared with love and care this sauce is really unbeatable.

The bolognese sauce, also known as ragu, is basically a meat based sauce, which originates from the city of Bologna. It incorporates ground beef, chunky vegetables, pancetta, and tomato paste to give a thick delectable sauce. Traditionally, the bolognese was served with fresh flat pasta, similar to the tagliatelle, over the years however spaghetti became the popular pasta dish which was served with this sauce.

The best bolognese I have eaten was, surprisingly not in Italy! It was actually at the Sheraton in Doha, Qatar. The chef was a humorous Swiss guy. I literally grew up on the stuff, when I would dig into a huge plateful of pasta bolognese at least once a week. When I finally got around to training in the kitchen of the Sheraton at the age of 19, I was lucky enough that the Chef was still around. My first day with the chef was memorable. He had me cutting vegetables in the tiniest of cubes for the whole day. I was irritated because all I wanted to do was make that bolognese. The next day he winked at me and put a huge sack of onions and garlic in front of me. I have never cried and cursed so much in my life. On the fourth day, he finally took me under his wing and showed me how to make the prized bolognese.

I have worked on this recipe over the years. Not really changing very much, just a sprinkling here and a hint there. But as I write this recipe for you, I am looking at the old Sheraton Doha letterhead, where I wrote the recipe down that day during my lunch break. And as if it were a seal of approval, there is a huge stain of the bolognese at the bottom.

The bolognese ragu can be varied in several ways. If you do not like beef use ground chicken. Add a handful porcini mushrooms to the sauce for a wonderful earthy flavor. For a vegetarian ragu, I have used vegetarian “ground beef” crumbles made of soya protein. These can be found in almost any grocery or organic stores. Whatever is used the basic method of preparation remains the same. I guarantee you a thick ragu for your pasta that will have you licking the plates clean.


Monthly Mingle 21 - Appetizers & Hors'Doeuvres

Appetizers&Hors'Doevres June 2008 250px The Monthly  Mingle is traveling this month again. This time to sunny California at Mansi's Fun & Food. Mansi has chosen a great theme - Appetizers and Hors'Doeuvres. If you love entertaining then you cannot miss this mingle.

For this monthly mingle, we'd like you to share some fancy vegetarian appetizers. Cook something that's pretty to look at and tasty to bite in, something that looks good on a plate and is irresistible to your guests!

Here's how it works:

1. All entries must be vegetarian (no meat or seafood); eggs and cheese is allowed
2. It can be sweet or savoury, as long as it is petit and crudite, fitting to be an Hors'Doeuvres. Anything that is bite-sized or individual serving-size is acceptable.
3. Entries must be received by June 9th at the latest.


4. Email your

  • your name
  • your location
  • the name of your blog and its url
  • the name of your dish and a link to the relevant post
  • a copy of the main photo of your dish 200px wide

to mansibshah[at]gmail[dot]com
5. Please include a link-back to Mansi's post and/or to this blog to encourage more readers to join in the fun.
6. Feel free to use the logo above
7. Older entries on blogs can be accepted only if they are republished in the month of May with a link-back to this announcement.


Ingredients
Printable version of recipe here.

SpaghettiBolognese 01 framed

2 onions, finely chopped
1 garlic, finely chopped
1 medium sized carrot, finely chopped
1 leek, finely chopped
50g pancetta, finely chopped
3 springs each - thyme, oregano and basil, finely chopped
2 tablespoons extra virgin olive oil
400g ground beef - not too lean or else the ragu will get too dry
2-3 tablespoons tomato paste
1/8 liter stock - vegetable or beef
Salt and pepper
Nutmeg, ground
1 bay leaf
1-2 cloves
425 ml can of tomatoes

Additional:

400g fresh pasta - spaghetti or tagliatelle
40g parmesan cheese, grated


Method

SpaghettiBolognese 05 framed

In a large heavy pan heat the oil and sauté the ground beef, breaking up the beef with a spatula - approx. 5 minutes. Add the pancetta, onions, garlic and vegetables into the pan and continue to sauté for a further few minutes. Salt and pepper to taste. 

Mix in the tomato paste and cook for a minute. Pour in the stock and add the bay leaf, cloves, thyme and canned tomatoes including the juice. Bring everything to a rolling boil then reduce heat and simmer for 30-45 minutes, stirring occasionally.

Cook pasta according to the instructions on the packet.

Add the basil and oregano to the ragu, which should have nicely thickened by now.

Remove from heat. Put the pasta in a large bowl and pour the ragu over the pasta. Toss well. Serve in deep plates with a good sprinkling of parmesan cheese.

Tip:

  • Make a double portion of this ragu and use it to make a scrumptious lasagne.
  • Buying pasta that is a bit rough will help the ragu to coat it well. Look out on the packet for pasta that is formed in copper forms. Pasta produced in such forms is the traditional way pasta is made. Pasta made in plastic forms produces a smoother pasta which causes the sauce to simply slide off.


Verdict

SpaghettiBolognese 03 framed

Nothing could bring bigger smiles all around the dinner table. This sauce has a perfect balance of spices, herbs and vegetables. It's not too tomato-ey but rather chunky.  It's perfect when you have a lot of friends around for game night. I normally make three to four different types of pastas to serve with this sauce for variety. Thanks Chef Z. for teaching me how to make this great ragu. I hope you all enjoy it as much as we do!

More pasta dishes on WFLH:

CaramelizedCherryGnocchi 05
Caramelized Homegrown Tomatoes on Homemade Gnocchi
ShrimpAsparagusPasta01
Pasta with Shrimps and Asparagus
DSC_0020
Spaghetti con gamberetti e rucola


All photographs and written content on What's For Lunch, Honey? © 2006-2008 Meeta Khurana unless otherwise indicated. | All rights reserved | Please Ask First

25 comments Continue »

Cooking School: Hot Cross Buns

| 37 comments
Hot Cross Buns (01) by MeetaK

Take a second look at the title of this post. That's right: Cooking School: Hot Cross Buns. The last time I looked, Hot Cross Buns fell under the category of Breads. Now take a look if you are on the right blog!

Yup! You are on What's For Lunch, Honey? and yes you are seeing this correctly. I am indeed presenting you with self baked bread outside of a Daring Baker's challenge, that is. If you have no idea what I am talking about then I presume you are new around these parts and would like to direct you to this post. That was my last challenge and as you can see I fear bread baking.

After reading the many comments and emails I got from that post I was rather amazed. Amazed, because you all seem to think that I was fearless. Well I guess Mighty Meeta's Kryptonite is bread baking.

Like any fearless super hero I decided to grab the proverbial bull by its proverbial horns and take this fear factor head on. I have been collecting a few bread recipes in the past few days and hope to present you with a few more bread varieties on this blog - outside of the DB challenges!

Do you see the Categories section on the sidebar? Well you all know how it works - click on the label and you get a list of all the recipes/articles filed under that particular category. The ones that have a larger font simply means that there are more recipes/articles under that category. Now look at the size of my breads category. It's minute! My aim this year is to make that label grow in font size!

As Easter is just around the corner I decided to start with Hot Cross Buns.

What are Hot Cross Buns?

Hot Cross buns have been a symbol of Good Friday for decades. They are specifically sold in bakeries and supermarkets throughout the Easter season. Each bun has cross piped, either with icing, pastry or glaze, on top to signify the crucifixion.

In England, they were once sold by street vendors who advertised their buns with cries of "Hot Cross Buns! "Hot Cross Buns!"

These street cries became the famous nursery rhyme. Do you remember?

Hot cross buns,
Hot cross buns,
one ha' penny,
two ha' penny,
hot cross buns.
If you have no daughters,
give them to your sons,
one ha' penny,
two ha' penny,
Hot Cross Buns

As I went to a British School, I certainly remember singing the rhyme. I would not say the Hot Cross Buns I have had in my life were of the gourmet kind but they were certainly delicious. I loved the smell of the spices and the sweet aroma of the raisins when the buns were cut open and toasted on the toaster.

In Christian history, the buns were traditionally eaten on Good Friday, with the cross depicting the crucifixion of Jesus Christ. Although they have been a Lenten and Good Friday tradition for centuries, Hot Cross Buns were not always associated with Christianity. The origins of the crumb lie in pagan traditions of ancient cultures, with the cross representing the four quarters of the moon. During early missionary efforts, the Christian church adopted the buns and re-interpreted the cross. In 1361, a monk named Father Thomas Rockcliffe began a tradition of giving Hot Cross Buns to the poor of St Albans on Good Friday.

In years that followed, many customs, traditions, superstitions, and claims of healing and protection from evil and were associated with the buns. In the 16th century, Roman Catholicism was banned in England, but the popularity of Hot Cross buns continued. Queen Elizabeth I passed a law banning the consumption of Hot Cross Buns except during festivals such as Easter, Christmas and funerals.

Source:
Wikipedia

The recipe I used must have been as old as Queen Elizabeth I herself, because it was taped in my recipe notebook and looked rather faded and tattered. The handwriting was not mine and I cannot remember for the life of me who gave me the recipe. I normally write the names down of the people who gave me the recipes but I only started doing this for the past 8-9 years! So the recipe is certainly older than that. What attracted me to the recipe was the use of all-spice.

The recipes I found during my comparison research did not have all-spice listed in them. It's a spice I really like, but do not use very often in my kitchen outside of the Christmas baking. I also liked that the buns were piped with a mixture of flour and water and not icing. As far as I remember the British either cut the crosses in the buns or use the flour/water pastry mixture to pipe the crosses - never with icing. The reason behind this is because the buns are made a few days ahead and should be enjoyed toasted with only butter spread thickly on the warm bread. Using icing sugar will only cause it to burn when toasted.

Hot cross buns,
Hot cross buns!

Extra Read: My latest article is out on FoodieView. This week I am Re-thinking Casseroles!


Reminder!

MM SpringFruitSensations 3 March 2008 250px


The Monthly Mingle gets fruity this month! My guest host Abby has chosen a spectacular theme for this month - Spring Fruit Sensations. So get out your colorful fruit creations and send them over to Abby.


Deadline: April 7th, 2008 


Ingredients
Printable version of recipe here.

Hot Cross Buns (02)  by MeetaK

14g dry active yeast or 30g fresh yeast
500g white flour for bread, plus more for dusting
3 tablespoons sugar
2 teaspoons ground mixed spices - I used cinnamon, all-spice, nutmeg, cloves and ginger 
40g butter
200g raisins

Pastry for the crosses:
30g flour
1/4 teaspoon sugar

For the glaze
1 1/2 tablespoon sugar
1 teaspoon gelatine powder


Method

Hot Cross Buns (04)  by MeetaK

Prepare a baking sheet by lightly greasing it.

In a small bowl incorporate the yeast, 2 teaspoons flour, 1 teaspoon sugar and 125 ml luke warm water well. Cover with a with a damp cloth and place in warm place for about 10 minutes to activate the yeast. After the 10 minutes your yeast mixture should be frothy and bubbly. If this is not the case this means that your yeast is too old and you will have to proof it again with fresh yeast.

In a larger bowl sift the flour and the spices, then mix in the sugar. Add the butter and knead with your fingertips until it resembles breadcrumbs. Throw in the raisins. Make a well in the middle of the flour and pour in the yeast mixture and 185ml water. Using your hands gently mix in the flour into the yeast mixture. Knead into a smooth dough.

Dust the countertop lightly with some flour then tip out the dough and knead for 5 minutes until the dough is soft and smooth. Dust a large bowl with flour. Shape a ball out of the dough and place into the bowl and cover with a damp cloth. Place in a warm place for 30-40 minutes until the dough has doubled in volume.

Preheat the oven to 200 degrees C.

Tip the dough onto the counter and give it another good kneading. Divide into 12 equal parts, then roll each portion into a ball and place on the greased baking tray. Place each ball of dough so that they are touching each other. Cover the tray with a damp cloth and allow to rest in a warm place for another 20 minutes. They balls of dough will double in volume again.

Pastry for the crosses:
Mix the flour, sugar and 2 1/2 tablespoons water into a thick, smooth paste-like mixture. Fill into a piping bag or a small sandwich bag with a slight cut at one of the corners. Now pipe crosses onto the buns.

Slide the baking tray into the oven and bake for 20 minutes until golden brown.

For the glaze
In the meantime prepare the glaze by mixing the sugar, 1 tablespoon water and the gelatine powder in a small saucepan. Mix until dissolved. On low heat heat the mixture until the mixture is smooth.

When the buns come out of the oven brush the buns while still hot with the glaze.

Allow to cool. The best way to enjoy the buns are cut, toasted and with lots of good butter. Hmmmn! You can serve these for a Easter breakfast or brunch.


Verdict

Hot Cross Buns (03)  by MeetaK

This is incredible. I think I am getting used to this rising and kneading thing as it is proving to be rather therapeutic. While the dough was doing its first rise I was able to complete a relaxing session of yoga. The kneading helps to take away and frustrations and on the second rise I was able to do my nails. LOL! The buns were simply delicious. They rose perfectly, took on a wonderful golden color and the whole house smelled of spices. We enjoyed these for breakfast on the weekend, lightly toasted on the toaster. Soeren spread honey on his, Tom red current jam and I just had it with butter. I think I will make these every now and then for sure and it does not always have to be Easter! ;-)

As I am quite proud of these little babies, I am sending these to - wait for it - Bread Baking Day! This month's hostess is Susan of Wild Yeast and her theme is focusing on the upcoming Spring seasonal holidays - Easter St. Patrick's Day and so on! I've watched from the sidelines and almost took part in last month's Flatbreads theme but chickened out instead. I hope I can often take part in this event from now on LOL!

To celebrate Easter I have thoughtfully and carefully put together a few menu ideas for you. Hope you enjoy them. I'll be in Dubai with my parents, Tom and Soeren, enjoying the sun and looking for Easter eggs in the sand.

Easter menu "Flavors":

Starter: CarrotGingerSoup2 Creamy Ginger Carrot Soup wit Lemon Cream
Entrée: TeriyakiSalmon04 Honey Teriyaki Salmon with Mange-Tout
Dessert: Lemon Meringue Pie 05 Lemon Meringue Pie


Easter Menu "Non-Vegetarian":

Starter: DSC02704 Spinach Soup with Coconut milk and Chicken
Entrée: Geschnetzeltes03 Creamy Veal and Mushroom Pie with Potato Crust
Dessert: RaspberryChocolateTiramisu01 Raspberry Chocolate Tiramisu


Easter Menu "Vegetarian":

Starter:  SpinachSalad02 Spinach Salad with Goat Cheese and Avocado
Entrée:  DSC02715 Mustard Eggs with Rice Duo
Dessert:  RaspberryDreamCream07 Raspberry Dream Cream


When I made these last week, Nandita of Saffron Trail and I were chatting and I showed her the pictures I took of these buns. She instantly wanted one. I told her she'd have to make them herself. Well she did and we decided to post on the same day. Do check out Nandita's version of Eggless Hot Cross Buns.


All photographs and written content on What's For Lunch, Honey? © 2006-2008 Meeta Khurana unless otherwise indicated. | All rights reserved | Please Ask First

37 comments Continue »