Showing posts with label Sauces and Dips. Show all posts

Zesty Olive Medley: Marinated in Preserved Lemons, Infused with Cumin and Za'atar

Zaitun-Marinated-Olives by MeetaKWolff-0070

The heartbeat of P@l3st!ne lies in the roots of the زيتون (zaytoun) tree. ⁠ As a resilient symbol of peace, heritage, and sustenance, the olive tree is more than an icon – it's the lifeblood of families. Tales that span centuries echo the strength of a people, rooted deep in the soil.

Continue »

German Spaetzle with Wild Garlic Almond Pesto and Green Asparagus

| 33 comments
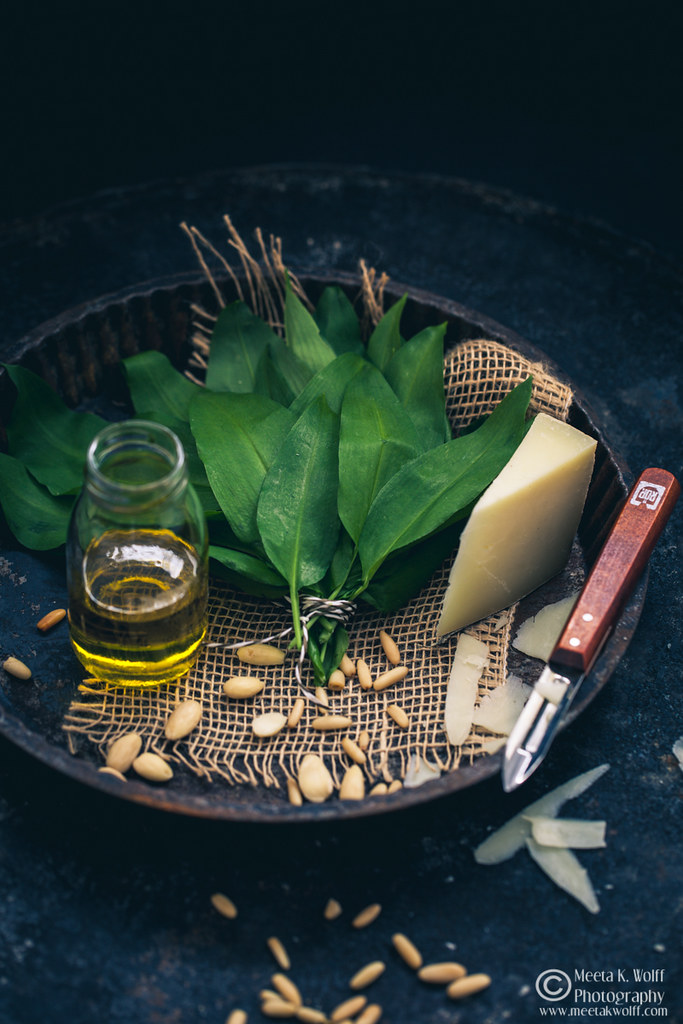
Wild Garlic Pesto-Ingredients-Meeta-Wolff-125

By the time spring arrived the air thickened with the pungent aroma hanging over the park and the woods. Following the path on my bicycle my nostrils were overwhelmed with the smell of garlic that seemed to follow me. I had not been living long in Germany and spring in this magnitude was often still overwhelming to my senses. For someone who had spent most of her life in the Persian Gulf in the bi-seasonal climates of hot and hotter, the feeling of four seasons was intoxicating.

33 comments Continue »

Tomato Sauces: Spicy Ketchup, Fruity Marinara and Passata di Pomodoro

| 30 comments
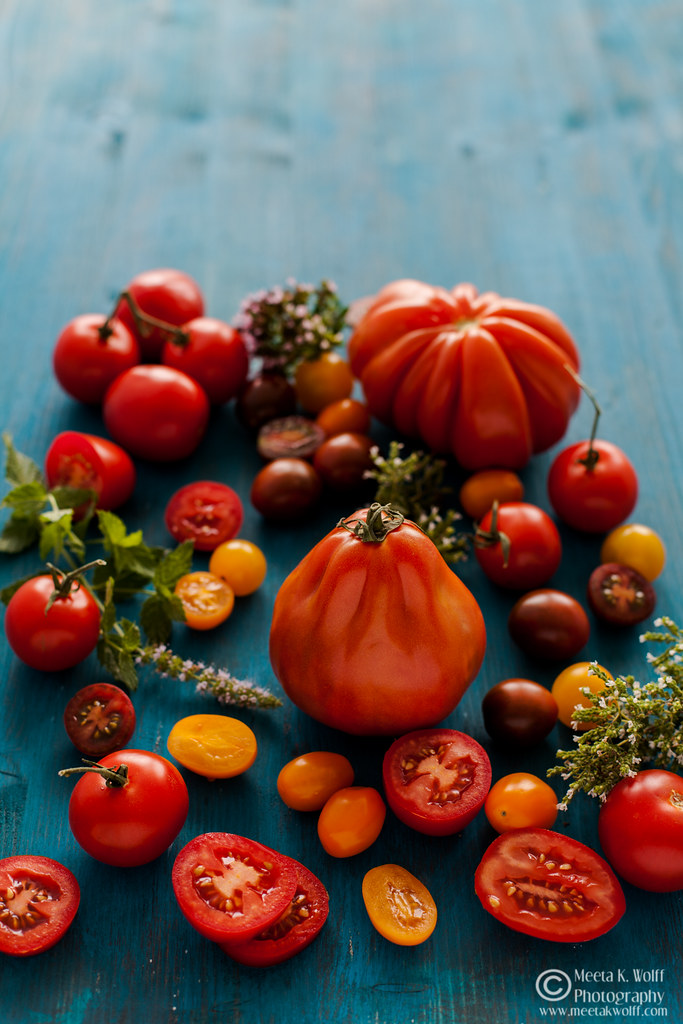
Tomatoes-WM-0013

If Eve had used a tomato instead of an apple, maybe the story of Adam and Eve would have been different. After all tomatoes are often called “love apples” and were thought to have aphrodisiac powers.The French therefore named it quite appropriately, pomme d’amour

30 comments Continue »

Lavender Macarons with Ruby Red Grapefruit Prosecco Curd

| 33 comments

Lavender Grapefruit Proseco Curd (0006) by Meeta K. Wolff  

Hello December!

You’ve arrived with a storm, taking us all in your wintery grasp and covering us in a deep fluffy white blanket. Each year you force yourself earlier upon us. Arriving like a silent ghost, you bring a shuddery chill throughout the region. The bare snow-topped trees sparkle as if lined with diamonds and morning rays of sunlight dance through the mist of a bleak and gray sky.     

33 comments Continue »

Candied Thyme Kumquats

| 38 comments

Candied Thyme Kumquats (01) by MeetaK 

I would definitely say that tangy citrus fruits have been the dominant ingredient in my kitchen the past few weeks. I’ve been hit by a surge of ideas and needed to realize them, at best all at once. I get impatient – when inspiration hits me I get all fidgety and need to work on the ideas as soon as possible.

38 comments Continue »

Tomato Apricot Chunky Chutney

| 44 comments

Tomato Apricot Chutney (01) by MeetaK  

"You say tomaaahtoh, I say ... sauce!" "You say tomaaytoh, I say ... salad!" "You say tomato, I say ... chutney!" Then I'll say "STOP!" before you give me any more tomatoes!

I am seeing red right now - tomato red! My CSA box has been overflowing with lovely ripe tomatoes and my mother-in-law’s green house has been producing more tomatoes than she can harvest. Last weekend I found myself with something like 4 kilos of tomatoes

44 comments Continue »

Cooking School: Falafel with a Tahini-Yogurt Sauce and a Minty Tabouleh

| 60 comments
Falafel ( 02) by MeetaK 
There are many reasons why I love going to visit my parents in Dubai - the main one, of course, is seeing my parents and brother! But also on the top of my list is the food - the Arabic food to be exact. Regulars to my blog will know that I have lived a larger part of my younger years in the Persian Gulf countries and literally grew up on good Lebanese, Egyptian and Syrian cuisine. Thanks to the large expatriate community in these countries we had several friends from these countries who often spoilt us with their large mezzes and delicious dishes.

60 comments Continue »

Cooking School: 5 Ways to Make Homemade Dulce De Leche

| 61 comments

Dulce De Leche (01) by MeetaK

Dulce De Leche - that sinfully good and deliciously decadent thick syrup from Latin America probably makes a lot of Foodie hearts beat faster. I've had it on my mind for quite a few weeks and as I had the week off last week I finally got the chance to make it.

61 comments Continue »

Cooking School: Fresh Homemade Lemon Curd

| 43 comments
Lemon Curd (04) by MeetaK

Something sweet and sour for this session of Cooking School - a delicious creamy lemon curd. At this time of year when citrus fruits are plentiful I often cannot resist the plethora of flavors and recipes one can create with lemons, limes, oranges, grapefruits, tangerines, satsumas and co.

One absolute must is a lemon curd - a rich, tart spread made with lemons and although one can use other citrus fruits like limes or oranges to make curds, lemons are the all time favorite. Why is lemon curd a must for me? Because from this as a basis I can make literally dozens of exciting creations. Having said that, I am giving you a heads up - go get your lemons and make this lemon curd - as later this week I will be sharing a great recipe, which uses lemon curd in a exciting and refreshing way.

43 comments Continue »

Aromatic: Sun Dried Tomato and Purple Basil Pesto

| 27 comments
Sundried Tomato Pesto (01) by MeetaK

A simple light meal today! The period from Thanksgiving right through to New Year’s is a killer. For the past few days I have been feeling extremely satiated. It’s all those parties and get-togethers that are the norm during this time of the year. We have so many events scheduled on our calendar this month and each one with promises of luscious food.

27 comments Continue »

After Hours: Pear Cranberry Chutney Spiced with Star Anise

| 16 comments
Pear Cranberry Chutney (03) by MeetaK

After hours - the dinner dishes are still scattered on the table - traces of an entertaining and fun meal. Giggles in the kitchen and cheers from the living room - everyone has settled in well. Stories have been told and news has been shared now it's time for the important stuff.

As the boys gather around the television to watch the game, the girls catch up on the latest gossip. It's a wonderful evening - cold, but the moon is shining, the stars glitter on a velvet black sky and the snow crunches beneath the feet.

It's only been a few hours but there is a slight craving again. The meal was rich and plentiful and everyone indulged excitedly not only in the chatter but also in the food. However, there is a yearning for sweet savory bites. Something decadent to nibble on - not a stately portion just a bite to satisfy the longing of an after hours craving.

Pear Cranberry Chutney (02) by MeetaK

A variety of cheese and a special something - sweet but with a spicy note. A delicate chutney to entice everyone back together again. One more time - gather around and be thankful for friends, family and food.

Recipe: Pear Cranberry Chutney

Ingredients
Printable version of recipe here.

5 medium sized pears, peeled and diced
Small piece of ginger, finely chopped
1 red chili, finely chopped
2 whole star anise
2 limes, zest and juice
150g fresh cranberries 
Agave syrup, to taste
1/2 - 1 teaspoon Agar agar powder
2 tablespoon canola oil

Method

In a saucepan heat the oil and quickly sauté the diced pear and chili. Add the ginger, agave syrup, agar agar, lime juice and zest and finally the cranberries. Bring everything to a boil, then reduce heat and simmer for 5 minutes until the pear cranberry chutney thickens.

Fill the pear cranberry chutney into clean sterilized jars then place in the refrigerator to cool.

The chutney will keep in the refrigerator for 1-2 weeks. 


Verdict

Pear Cranberry Chutney (01) by MeetaK

The pear and cranberry chutney is a perfect partner to wild, poultry and veal, but it works delectably with a fresh piece of bread and a slice of your favorite cheese. That's why it's my favorite after dinner treat. A platter of cheese, a few grapes, some fresh sliced rustic bread and this pear and cranberry chutney is the best way to keep the crowd comfortingly happy.

Although I do not have any vegan friends I did try to veganize the pear cranberry chutney, as I have been playing around with several recipes. So Sug's Vegan Ventures Round 2 was the perfect occasion to show-off one of my attempts. I hope I did a good job here as it is unexplored territory I am treading in.

Don't Forget

MM low-sugar sweet treats


This month the team over at the Daily Tiffin are hosting the Monthly Mingle. We are all looking forward and eagerly awaiting your ideas and creations to this session's theme - Low-Sugar Treats. Come on over and share your healthy treats.

The deadline is December 8th, 2008. See you there.


You might like these other "after hours" treats from WFLH:

LavashAjvar 03 ApricotSalsa02 framed TroutMousse02
Ajvar - Roasted Pepper, Aubergine and Garlic Dip Apricot Salsa Mousse de Truit

Wishing you all a happy Holiday. Enjoy your Thanksgiving with your loved ones. I will be taking a short break to enjoy the next few days with my family and friends. Plenty planned and there will be lots of good food.

See you soon!

Hugs! 


All photographs and written content on What's For Lunch, Honey? © 2006-2008 Meeta Khurana unless otherwise indicated. | All rights reserved | Please Ask First

16 comments Continue »

Daring Bakers: Pizza with Caramelized Fennel, Radicchio, Pears, Spinach, Prosciutto di Parma, Roasted Tomato Sauce, Nuttela and Almonds

| 62 comments

Daring Bakers Challenge October 2008

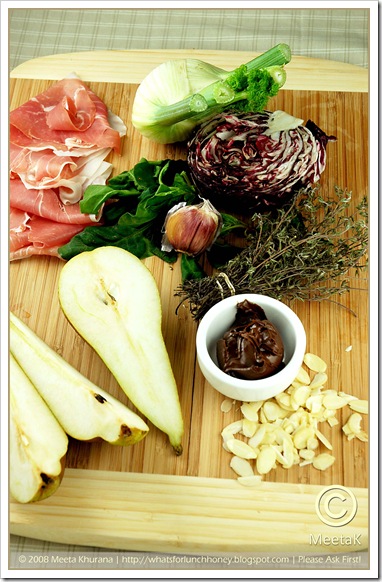
 Pizza Toppings (01) by MeetaK

~ In memory of Sherry “Sher” Cermak 1948-2008 ~

Just a few of the ingredients I used for this months Daring Bakers' challenge. On one pizza? No of course not. And what are the Daring Bakers doing making pizza, you must be thinking? What's daring about that?

Well this is what I love about the group. We get to try our hands at everything and this would not be a daring group if we were making any ole pizza!

This month it was Rosa of Rosa's Yummy Yums who was hosting the challenge. Initially she was going to co-host the challenge with Sher, but life takes sad unexpected turns. To honor her memory Rosa decided to carry through with Sher's chosen recipe for the October challenge.

The challenge was to make pizza dough using the recipe from The Bread Baker’s Apprentice by Peter Reinhart and using the tossing method! This was going to be fun. Otherwise we were free to use our imaginations. This was going to be a lot of fun.

I chose to make this quite early on in the month. Tom was away for the weekend and Soeren and I decided to tackle the challenge together. The tossing method with a 6 year old is a hilarious event. After the kitchen looked like we had just been snowed in with flour we decided to really get to work.

We are your typical family who love pizza - but are a bit picky. We have very specific likings to our pizzas and our notion of pizza is a perfect thin crusted one rather than the greasy deep pan pizza. Our pizzas have just a few toppings, going for a medley of full flavor rather than piling on the ingredients. We often make pizza at home and over the years we have found a few basics we stick to - basics like the dough, the spice oils and the tomato sauce.

So that is why I was quite keen on trying another type of pizza dough.
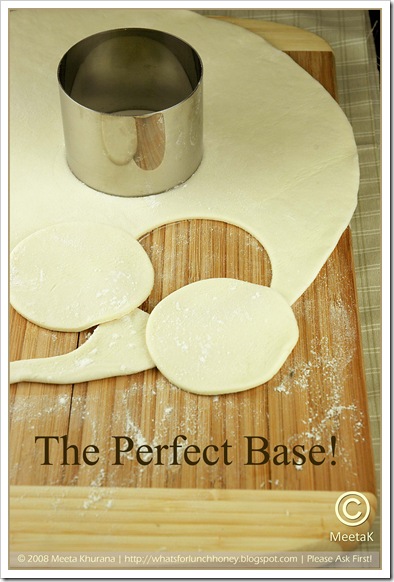
Pizza Dough (01) by MeetaK

Basic Pizza Dough

Original recipe taken from “The Bread Baker’s Apprentice” by Peter Reinhart.

Ingredients
Printable version of recipe here.

Makes 4-6 pizza crusts (about 9-12 inches/23-30 cm in diameter).

4 1/2 Cups (20 1/4 ounces/607.5 g) Unbleached high-gluten (%14) bread flour or all purpose flour, chilled
1 3/4 Tsp Salt
1 teaspoon Instant yeast
1/4 Cup (2 ounces/60g) Olive oil or vegetable oil (both optional, but it’s better with)
1 3/4 Cups (14 ounces/420g or 420ml) Water, ice cold (40° F/4.5° C)
1 tablespoon sugar
Semolina/durum flour or cornmeal for dusting

Method

Day one

Mix together the flour, salt and instant yeast in a big bowl (or in the bowl of your stand mixer).

Add the oil, sugar and cold water and mix well (with the help of a large wooden spoon or with the paddle attachment, on low speed) in order to form a sticky ball of dough. On a clean surface, knead for about 5-7 minutes, until the dough is smooth and the ingredients are homogeneously distributed. If it is too wet, add a little flour (not too much, though) and if it is too dry add 1 or 2 teaspoons extra water.

If you are using an electric mixer, switch to the dough hook and mix on medium speed for the same amount of time. The dough should clear the sides of the bowl but stick to the bottom of the bowl. If the dough is too wet, sprinkle in a little more flour, so that it clears the sides. If, on the contrary, it clears the bottom of the bowl, dribble in a teaspoon or two of cold water.

The finished dough should be springy, elastic, and sticky, not just tacky, and register 50°-55° F/10°-13° C.

Flour a work surface or counter. Line a jelly pan with baking paper/parchment. Lightly oil the paper.

With the help of a metal or plastic dough scraper, cut the dough into 4-66 equal pieces (or larger if you want to make larger pizzas).

To avoid the dough from sticking to the scraper, dip the scraper into water between cuts.

Sprinkle some flour over the dough. Make sure your hands are dry and then flour them. Gently round each piece into a ball.

If the dough sticks to your hands, then dip your hands into the flour again.

Transfer the dough balls to the lined jelly pan and mist them generously with spray oil. Slip the pan into plastic bag or enclose in plastic food wrap.

Put the pan into the refrigerator and let the dough rest overnight or for up to thee days.

NOTE: You can store the dough balls in a zippered freezer bag if you want to save some of the dough for any future baking. In that case, pour some oil (a few tablespoons only) in a medium bowl and dip each dough ball into the oil, so that it is completely covered in oil. Then put each ball into a separate bag. Store the bags in the freezer for no longer than 3 months. The day before you plan to make pizza, remember to transfer the dough balls from the freezer to the refrigerator.

Day Two

On the day you plan to eat pizza, exactly 2 hours before you make it, remove the desired number of dough balls from the refrigerator. Dust the counter with flour and spray lightly with oil. Place the dough balls on a floured surface and sprinkle them with flour. Dust your hands with flour and delicately press the dough into disks about 1/2 inch/1.3 cm thick and 5 inches/12.7 cm in diameter. Sprinkle with flour and mist with oil. Loosely cover the dough rounds with plastic wrap and then allow to rest for 2 hours.

At least 45 minutes before making the pizza, place a baking stone on the lower third of the oven. Preheat the oven as hot as possible (500° F/260° C).

If you do not have a baking stone, then use the back of a jelly pan. Do not preheat the pan.

Generously sprinkle the back of a jelly pan with semolina/durum flour or cornmeal. Flour your hands (palms, backs and knuckles). Take 1 piece of dough by lifting it with a pastry scraper. Lay the dough across your fists in a very delicate way and carefully stretch it by bouncing it in a circular motion on your hands, and by giving it a little stretch with each bounce. Once the dough has expanded outward, move to a full toss.

Make only one pizza at a time.

During the tossing process, if the dough tends to stick to your hands, lay it down on the floured counter and re-flour your hands, then continue the tossing and shaping.

In case you would be having trouble tossing the dough or if the dough never wants to expand and always springs back, let it rest for approximately 5-20 minutes in order for the gluten to relax fully, then try again.

You can also resort to using a rolling pin, although it isn’t as effective as the toss method.

When the dough has the shape you want (about 9-12 inches/23-30 cm in diameter - for a 6 ounces/180g piece of dough), place it on the back of the jelly pan, making sure there is enough semolina/durum flour or cornmeal to allow it to slide and not stick to the pan.

Lightly top it with sweet or savory toppings of your choice.

NOTE: Remember that the best pizzas are topped not too generously. No more than 3 or 4 toppings (including sauce and cheese) are sufficient.

Slide the garnished pizza onto the stone in the oven or bake directly on the jelly pan. Close the door and bake for about 5-8 minutes.

NOTE: After 2 minutes baking, take a peek. For an even baking, rotate 180°.

If the top gets done before the bottom, you will need to move the stone or jelly pane to a lower shelf before the next round. Should the bottom crisp before the cheese caramelizes, then you will need to raise the stone or jelly.

Take the pizza out of the oven and transfer it to a cutting board or your plate. In order to allow the cheese to set a little, wait 3-5 minutes before slicing or serving.
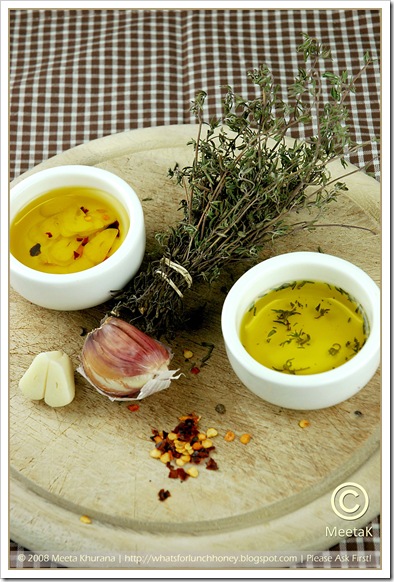
 

Pizza Spice Oils (01) by MeetaK 

Another basic for our pizza are spiced oils. These are used to pour into the pizza sauce or toss rucola, radicchio, chard or spinach to give these leafy toppings a lovely aroma. I normally infuse olive oil with herbs, like thyme, rosemary, oregano or marjoram. Garlic, ginger or chili flakes give the oil an extra body and a powerful flavor. Try using a delicate organic extra virgin olive oil because you will really taste the difference. For these pizza selections I infused the oil with 2 varieties: garlic and chili flakes for the sauce and dried thyme for the radicchio.

Infusing the oils is fairly easy and does not require an extra recipe. I normally buy small sealable glass bottles to store the oils in, because the longer the oils are infused the more time they have to enfold their aromas. However if you do not have time to infuse the oils for that long, even a 3-6 hour quick-infusion will be sufficient. Simply pour the amount of oil you require in small bowls and add your herbs and spices. Then just forget about it while you tackle the rest of your pizza.
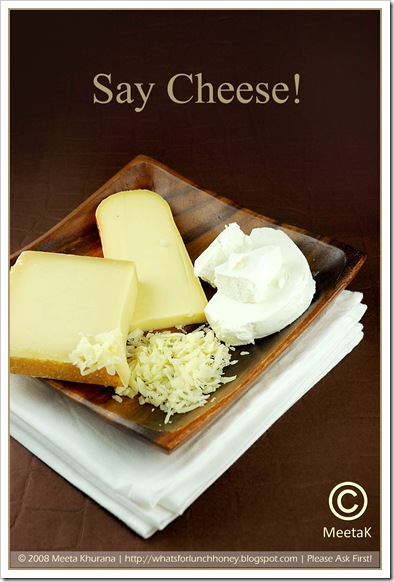
Pizza Cheese (01)by MeetaK

Cheese is an important element in a pizza and something I like to experiment with. My organic store has an incredible cheese counter - a cheese for every occasion, or every pizza if you prefer. Fontina, Roquefort, Manchego, Goat cheese, Gruyere or even a dollop of quark are all some of my favorite types of cheese for pizza.

Some say a pizza is made or broken with the pizza sauce. I agree. If a pizza uses tomato sauce as a base for the toppings, I believe it should blend well with the rest of the flavors used in the pizza. It should not overpower and I prefer it chunky rather than puréed. I also prefer using a mix of cherry tomatoes and passata.  For this pizza I gently roasted the tomatoes for 45 minutes in the oven with some thyme spice olive oil and a few slivers of garlic. 

Once out of the oven the cherry tomatoes were thrown into the passata, garlic and all, and gently simmered.

The recipe below makes a fairly large batch of roasted tomato sauce. It’s also perfect for pasta sauces or as a base for stews, goulash our even soups. Stored in air-tight Weck jars the sauce keeps for 3-4 days in the refrigerator. You can also freeze the sauce in Ziploc bags for up to a month. This is a superb sauce so full of flavor and you’ll definitely want to make a big enough batch that goes around for a while.
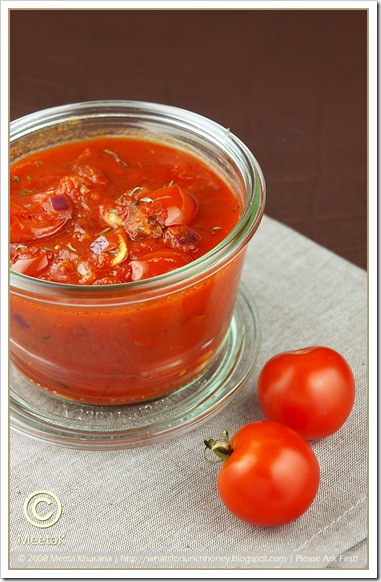
 

 Pizza Sauce (01) by MeetaK

Roasted Tomato Sauce

Ingredients
Printable version of recipe here.

500g cherry tomatoes, cut in half
3-4 garlic cloves, thinly sliced
500g tomato passata
1 tablespoon thyme spiced olive oil
2 tablespoon garlic-chili spiced olive oil
1 large red onion, coarsely chopped
Fresh or dried thyme
Salt and pepper

Method

Preheat the oven to 150 degrees C. Line a baking tray with aluminum foil.

In a large bowl toss together the tomato halves, garlic slivers, thyme spiced oil and a pinch of salt. Spread out on the baking tray and bake in the oven for 40-45 minutes. Keep an eye on the tomatoes and if required reduce the heat if they start to get too brown.

In a large pot pour in the passata and the garlic spiced olive oil. Bring to a simmer, then add onions and roasted tomatoes, including garlic, into the mixture.

Simmer for 15-20 minutes until the onions softened and the sauce thickens. Sprinkle with thyme, salt and pepper to taste.

Notes:

  • If you are planning on storing the tomato sauce in jars, pour in sterilized jars 
  • If you are planning to freeze the sauce in Ziploc bags, allow the sauce to cool completely before pouring it in the bags.


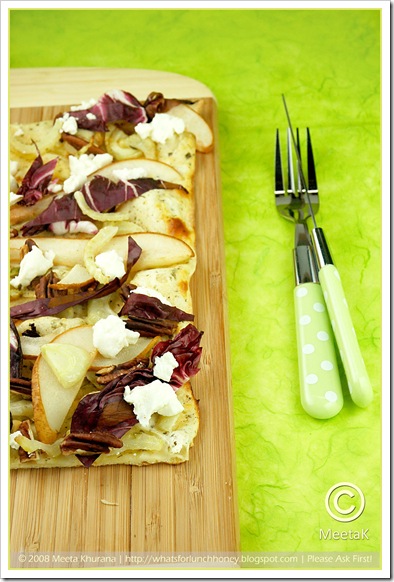
Caramelized Fennel, Radicchio, Pears and Goat Cheese Pizza  
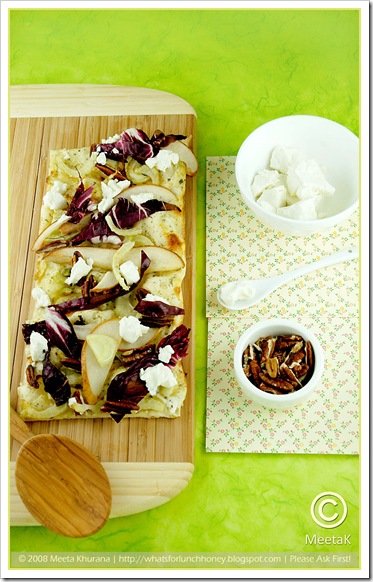
Pizza Fennel Raddichio (01) by MeetaK

Finally it’s time for the toppings. For me pizza is like a canvas and I love painting it with a variety of aromatic ingredients. Each ingredient harmonizes perfectly with the other complementing each flavor combination.

For this challenge I made three pizzas, each very different from the other and each highlighting an entirely different flavor combination.

Which is your favorite flavor combination?

Ingredients

Printable version of recipe here.

2 fennel bulbs, sliced
1 teaspoon maple syrup
Small head of radicchio
2-3 small pears, thinly sliced
Soft goat cheese
Pecans, roughly chopped
1 tablespoon thyme spiced olive oil
150g herb quark,  simply chop up some fresh herbs of choice and mix into the quark.
Salt and pepper
1 portion basic pizza dough

Method

Preheat oven to 200 degrees C.

In a large bowl toss the fennel with the thyme spiced oil. Heat a large skillet to medium-high and sauté the fennel slices. Add the maple syrup and mix. Once the fennel begins to soften, turn the heat down and sauté gently until the fennel caramelizes and releases its aromatic fragrance.

Make sure you stir frequently so that the fennel does not stick to the bottom of the pan. This normally takes 15 to 20 minutes.

Spread the prepared pizza base with the herb flavored quark, the caramelized fennel and pear slices. Break off a few edges of the goat cheese and lay out on the pizza. Finally sprinkle with the chopped pecans.

Bake in the oven for 8-10 minutes or until the base is crispy. Take out of oven sprinkle with salt and pepper then arrange the radicchio leaves over the top.

Allow to rest for 2-3 minutes, then slice.

Helpful reads:
 

Pizza Fennel Raddichio (02) by MeetaK

 Prosciutto di Parma, Spinach and Gruyere Pizza 
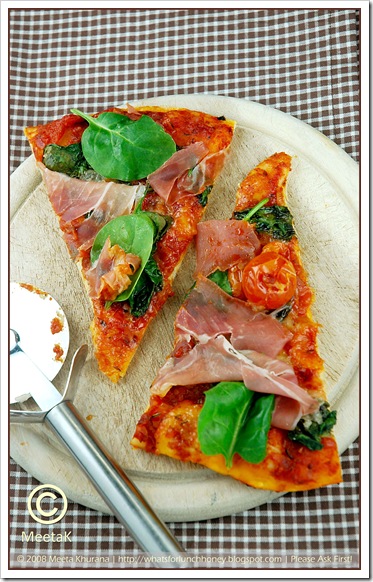
Pizza-Parma Spinach (02) by MeetaK

Ingredients
Printable version of recipe here.

5-6 slices prosciutto di Parma
Handful of fresh baby spinach
150g roasted tomato sauce
100g Gruyere cheese, grated
1 portion basic pizza dough
Salt and pepper

Method

Preheat oven to 200 degrees C.

Generously spread the prepared pizza base with the roasted tomato sauce. Salt and pepper to taste. Sprinkle the cheese and bake in the oven for approx. 8-10 minutes.

Take out and arrange the ham and spinach leaves on top of the pizza.

Allow to rest for 2-3 minutes, then slice.
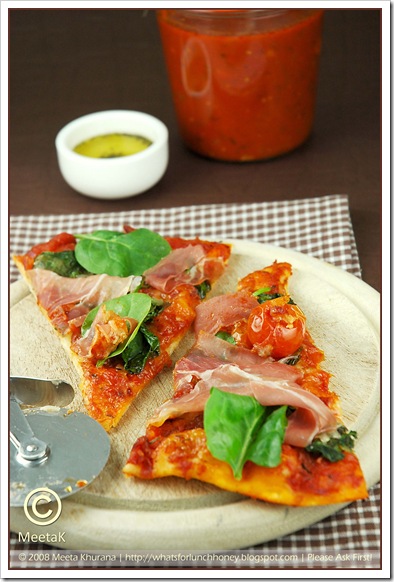
 

Pizza-Parma Spinach (01) by MeetaK

 Nutella, Pears and Toasted Almonds Pizza
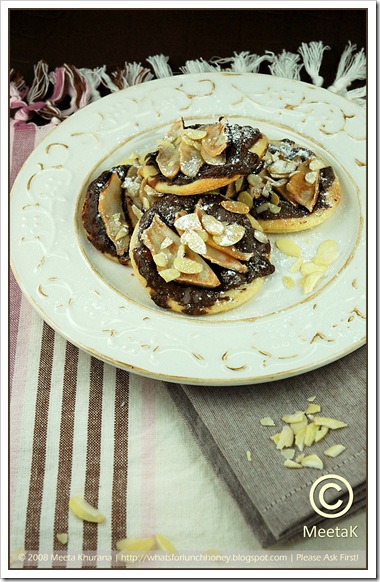
Pizza-Nutella (01) by MeetaK


Ingredients
Printable version of recipe here.

Several large tablespoons of Nutella
2 pears, thinly sliced
Handful almonds, sliced
Powdered sugar
1 portion basic pizza dough

Method

Preheat oven to 200 degrees C. Line a baking tray with waxed paper.

Using a cookie cutter or a glass cut circular shapes out of the prepared pizza base. Place each mini-pizza on the baking tray.

Generously spread each mini-pizza with Nutella. Arrange the pear slices and sprinkle with the almond slivers.

Bake in the oven for approx. 8-10 minutes. Remove and sprinkle with powdered sugar.


Verdict

“Nutella Pizza for dessert rocks!” was the all thumbs up verdict from Soeren. What surprised me the most was that he seemed to like the fennel radicchio combination a lot more than the expected Parma ham and spinach. I had made that pizza extra for him thinking he would not like the fennel-radicchio pizza that much. But to my surprise he wanted more than the one slice I had given him to taste. The Parma-spinach pizza combination is one of the regular types of pizzas we often make. Sometimes I will substitute the spinach with rucola and the prosciutto with bresaola.

Would I make this again?

This is very similar to the pizza dough I regularly make at home. The only difference my proofing/rising takes just an hour in a warm place. Tossing is not going to be something we will do often when making pizza though. Although we had a great laugh, the tossed dough was hardly usable, after it had flown two or three times through the kitchen and swept up the floor. We’ll be sticking to the trusty rolling pin.

What did I learn from this challenge?

That I can proof the dough in the fridge overnight for a more hassle free pizza. I know this might seem pretty normal to most of you, but we normally make pizzas on the spur of the moment. I will quickly buy a few ingredients for the topping on the way home from work and then make the dough allowing it to proof for 45-60 minutes. It never occurred to me that if I planned ahead I could actually allow the base to proof in the fridge. Duh!

I’d like to thank Rosa for this fun challenge. If you need more inspiration for pizza toppings please browse through the several great creations from the other Daring Bakers.

Have fun!


All photographs and written content on What's For Lunch, Honey? © 2006-2008 Meeta Khurana unless otherwise indicated. | All rights reserved | Please Ask First

62 comments Continue »

Quark: The Recipe

| 63 comments
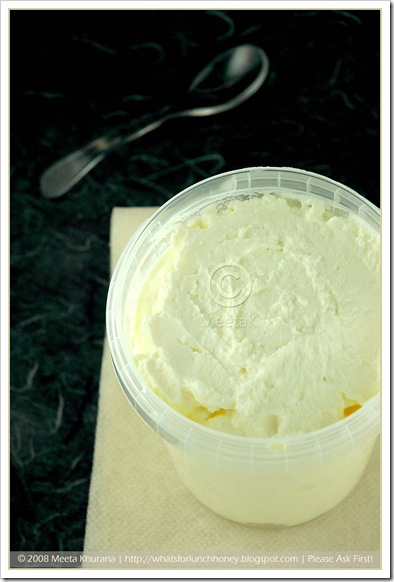
Quark (01) by MeetaK

Ask any European foodie living outside Europe what they miss the most back home, the answer is most likely to be “Cheese and the variety of dairy products”. Ask any passionate foodie living in Europe what they love the most the answer is certainly going to be the same!

There are so many different types of yogurts, milk based puddings, yogurt based drinks, cream cheeses, soft cheeses and hard cheeses that the dairy section at the grocery stores makes one giddy. We truly are spoilt for choice.

There is one specific product that I have a special fondness towards – and that is quark. A smooth creamy creamy cheese readily available in Germany and very similar to the French fromage blanc or fromage frais.

Some of my friends think it's a "strange ingredient" but for those who have experienced quark will know that it works magic in all kinds of dishes from salad dressings to puddings, from sauces to cakes.

Today's post focuses on this amazing cheese and I will attempt to take the "strange" out of this ingredient for my readers and those friends ;-)

Quark literally means "curd" and is a fresh unripe cheese prepared similarly to cottage cheese. It is a low-fat curd cheese made from skimmed milk and soured with a starter culture to generate lactic acid from lactose. I am sure my Indian readers will see the similarities to our own paneer.

Quark comes in a range of fat levels from no fat, low-fat to 40 percent fat. You'll notice a visible difference between the low-fat and the 40 percent versions. Low-fat quark has a milky-white shade while quark with a higher fat content is slightly yellowish is color.

This soft cheese is made without the aid of rennet making it an acid set cheese. In Germany in is sold in plastic white tubs with the whey. The texture is very much similar to sour cream, just a little dryer and in its basic form has a fat content of 0.2 percent. Quark available with a higher fat content is often made by adding cream to it.

The eastern European version of quark is firmer as a small amount of rennet is added to the milk. The whey is removed by hanging the cheese in a cheesecloth and allowed to drip until the the whey has dripped off.

The German quark however is creamy and smooth and can be eaten plain or with nuts, herbs and garlic. It is tangy in flavor and thick in texture. Seventeen lbs of quark per person per year is consumed here is Germany and you'll find it being used in several ways like for soufflés, as dips and for the famous German quark kuchen - German cheesecake.

I often use quark in my recipes and promptly get emails or comments asking me what quark is. Living in Germany I have never found the need to make my own quark, but I too was curious about my favorite kitchen helper. So, I decided to make my own quark at home. To help me start off I turned to Tom's grandma, who has been making her own quark for decades and at the age of 86 she still makes the meanest quark cheesecake with homemade quark. The quark I made at home was nothing compared to the commercial stuff. It was more intensive and creamier than anything I have ever bought.

I do not think I can go back to store bought quark again!

The quark recipe below is the one I got from Tom's grandmother. It is uncomplicated to prepare, just takes a bit of time. The oven does most of the work and you are rewarded with a wonderfully tangy and flavorful creamy cheese.


Homemade Quark

Ingredients
Printable version of recipe here.

3.5 liters buttermilk

Method

Pre-heat the oven to approx. 65 degrees C.

Pour all of the buttermilk in a large ovenproof dish with a lid. Cover and place overnight in the oven.

The whey and curd should have separated and there should be large bits or curd.

The next morning line a sieve or a strainer with a large cheesecloth and pour the buttermilk into the cloth. You can place the sieve over a container to catch the whey, which can be used elsewhere for example in soups or to thicken sauces.

Let the mixture drain for 1 hour, then take the four tips of the cheesecloth and twist to drain any remaining whey.

Now it's time to drip the cheese. I normally tie the cheesecloth on a sturdy wooden spoon and place the spoon over a large pot or the sink with the cheese ball hanging into the pot/sink. In this way allow the quark to drip for 5-6 hours.

Divide the quark into containers and refrigerate. Depending on the way you are planning on using the quark you can pass it through a fine meshed sieve and add some cream for a creamier mixture.


This is a a basic recipe for quark. From here you can use it to make a peach cardamom tart, a rhubarb raspberry trifle, baked beetroot with an apple-horseradish dip or a cherry semifredo cake. If this is not enough browse through all my quark recipes for ideas and inspiration.

I hope I was able to raise your interest in this wonderful cheese. If you've used quark in your dishes before let us know what your favorite dish is. Leave a link to the recipe here. If you are planning on making quark for the first time come back and share your experience with us.

This week I'll be sharing another great recipe which uses quark as one of its main components. So, if you want to join me - start making that quark now ;-)

Daily Tiffin Reading Tip:


All photographs and written content on What's For Lunch, Honey? © 2006-2008 Meeta Khurana unless otherwise indicated. | All rights reserved | Please Ask First

63 comments Continue »

Daring Bakers: Lavash Crackers and Ajvar - Vegan & Gluten-Free Recipe

| 48 comments

Daring Bakers Challenge September 2008

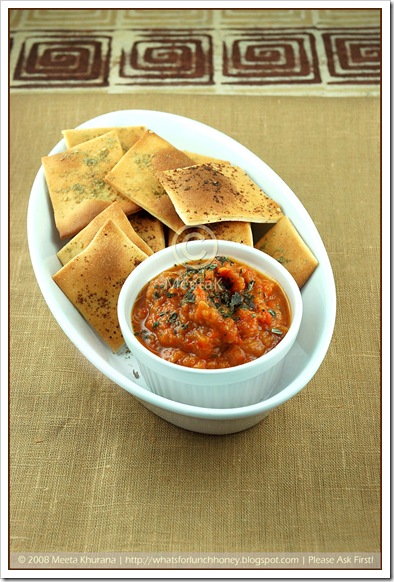
Lavash & Ajvar (01) by MeetaK

I procrastinated!! This is totally unlike me. I hardly ever procrastinate. I am not going to say "never" because I have been known to put back tasks or jobs to the bottom of my list. Those little jobs that one kind of pushes back because they are not interesting or one thinks they are easy enough to tackle at some other time.

This month's daring bakers challenge was very interesting and I was quite intrigued as it was the first in it's kind in the group. See, it was a vegan and a gluten-free challenge! Since April 2007, when I first joined this amazing group, we have made incredible pastries, cakes and sweets. The group has grown to accommodate so many nationalities, cultures and lifestyles. I was always extremely inquisitive by the way my gluten-free and vegan colleagues in the group adapted each challenge to fit their dietary lifestyle. Often I marveled and admired their resourcefulness.

This month I was excited as the lovely Natalie from Gluten A Go Go (yes the same Natalie who helped with my own challenge last month) and co-host Shelly of Musings From the Fishbowl chose Lavash Crackers from Peter Reinhart's The Bread Baker's Apprentice: Mastering The Art of Extraordinary Bread. It's a book I've been eying for quite some time to help me get rid of my bread-baking phobia!

Why did I procrastinate with this one? I was so relieved to read the instructions for this challenge, when it was announced at the beginning of the month. First it was savory (however, I have noticed a few sweet varieties appearing on a few blogs as we speak!) and second it sounded so easy. Well I simply pushed it back from day to day thinking "I'll do it tomorrow!"

Well finally today came and I still had no lavash crackers. Out came my mixing bowls, flour and measuring cups and after breakfast I began with the challenge.

The challenge came in two parts. While Natalie asked us to make the lavash crackers gluten-free, Shelly challenged us to make vegan dips to accompany the crackers. We were however, left with the option to make the crackers non gluten-free, using normal unbleached flour.

For me, this challenge was really the opportunity to try and understand a tiny bit about such dietary restrictions. So, earlier in the week I had gone to my organic store in search of a gluten-free flour blend and xanthan gum. They also had wonderful looking fresh red bell peppers and juicy eggplants. Right then I decided on the dip that would accompany these crackers.

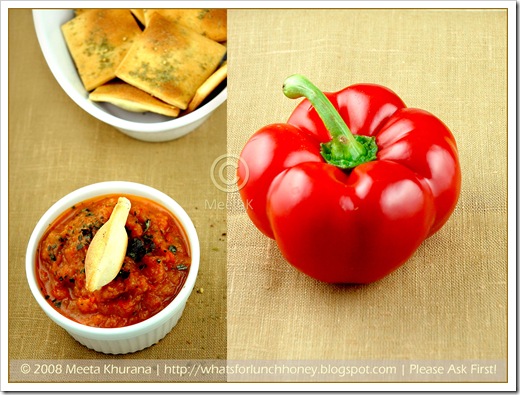
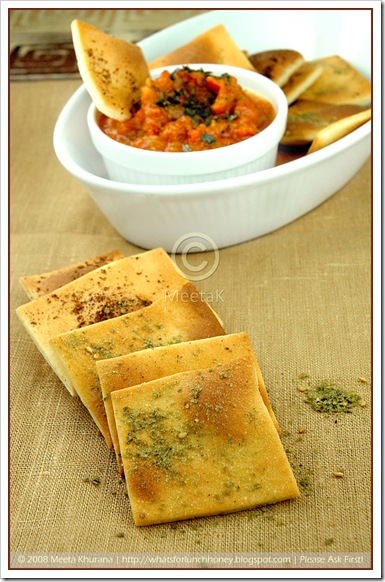
Lavash Ajvar Pepper Diptych (01) by MeetaK

I love the flavors of roasted red pepper and aubergines. One of my favorite dips is ajvar, a delicious relish or dip popular in the Balkan countries, but there are versions of it found in Turkey and the Middle East. It is made with fresh red pepper, aubergines and garlic. One of my good friends, who comes from Bosnia was the one who inspired me to make this wonderful dip. It's a breeze to make, the only real work being the peeling of the vegetables.

Sumac and Za'atar where my toppings of choice. I love the aromatic lemony flavor, sumac gives to dishes and za'atar lends it's herby zing giving my crackers a wonderful Middle Eastern flair. The marvelous aromas seeping out of the kitchen evoked delicious memories of my childhood in Qatar, where toasted pita bread covered in a buttered mix of za'atar and olive oil, dipped into bowls of labneh - strained yogurt sprinkled with sumac were my snack of choice.

The recipe amount is quite small, so if you are expecting friends increase the amount as required. I doubled the amount as I thought this would be a great and healthy snack for Soeren and his sleep-over friend this evening.

I'll leave you with the recipe now, excuse me while I nibble on a few of these and check out the the grand lavash creations from the rest of the Daring Bakers.


Lavash Crackers

Ingredients
Printable version of recipe here.

Makes one sheet pan

1 1/2 cups (6.75 oz) unbleached bread flour or gluten free flour blend (If you use a blend without xanthan gum, add 1 tsp xanthan or guar gum to the recipe)
1/2 tsp (.13 oz) salt
1/2 tsp (.055 oz) instant yeast
1 Tb (.75 oz) agave syrup or sugar
1 Tb (.5 oz) vegetable oil
1/3 to 1/2 cup + 2 Tb (3 to 4 oz) water, at room temperature
Poppy seeds, sesame seeds, paprika, cumin seeds, caraway seeds, sumac, za'atar or kosher salt for toppings

Method

In a mixing bowl, stir together the flour, salt yeast, agave, oil, and just enough water to bring everything together into a ball. You may not need the full 1/2 cup + 2 Tb of water, but be prepared to use it all if needed.


For Non Gluten Free Cracker Dough
Sprinkle some flour on the counter and transfer the dough to the counter. Knead for about 10 minutes, or until the ingredients are evenly distributed. The dough should be firmer than French bread dough, but not quite as firm as bagel dough (what I call medium-firm dough), satiny to the touch, not tacky, and supple enough to stretch when pulled. Lightly oil a bowl and transfer the dough to the bowl, rolling it around to coat it with oil. Cover the bowl with plastic wrap.


For Gluten Free Cracker Dough
The dough should be firmer than French bread dough, but not quite as firm as bagel dough (what I call medium-firm dough), and slightly tacky. Lightly oil a bowl and transfer the dough to the bowl, rolling it around to coat it with oil. Cover the bowl with plastic wrap.
Ferment at room temperature for 90 minutes, or until the dough doubles in size. (You can also retard the dough overnight in the refrigerator immediately after kneading or mixing).


For Non Gluten Free Cracker Dough
Mist the counter lightly with spray oil and transfer the dough to the counter. Press the dough into a square with your hand and dust the top of the dough lightly with flour. Roll it out with a rolling pin into a paper thin sheet about 15 inches by 12 inches. You may have to stop from time to time so that the gluten can relax. At these times, lift the dough from the counter and wave it a little, and then lay it back down. Cover it with a towel or plastic wrap while it relaxes. When it is the desired thinness, let the dough relax for 5 minutes. Line a sheet pan with baking parchment. Carefully lift the sheet of dough and lay it on the parchment. If it overlaps the edge of the pan, snip off the excess with scissors.


For Gluten Free Cracker Dough
Lay out two sheets of parchment paper. Divide the cracker dough in half and then sandwich the dough between the two sheets of parchment. Roll out the dough until it is a paper thin sheet about 15 inches by 12 inches. Slowly peel away the top layer of parchment paper. Then set the bottom layer of parchment paper with the cracker dough on it onto a baking sheet.


Preheat the oven to 200 degrees C with the oven rack on the middle shelf. Mist the top of the dough with water and sprinkle a covering of seeds or spices on the dough (such as alternating rows of poppy seeds, sesame seeds, paprika, cumin seeds, caraway seeds, kosher or pretzel salt, etc.)

Be careful with spices and salt - a little goes a long way. If you want to precut the cracker, use a pizza cutter (rolling blade) and cut diamonds or rectangles in the dough. You do not need to separate the pieces, as they will snap apart after baking. If you want to make shards, bake the sheet of dough without cutting it first.


Bake for 15 to 20 minutes, or until the crackers begin to brown evenly across the top (the time will depend on how thinly and evenly you rolled the dough).
When the crackers are baked, remove the pan from the oven and let them cool in the pan for about 10 minutes. You can then snap them apart or snap off shards and serve.


Ajvar -Roasted Bell Pepper, Aubergine & Garlic Dip

Ingredients
Printable version of recipe here.

Makes about 6 servings

2 large aubergines
6 red bell peppers
3-4 garlic cloves
1 tablespoon coriander leaves, chopped
Juice of 1/2 lime
1/2 teaspoon cumin powder
1-2 tablespoons olive oil
Salt and fresh cracked black pepper

Method

Heat the grill function of your oven to 250 degrees C. Cut the bell pepper in half, de-seed and them. Cut the aubergine in half. Place them skin side up, along with the garlic cloves, on a baking tray lined with aluminum foil.

Roast the vegetables for a good 30 minutes until the skins of the peppers and aubergines have charred and blister.

Remove from the oven and cover with a kitchen towel to allow them to steam for 10 minutes.

Peel the skins off the peppers and aubergine using your fingers. Squeeze the garlic clove out. Place in a large bowl and mash or purée depending how chunky or fine you would like it to be.

Add olive oil and the remaining ingredients and incorporate with a wooden spoon. Salt and pepper to taste.

You can store the ajvar in air-tight jars for up to a week.

Notes:

  • Chop up a green chili and add it to the mixture for a bit heat
  • Use fresh mint leaves instead of the coriander for a new flavor level


Verdict

Lavash & Ajvar (02) by MeetaK

Well Soeren and I have nibbled on a few of these already and are addicted. To all mummies out there - this is guilt free and healthy snacking for the kids. We plan to have the rest tonight with Soeren's sleep-over buddy while watching Happy Feet. I loved the crispy and crunchy texture these crackers have. They taste great, with the tangy sumac and aromatic za'atar. The dip adds all those perfect roasted flavors that one associates with vacations by the sea!

Would I make this again?
Are you kidding I am already thinking of toppings for the next batch. Maybe a sweet variation, although my savory ideas are pretty tempting. I really do believe I have found the perfect snacking bites for my family and guests. The fact that these are easy to whip up makes it all the more attractive.

What did I learn from this challenge?
I am glad I gave the gluten-free version a go. It's simply good to be able to experiment with different techniques and forms, when you would not have if the need did not arise. This challenge has opened an interesting door for me - to dare to experiment with more vegan and gluten-free recipes.

Thanks to Natalie and Shelly for daring me to be different this month!

A few of the past challenges:

Foccacia 04 Tender Potato Focaccia
French Baguette 01 framed French Baguette
Bagels08 Jewish Purists Bagels


All photographs and written content on What's For Lunch, Honey? © 2006-2008 Meeta Khurana unless otherwise indicated. | All rights reserved | Please Ask First
48 comments Continue »

Aubergine Dolma with a Piquant Rice Filling and Tzatziki

| 49 comments
Aubergine Rolls-Dolma (06) by MeetaK

Last week Tom and I celebrated our 10 year anniversary. On one side when I think about it I find it so hard to believe that 10 years with this wonderful man have past. On the other it feels so natural, like there was no other meant to be for me.

I did make a mistake in my “past life” but I think that mistake was meant to happen - to lead me to Tom.

For the past several weeks Tom, Soeren and I have been living in perfect symbiosis with each other. Everything fits together, everything is tuned to perfect harmony and everything works like clockwork. At times it feels like we are living in our own bubble, taking a step outside of it wakes us up to the realization that there indeed is another world out there.

It was not always like this though. Like any “healthy” relationship both of us had our downs and hard times. So much so that at times I really thought about leaving!

Being a Gemini I am constantly restless and need to be on the move. I can be hard-headed and stubborn. Put this up against the characteristic traits of an Aries, to which Tom is born under, you will see we make an explosive couple. Tom can be broody, impatient and far too logical, sometimes driving me up the wall. I know I often hit against Tom’s rational aspect of life with my light and airy ideas, making him impatient.

We’ve had our share of fights and battles. However, we’ve come through and found our peace. We do make an explosive pair but I could not think of anyone else I would rather have my fireworks with. Sure he makes me mad, but no one else can make me laugh as much as he does. I probably drive his patience with my wild ideas, but it is his rational thinking that always puts my world into perspective.

Together we share one treasure: Soeren. The Virgo in him brings the order we often need in our relationship. With his coolness and sensitivity, he is the soothing balsam on our egos, making us complete.

This weekend we wanted to remain in our bubble. It was just so cozy and comfortable. The rain could fall down in sheets and the wind could howl against our windows, we were happy just enjoying each other's company. Over a game of Uno, I looked over to Tom and smiled to myself. Yes - I am looking forward to the next ten.

Aubergine Rolls-Dolma (04) by MeetaK 

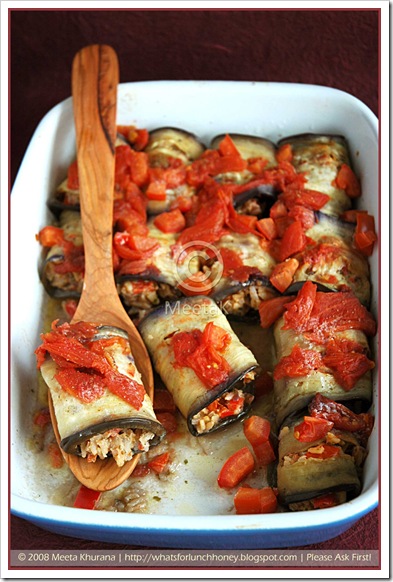
Dolma is the name given to stuffed vegetable dishes typical in the Turkish, Middle Eastern, Lebanese and Greek cuisines. However you will most certainly find versions of the dolma in the Balkan countries and even Central and South Asia. One of the most popular dolma variety is probably the grape-leaf dolma.

My dolma is typically found in Greece. I use rice and Kefalotyri cheese, a sensational Greek salty cheese made from goat milk. For the required heat I use a hot Aci Sivri pepper, a Turkish chili. The entire dish is served with a garlicky Tzatziki style sauce, making this an unforgettable experience. 


Ingredients
Printable version of recipe here.

1kg Aubergines, cut lengthwise is approx. 1cm thick slices, then placed in salt water.
6 tablespoons olive oil
Butter for the form
50g cold butter

The Filling
120g onions, finely chopped
1 garlic clove, finely chopped
100g rice, cooked
200g bell pepper, cut into very small cubes
1 aci sivri pepper, finely chopped. Substitute with any other green chili.
300g large Roma tomatoes, blanched, skin removed, de-seeded, and coarsely chopped
70g Kefalotyri cheese, cut into very small cubes. Substitute with an Italian Pecorino sardo
Olive oil
2 tablespoons flat leaf parsley, finely chopped
Salt and fresh cracked pepper

The Yogurt Sauce
150g thick Greek yogurt
2 tablespoons crème fraiche
2-3 garlic cloves, mashed
Salt and fresh cracked pepper
 

Method

In a large skillet heat the 2 tablespoons of oil for the filling and sauté the onions and garlic until aromatic and translucent.

Add the bell pepper and the Aci Sivri pepper and continue to stir-fry for another 5 minutes. Incorporate half of the tomatoes and 1 tablespoon parsley into the mixture.

Remove from heat and allow to cool slightly, then add the cheese and rice. Mix well, salt and pepper to taste. Set aside.

Take the aubergine slices out of the salt water and pat dry with paper kitchen towels. Reserve 1 cup of salt water.

Heat the olive oil in a non-stick pan and cook both sides of the aubergine slices until slightly golden. Set on paper towels to soak up excess oil.

Butter an ovenproof dish. Pre-heat the oven to 180 degrees C.

Taking the narrow end of the aubergine place approx. 1 tablespoon of the rice filling on the aubergine and gently roll. Place each aubergine roll tightly next to each other in the ovenproof dish.

Distribute the remaining tomatoes over the top of the aubergine rolls. Cut up the cold butter into flakes and divide over the top. Pour 1 cup of reserved salt water into the dish, cover tightly with aluminum foil and bake for 20 - 25 minutes.

In the meantime prepare the yogurt sauce, by mixing the mashed garlic into the yogurt. Add the crème fraiche and whisk until smooth. Salt and pepper to taste.

Take the ovenproof dish out of the oven, sprinkle with remaining parsley. Serve with yogurt sauce and rustic bread.


Verdict

Aubergine Rolls-Dolma (01) by MeetaK

Maybe I am featuring this recipe because it is in a way a lot like the three of us. The aubergine and the rice-cheese mixture are quite the individuals. But the aubergine tightly hugs the rice-cheese filling, creating the perfect harmony. It is the cool refreshing yogurt that caresses the entire dish, adding a totally new flavor level. We love it because it simply tastes fantastic.

You might like these aubergine ideas from WFLH:

Ratatouille o6 Ratatouille Provençal
ChokaAubergines 02 framed Aubergine Choka
 Babaganoush01 Baba Ghanouj

Dolma from around the blogs:


Daily Tiffin Reading Tip:


All photographs and written content on What's For Lunch, Honey? © 2006-2008 Meeta Khurana unless otherwise indicated. | All rights reserved | Please Ask First
49 comments Continue »

BBQ Favorites: Salads & Salsa

| 21 comments
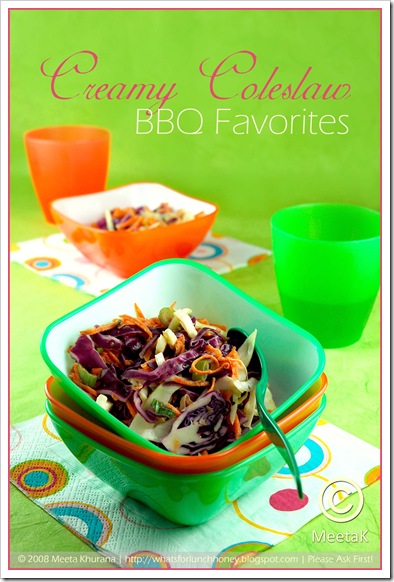
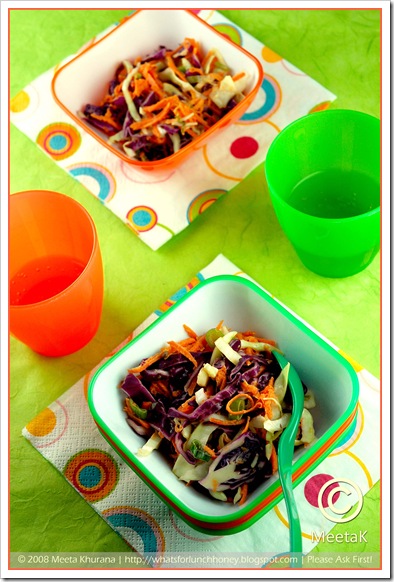
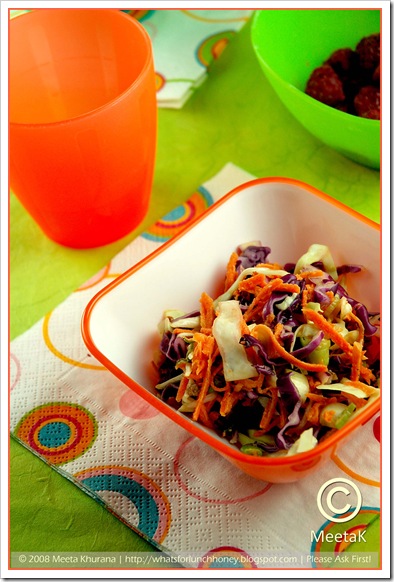
Creamy Coleslaw (01) by MeetaK

In my last post I shared my passion for being outdoors and enjoying our meals in some scenic spot. Picnics and sandwiches a great combination and from your comments I see I share the passion with several of you.

Another one of my all time favorites is barbecuing. To me barbecues are synonymous with Summer. As soon as the first warm sunrays strike our side of the hemisphere I start dreaming up huge barbecue parties and themes. I just love sitting out on our terrace with a few friends, laughing and chatting, the aromas of smoky grilled meats and vegetables in the air and the taste of a chilled Riesling on my tongue. The gentle summer breeze brings the scent of perfumed flowers and the sounds of other people giggling and laughing as they too enjoy their barbecue parties.

Unlike picnics, where I simply make a few sandwiches and cut up some vegetables and fruit, I spend more time on barbecues. Not saying that my picnics are not planned with care – the spotlight is mostly on the location rather than the food at the picnics.

Barbecues are different – the mere mention of a barbecue has us drooling and imagining all sorts of grilled delicacies, refreshing salads and piquant sauces. The food always has to be plentiful because, I do not know about you, but I always tend to overeat at barbecues. Everything always tastes better.

Then there are always discussions what technique is the best to grill: charcoal, wood, gas or lava stones. Our German friends swear on charcoal, the Americans love the comfort of gas, my in-laws love their lava stones, I – well I don’t care as long as my food tastes great. Tom is a charcoal griller – but just like our multi-cultural family, we have, what in Germany is known as an American charcoal grill. Here in Thuringia this is the typical type of grill that is used.

Our neighbors are forever shaking their heads when we roll out our “American” grill! But they will never turn down a juicy rib or a wonderfully smoked trout from our grill ;-)

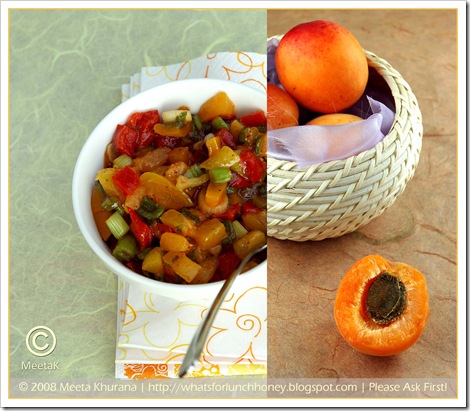
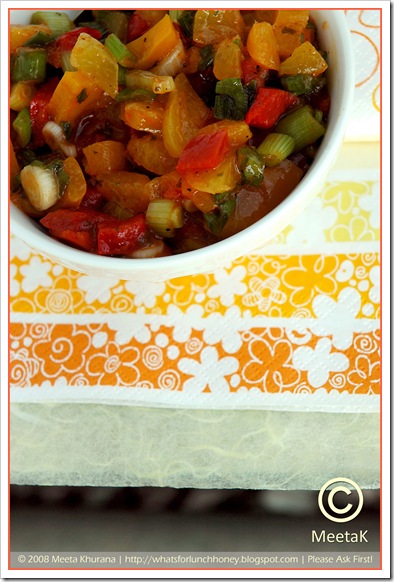
Apricot Salsa Diptych (01) by MeetaK

That’s where we once again stand out amongst our German friends and neighbors. Over the years Tom has taken to the variety I knew while growing up in the USA and the Middle East and he enjoys being creative when grilling. While our German friends will typically grill the famous Bratwurst, and in Thuringia the world famous Thuringen Bratwurst, we will be doing lamb, ribs and steaks, fish/seafood and vegetables. After all the teasing we get from our neighbors, I still smile when I see an occasional fish or a rib on a few of our neighbors’ grills. In return we get nods of approval from them when they see the holy bratwurst on our grills!

Over the last few years, I do have to say, I have noticed a huge change in the German grill culture. The butcher’s and grocery stores offer a larger variety of products to grill, which makes for more creative ideas and parties.

Creamy Coleslaw (04) by MeetaK

Just as important as the major grill item on your barbecue are the sides. I love playing around with flavors for salads, sauces and salsas. Here I took an old salad favorite and gave it a slight twist. Coleslaw – instead of mayonnaise I used a mix of sour cream and yogurt, making it lighter and slightly tangier in flavor. For the eyes, I used a mix of red and white cabbage and a slight sweet sharpness comes from a few cracked red peppercorns.

The apricot salsa is exquisite. Using the season’s ripest and sweetest apricots, I add a small green chili for a flavor explosion. The salsa pairs extremely well with grilled poultry and fish dishes but will also add a pinch of pizzazz to veal, lamb and pork.


Creamy Red Peppercorn Coleslaw

Ingredients
Printable version of recipe here.

150g thick sour cream
300g natural yogurt
½ head white cabbage, cut into thin strips
½ head red cabbage, cut into thin strips
2 carrots, cut into juliennes
3-4 green onions, sliced
2-3 tablespoons cider vinegar
2 tablespoons olive oil
Handful of fresh mixed herbs, use coriander, flat leaved parsley, chives
10-12 red peppercorns, crushed using a mortar and pestle
Salt and pepper

Method

In a small bowl whisk sour cream, yogurt vinegar, olive oil, salt and pepper to taste. Whisk until you have a thick and smooth mixture.

In a large salad bowl toss the vegetables and herbs together. Pour the salad dressing over the coleslaw and sprinkle with the red peppercorns. Toss well. Leave for about 30 minutes for the flavors to incorporate.


 Apricot Salsa (02) by MeetaK


Apricot Salsa

Ingredients
Printable version of recipe here.

500g fresh apricots, pitted and coarsely chopped
1 red bell pepper, coarsely chopped
1 green chili, finely chopped
2-4 green onions, sliced
Handful of coriander leaves, chopped
2 tablespoons lime juice
2 tablespoons olive oil

Method

Mix all of the ingredients in a bowl and toss well. Leave to stand for 30 minutes to allow the flavors to infuse.


Verdict

Creamy Coleslaw (02) by MeetaK

Whatever you like grilling on your barbecue, a delicious salad and a few flavorful sauces or salsas complements the grilled goods, highlighting the flavors more intensively. Imagine a barbecue table without a colorful salad or sauces. Kind of boring for the eyes, huh? In the same way it would be boring for your tastebuds not to experience the crunchiness of a creamy coleslaw or a fruity salsa.

Hope you enjoy a few great barbecues before we say goodbye to summer. I’m taking over my coleslaw and salsa over to Sig’s who is grilling it and asked us to come along for a mingle. Are you joining us?

You might like these salad and sauces from WFLH:

OrientalVegies02
Warm Vegetable Salad
TomatoPeachSalad 04
Peaches & Tomato Salad
CranberryGingerChutney1
Cranberries Ginger Chutney
DSC_0074.1 Aglio Olio - Garlic Dip

From around the blogs:


Daily Tiffin Reading Tip:

Vegetarian Kids by Meeta


All photographs and written content on What's For Lunch, Honey? © 2006-2008 Meeta Khurana unless otherwise indicated. | All rights reserved | Please Ask First

21 comments Continue »

Cooking School: Rhubarb Compote with Vanilla Sauce

| 32 comments
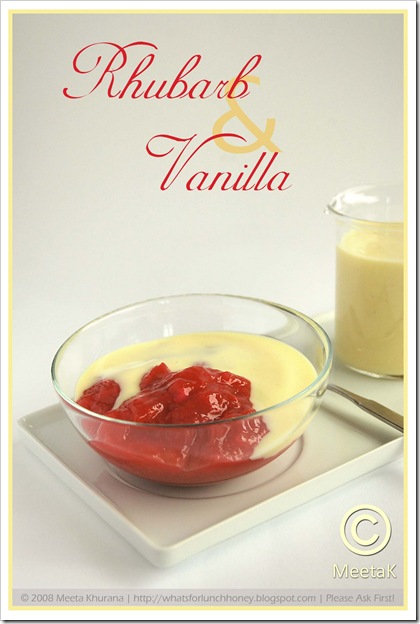
Rhubarb Compote (01) by MeetaK

Rhubarb is in full season right now and I have been enjoying several sweet (some not so sweet) experiments with this wonderful ingredient in my kitchen.

I was not always a rhubarb fan though. I remember getting served some kind of funny looking, greenish, slop that tasted so chemical I was under the impression rhubarb only came in cans!

It was much later that I learned to appreciate the spectacular versatility of rhubarb. I am inquisitive by nature and I am always keen to experiment with fruit and vegetables that I once upon a time did not like. I bring it home to my kitchen and work on recipes – often for several weeks in a row. My two men are great and patient, hardly ever complaining that they’ve been eating one type of ingredient for weeks. Probably because the dishes are prepared so differently they hardly realize! LOL!

This season I have been indulging in 2 particular types of ingredients. Rhubarb is one of them. The farmers at my Farmer’s Market have provided me with several varieties of rhubarb and are educating me about the vegetable.

Rhubarb

Did you know that Rhubarb is in actual fact a vegetable? I will be honest – I did not and thanks to the lovely lady at my favorite organic stall at the Farmer’s Market, I was informed of its origins.

Rhubarb is a vegetable with an incomparable taste, which makes it a favorite in many pies and desserts. It originated in Asia over 2,000 years ago and was initially cultivated for its medicinal qualities. It was not until the 18th century that rhubarb was actually grown for culinary purposes in Britain and America.

Often rhubarb is commonly mistaken to be a fruit but rhubarb is actually a close relative of garden sorrel, and is therefore a member of the vegetable family.

Rhubarb's crisp sour stalks are rich in vitamin C, dietary fibre and calcium. The leaves of rhubarb should never be eaten as they contain toxic levels of oxalic acid.

Rhubarb is in season from April through to September. It can be grown forced which accounts for its availability early in the year when other crops are scarce. Forced rhubarb, which is grown in the dark, has yellowish leaves and usually appears in January. The field-grown variety replaces it around April and is less tender but often more flavorful.

Nowadays Rhubarb is grown in many areas. Greenhouse production allows it to be available throughout much of the year. Rhubarb is ready to be consumed as soon as it is harvested, and freshly cut stalks will be firm and glossy.

Rhubarb (01) by MeetaK

The color of the Rhubarb stalks varies from the commonly associated deep red, through speckled pink, to simply green. The color, which results from the presence of anthocyanins, varies according to both rhubarb variety and production technique. The color is not related to its suitability for cooking. The green-stalked rhubarb is more robust and has a higher yield, and the red-colored stalks are more popular with consumers.

The stalks, which are petioles, may be prepared in a variety of ways. Stewing them will produce a tart sauce that can be eaten with sugar and other stewed fruit or used as filling for pies, tarts, and crumbles. This was the popular way rhubarb was enjoyed, which led to the common term for rhubarb, "pie plant". Rhubarb makes excellent jam and can be easily paired with other fruit like strawberries or apples. It can also be used to make wine and as an ingredient in baked goods.

Selecting & Storing

When buying rhubarb look for fresh crisp, firm, plump stalks with good color. Peel off any stringy covering before use. Stand the stalks in cold water for an hour or so to refresh them before cooking.

Kept in the fridge, fresh rhubarb will stay in reasonable condition for 1-2 weeks. However to enjoy its full flavor eat within three days of purchase. Raw and cooked rhubarb freeze well.

Preparing rhubarb is easy but not everyone knows what to do with it, if they have never worked with the ingredient before. So here are my tips to help you enjoy this vegetable with an identity crisis. Wash and trim both ends of the stalks. Discard the poisonous green leaves. If the rhubarb is a bit stringy, using a sharp knife, peel off the stringy covering. Rhubarb is very tart and requires considerable sweetening.

Rhubarb is incredibly versatile and has many culinary uses. Try it in cakes and desserts, pastries, jams, pickles, conserves, sauces and, of course, wine.

This is currently my favorite way to enjoy rhubarb in its simplest form. Compote is perfect because you can make large batches and use them in several ways. My rhubarb compote was used as a pastry filler, as a sauce for pancakes, in muffins and of course pure with rich vanilla sauce drizzled over the top.

Hope you enjoy your rhubarb season too!

Updated: You'll find all the different types of rhubarb varieties here.


Ingredients
Printable version of recipe here.

Rhubarb Compote (02) by MeetaK

For the Rhubarb Compote

750g rhubarb, cleaned, scraped and cut into larger sized pieces
50-70g + 2 tablespoons sugar
1-2 tablespoons lemon juice
30g cornflour

For the Vanilla Sauce

3 egg yolks
20g sugar
15-20g vanilla sugar
20-30g cornflour (cornstarch)
3/8 liter milk
1 vanilla pod


Method

For the Rhubarb Compote

Place the rhubarb with about 2 tablespoons of sugar in a saucepan. Set aside for approx. 15 minutes until the juices are drawn out. Pour in about 100 ml water and the lemon juice into the sauce pan and bring to a boil. Covered, simmer for 4-5 minutes. In a small cup or bowl mix the cornflour with 6 tablespoons of water to a smooth mixture. Pour into the rhubarb mixture and simmer for a further 3 minutes.

Sprinkle in the 50-70g of sugar. Give it a taste if the compote is still too tart then add another few teaspoons. Set aside to cool completely.

For the Vanilla Sauce

In a bowl, beat the egg yolks with the cornstarch, sugar and vanilla sugar to a smooth paste. Make sure there are no lumps in the mixture. Whisk in the milk.

Split the vanilla pod lengthways and scrape out the seeds. Add the seeds and pod into the egg-milk mixture.

Heat mixture in a pan over a medium heat until the sauce thickens. Do not allow to boil. Remove the vanilla pod and serve either still warm or chilled.


Verdict

Rhubarb Compote (03) by MeetaK

Fruit served in this way is a treat. Soeren always enjoys a good compote with vanilla sauce. They are also simply perfect for the school lunchboxes or a little treat for us mums in between. Tom loves this compote with vanilla ice cream and often serves himself a little portion a little later in the evenings. On the weekends we enjoy the compote with pancakes or waffles. So you see it really is worthwhile making large batches - because even those do not last too long!


All photographs and written content on What's For Lunch, Honey? © 2006-2008 Meeta Khurana unless otherwise indicated. | All rights reserved | Please Ask First

32 comments Continue »