Showing posts with label Preserves/Jams/Jellies. Show all posts

Breakfast of Champions - The Big Breakfast Post

| 10 comments


BigBreakfastPost

Breakfast is for champions! And according to the trend it is sneaking its way into the other meals of day. We have a tendency to put an egg on everything and serve up “breakfast for lunch/dinner” – a trend that I follow myself, especially when the traditional eggs, bacon, grilled tomatoes and baked beans are concerned.

10 comments Continue »

Tomato Sauces: Spicy Ketchup, Fruity Marinara and Passata di Pomodoro

| 30 comments
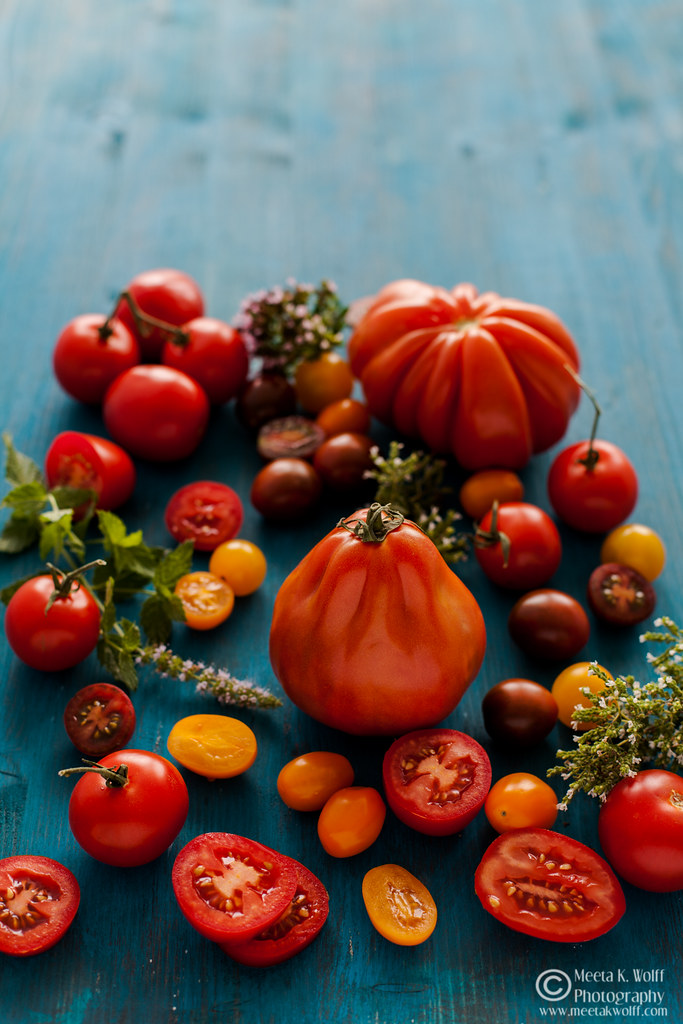
Tomatoes-WM-0013

If Eve had used a tomato instead of an apple, maybe the story of Adam and Eve would have been different. After all tomatoes are often called “love apples” and were thought to have aphrodisiac powers.The French therefore named it quite appropriately, pomme d’amour

30 comments Continue »

Christmas: Buttery Quince Hazelnut and Cognac Mincemeat

| 21 comments

Quince Hazelnut and Cognac Mincemeat (0380) by Meeta K. Wolff

With Advent begins the frantic cooking and baking in my kitchen. Over the years it has become somewhat of a tradition that friends and family receive little gifts of homemade treats. The warm fuzzy feeling I get when wrapping spiced cookies, little festive tarts, nutty and boozy cakes or jars of preserves in sparkly golden bags tied with bows and sealed with an angel for good luck, is unbeatable. It’s Christmas after all and a bit of kitsch is allowed!

21 comments Continue »

Rømmevafler: Norwegian Sour Cream Waffles with Brunost and Cloudberry Cream

| 45 comments

Rommevafler with Brunost and Cloudberry Cream (0013) by Meeta K. Wolff  

This week while many were flipping pancakes for Shrove Tuesday, we were busy making waffles. I guess we are different that way, but if I were to choose between both, waffles would win by a slight margin. It’s the contrast of the crispy exterior and the soft interior that makes the waffle rank high on my list. 

45 comments Continue »

Morello Cherry Chocolate and Cognac Teacakes

| 45 comments

Morello Cherry Cognac Chocolate Cakes (0007) by Meeta K. Wolff  

Treats come in many shapes, forms and sizes. For her a treat could be the finest leather high heeled shoes, in red; all eyes are on her as she sways down the street. For him, his treat is a brand new part to the sleek Porsche 550 Spyder; he puts the pieces together like a jigsaw puzzle with his own hands. For the writer probably a simple stack of paper: his writer’s block subsides as he begins to fill the blank pages with new ideas.
Treats: we all need and depend on them. 

45 comments Continue »

Lavender Macarons with Ruby Red Grapefruit Prosecco Curd

| 33 comments

Lavender Grapefruit Proseco Curd (0006) by Meeta K. Wolff  

Hello December!

You’ve arrived with a storm, taking us all in your wintery grasp and covering us in a deep fluffy white blanket. Each year you force yourself earlier upon us. Arriving like a silent ghost, you bring a shuddery chill throughout the region. The bare snow-topped trees sparkle as if lined with diamonds and morning rays of sunlight dance through the mist of a bleak and gray sky.     

33 comments Continue »

Tropical Homemade Passionfruit Curd

| 49 comments

Passionfruit Curd_0024-2-framed  

There is something intensely satisfying about fruit curds and butters. They are intense in flavor, smooth, creamy and just simply luscious. Looking ahead to the summer produce I really am dreaming up all sorts of incredible fruity curds and butters I can make in my kitchen.  

49 comments Continue »

Daring Bakers: Kumquat Tian

| 46 comments

Kumquat Tian (02) by MeetaK 

If I should ever loose track of time or forget what time of month it is – it’s the Daring Bakers’ challenges that always remind me exactly in which time frame I am in. It comes around like clockwork and considering the fact that I have been a part of the group for four years (next month), there is not only a certain routine but also that perfect sense of organization that I truly find relaxing.

46 comments Continue »

Candied Thyme Kumquats

| 38 comments

Candied Thyme Kumquats (01) by MeetaK 

I would definitely say that tangy citrus fruits have been the dominant ingredient in my kitchen the past few weeks. I’ve been hit by a surge of ideas and needed to realize them, at best all at once. I get impatient – when inspiration hits me I get all fidgety and need to work on the ideas as soon as possible.

38 comments Continue »

Caramelized Quince Jam with a Sprinkling of Cinnamon

| 44 comments

Quince Cinnamon Jam (01) by MeetaK 

Monday 9th November 2009 marked 20 years of German re-unification. I remember, like it was only yesterday, watching The Wall come down back in 1989. I was in Doha watching CNN with my parents and friends and thinking "WOW! They do not have to queue for bananas anymore!"

44 comments Continue »

Bakewell Tart with Thyme Infused Cherry Preserve and Cashew Frangipane

| 57 comments

Bakewell Tart (01) by MeetaK 

Surprised to see me back doing the Daring Bakers' challenge so soon? Especially since in my last challenge post I announced it would be my last till October! If you do not know yet then let me tell you that although we packed, sold and sorted out a lot of our stuff for the anticipated move, we are not moving anymore. Due to several issues in the project, Tom was supposed to work on in Doha, we decided that the perspective initially offered to him had changed too much and Tom has oriented himself elsewhere.

57 comments Continue »

Cooking School: 5 Ways to Make Homemade Dulce De Leche

| 61 comments

Dulce De Leche (01) by MeetaK

Dulce De Leche - that sinfully good and deliciously decadent thick syrup from Latin America probably makes a lot of Foodie hearts beat faster. I've had it on my mind for quite a few weeks and as I had the week off last week I finally got the chance to make it.

61 comments Continue »

Cooking School: Fresh Homemade Lemon Curd

| 43 comments
Lemon Curd (04) by MeetaK

Something sweet and sour for this session of Cooking School - a delicious creamy lemon curd. At this time of year when citrus fruits are plentiful I often cannot resist the plethora of flavors and recipes one can create with lemons, limes, oranges, grapefruits, tangerines, satsumas and co.

One absolute must is a lemon curd - a rich, tart spread made with lemons and although one can use other citrus fruits like limes or oranges to make curds, lemons are the all time favorite. Why is lemon curd a must for me? Because from this as a basis I can make literally dozens of exciting creations. Having said that, I am giving you a heads up - go get your lemons and make this lemon curd - as later this week I will be sharing a great recipe, which uses lemon curd in a exciting and refreshing way.

43 comments Continue »

After Hours: Pear Cranberry Chutney Spiced with Star Anise

| 16 comments
Pear Cranberry Chutney (03) by MeetaK

After hours - the dinner dishes are still scattered on the table - traces of an entertaining and fun meal. Giggles in the kitchen and cheers from the living room - everyone has settled in well. Stories have been told and news has been shared now it's time for the important stuff.

As the boys gather around the television to watch the game, the girls catch up on the latest gossip. It's a wonderful evening - cold, but the moon is shining, the stars glitter on a velvet black sky and the snow crunches beneath the feet.

It's only been a few hours but there is a slight craving again. The meal was rich and plentiful and everyone indulged excitedly not only in the chatter but also in the food. However, there is a yearning for sweet savory bites. Something decadent to nibble on - not a stately portion just a bite to satisfy the longing of an after hours craving.

Pear Cranberry Chutney (02) by MeetaK

A variety of cheese and a special something - sweet but with a spicy note. A delicate chutney to entice everyone back together again. One more time - gather around and be thankful for friends, family and food.

Recipe: Pear Cranberry Chutney

Ingredients
Printable version of recipe here.

5 medium sized pears, peeled and diced
Small piece of ginger, finely chopped
1 red chili, finely chopped
2 whole star anise
2 limes, zest and juice
150g fresh cranberries 
Agave syrup, to taste
1/2 - 1 teaspoon Agar agar powder
2 tablespoon canola oil

Method

In a saucepan heat the oil and quickly sauté the diced pear and chili. Add the ginger, agave syrup, agar agar, lime juice and zest and finally the cranberries. Bring everything to a boil, then reduce heat and simmer for 5 minutes until the pear cranberry chutney thickens.

Fill the pear cranberry chutney into clean sterilized jars then place in the refrigerator to cool.

The chutney will keep in the refrigerator for 1-2 weeks. 


Verdict

Pear Cranberry Chutney (01) by MeetaK

The pear and cranberry chutney is a perfect partner to wild, poultry and veal, but it works delectably with a fresh piece of bread and a slice of your favorite cheese. That's why it's my favorite after dinner treat. A platter of cheese, a few grapes, some fresh sliced rustic bread and this pear and cranberry chutney is the best way to keep the crowd comfortingly happy.

Although I do not have any vegan friends I did try to veganize the pear cranberry chutney, as I have been playing around with several recipes. So Sug's Vegan Ventures Round 2 was the perfect occasion to show-off one of my attempts. I hope I did a good job here as it is unexplored territory I am treading in.

Don't Forget

MM low-sugar sweet treats


This month the team over at the Daily Tiffin are hosting the Monthly Mingle. We are all looking forward and eagerly awaiting your ideas and creations to this session's theme - Low-Sugar Treats. Come on over and share your healthy treats.

The deadline is December 8th, 2008. See you there.


You might like these other "after hours" treats from WFLH:

LavashAjvar 03 ApricotSalsa02 framed TroutMousse02
Ajvar - Roasted Pepper, Aubergine and Garlic Dip Apricot Salsa Mousse de Truit

Wishing you all a happy Holiday. Enjoy your Thanksgiving with your loved ones. I will be taking a short break to enjoy the next few days with my family and friends. Plenty planned and there will be lots of good food.

See you soon!

Hugs! 


All photographs and written content on What's For Lunch, Honey? © 2006-2008 Meeta Khurana unless otherwise indicated. | All rights reserved | Please Ask First

16 comments Continue »

Preserving Summer: Jams, Jellies, Chutneys and Relishes

| 43 comments


Cooking School – Preserving 101!

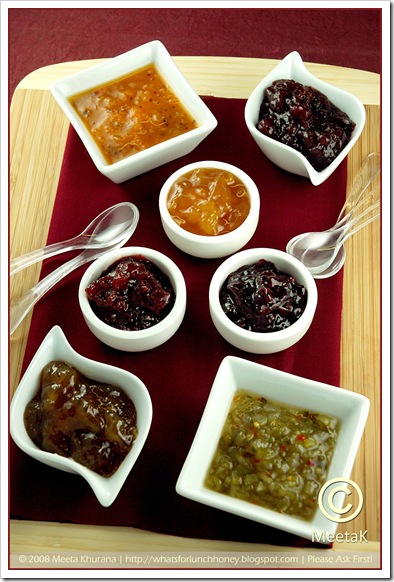
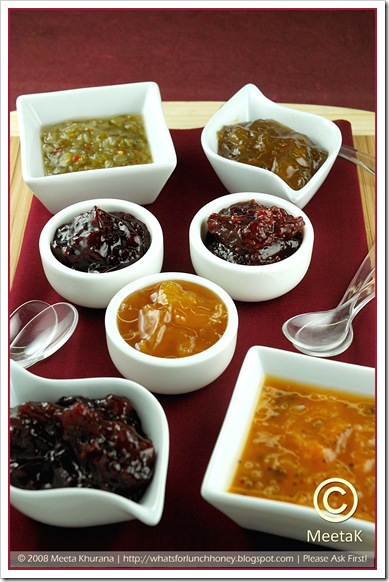
JamsPreservesChutney01 framed 

The markets, home gardens and stores are simply bursting with fresh and ripe fruit and vegetables at this time of year. Not only am I getting tons of gorgeous produce in my CSA box each week, I can never resist buying huge loads of colorful, berries, stone fruit or squash from the Farmer’s Markets. To top it all off my mother-in-law and friendly neighbors keep bringing tons of homegrown cucumbers, tomatoes and zucchini harvested from their overflowing gardens. I always have a problem saying no!

So it is not surprising that I have a surplus amount of produce at this time of year. Does this sound familiar to you?

My solution to all this surplus produce is preserving – making jams, jellies, chutneys and preserves is something we have gotten used to doing every year. Although it’s just the three of us, our consumption on these items is rather high.

Every weekend we enjoy long and relaxing breakfasts with warm rolls, organic butter, eggs and homemade jams and preserves. While I am the type who spreads my jam or preserve thinly on my buttered rolls, Tom and Soeren dollop thick layers enjoying the fruity taste. The cooler seasons also has me making more hearty roasts and piquant types of dishes and there is nothing better than having some delicious homemade spicy chutney or a fruity jelly to serve with it. Moreover, giving away colorful jars of jelly and jam as gifts in the holiday season always adds a special touch.

We’ve been doing this every year for the past four years, this year however we were rather creative with a few of our experiments. As I looked into my pantry for that recently made fig and ginger preserve the jars of jams, jellies, preserves and chutney all lined on the rack, gleamed at me. At this moment I was struck with the idea to write this post.

I have often heard some of my friends tell me they have no time to go through the process of making jams or chutneys at home. It’s a lot easier than one thinks. There are however, certain points and tips one has to consider. With this post I hope not only to offer a comprehensive column focusing on preserving and making jams, jellies, chutneys and relishes, I am also going to be sharing several of our favorite recipes.

Jams, Jellies Marmalades, Preserves and Conserves

This is the ideal way to preserve fruit. Sugar is the main ingredient that preserves the delicious summer fruits of choice. Exactly that is what a all of these start with: delicious, succulent and ripe fruit.

Jams are made by crushing or grinding, whole fruit. They usually have a thick consistency due to high pectin content.
Jellies are made using the juices of the fruit. It is much stiffer that a jam and if cut it will hold its shape.
Marmalade is a jelly with pieces of cut fruit in it. Often citrus fruit like oranges, lemon or lime are the basis of a marmalade.
Preserves is usually interchangeable with jam, but it often applies to cooked and gelled whole fruit, which includes a significant portion of the fruit.
Conserves are made using a mixture of fruit, not necessarily fresh, and also contains nuts and citrus fruits.

Chutneys and Relishes

Chutneys originated in India and comes from the East Indian word chatni, which means "strongly spiced," Chutneys are basically condiments which usually consists of a mix of chopped fruits, vinegar, spices and sugar cooked into a chunky spread.
Relishes are hardly cooked and use much less sugar. It is made by coarsely chopping fruit or vegetables, giving it a crunchier bite.

Although both chutneys and relishes are interchangeable, often chutneys are made using fruit and relishes using vegetables.

Sterilizing Your Jars and Lids

jamjar

Whether you are making a jam, relish, chutney or a marmalade one thing that needs the highest priority before you start is that everything you use, needs to be scrupulously cleaned. The pan, spoons and most importantly the jars should be scrubbed cleaned and wiped dry. Boil jars and lids to sterilize them to prevent bacteria from getting into the jam/chutney and spoiling it.

How To:
Place your empty jars, upright, without lids and open side up in a large clean pot. In a tea kettle bring water to a boil, and then pour enough water in the pot, filling the jars with the hot water. The jars should be covered with water. Bring the water to a boil and continue boiling for 10 minutes. In the meantime lay out clean kitchen towels on your counter. Using tongs take the jars out and allow to drip dry.

Place the lids in the hot water and leave them in the hot, not boiling, water until ready to use.

For best results with your fruity jams or preserves, it’s best to work with approx. 1 to 2 kgs of fruit at a time. Using more than that makes it difficult to handle in a home kitchen and it also becomes difficult to get the jam to set as it does not boil fast enough. With 2 kgs of fruit I often yield approx 6 jars of 450g-sized jars.

Making Of

prepjam

Jams, Jellies, Preserves and co. can be made with or without using pectin. Pectin is needed to allow the thickening or gelling of the jam. It is created from a compound, protopectin, during the ripening of fruit and during the cooking of under-ripe fruit. All fruits contain some pectin. Large amounts of pectin can be found in apples, gooseberries, plums and citrus peel. Fruit like rhubarb, blueberries, strawberries or cherries have very little pectin.

If using fruit with little pectin and you do not want to add commercial pectin, the jams, preserves and co. will thicken or gel only if it is combined with other pectin rich fruit or powdered or liquid pectin is incorporated in it.

Jams and co. made without added pectin will require longer cooking time and you might notice a slightly different taste from those with added pectin. They also yield a less finished product.

You will find that most recipes call for powdered or liquid pectin. Purchase pectin fresh every year as old pectin may result in poor gels. When preparing a jam, jelly & co. with powdered or liquid pectin, it is vital to carefully follow the directions accompanying the pectin product. Generally 50-125 ml of liquid or 2 teaspoons of dried pectin to each 450g of fruit is sufficient. The order of combining ingredients depends on the type of pectin used. For successful preparation of pectin-added jams and co., accuracy of timing is very important. Begin counting time when the mixture reaches a full rolling boil.

JamsPreservesChutney02 framed

Sugar is another important ingredient in jams and co. You can use any type of white sugar however; I find finer types of sugar dissolve more quickly. I often use gelling sugar, which is specifically used for preserves and contains pectin, in my jams and co. It is very important to make sure that the sugar has dissolved in the simmered fruit before it is brought to the boil. If not the jam may become crystallised and sugary. The amount of sugar needed for gelling basically depends on the amount of pectin present. If you have used fruits with plenty of pectin, use 1½ times the amount of sugar to fruit. If there is just enough pectin, use equal amounts of sugar and fruit.

The easiest way to test the consistency of the jam or jelly is by placing a saucer into the freezer for a few minutes, then spoon about ½ teaspoon full of the jam onto the saucer. Place the saucer back into the freezer for approx. 30 seconds. If the sample is firm to the touch and has your required spreadable texture then it is done. It can now be removed from the heat.

Chutneys and relishes I love them - the best is that the variety seems endless. The combinations and alterations can be varied according to personal taste and the ingredients available. They can be sweet, sour, hot or mild.

One of the big advantages to both chutneys and relishes is that they improve with age. If properly stored they will remain in good condition for several months or years and you will be rewarded with spectacular bursts of new flavor.

Vinegar, spices and sugar are all the things that make chutney or relish nice. As vinegar is the most important ingredient, it is vital that a good quality is used. I love using white wine vinegar, but you can use apple cider or a champagne vinegar too. Although any kind of granulated sugar can be used, I prefer brown or Demerara sugar as it gives the final product a wonderful rich and dark color. However, you can also achieve the darker color by simply cooking the chutney a little longer. Spices really make the chutney or relish nice. Your imagination is required here. Use whole spices rather than powdered. If you just want the flavor of the spice in your chutney then slightly crack or bruise them and tie them in a spice bag. Then cook along with the rest of the ingredients. Finally remove and discard. However, I often prefer having the spices in my chutney and just throw the amounts loose in the pot.

Good chutney is relatively smooth in texture and it will have a rich mellow flavor. The best way to achieve this is to cook it long and slow. Ideally, it should be left to mature for at least three months.

Relish on the other hand is cooked for a lot less and the texture is crunch, with bits of coarsely chopped vegetables.

Whatever you preserve one thing is for sure nothing will satisfy you more than opening a jar of freshly preserved summer! I hope you will find this Preserving 101 helpful and refer to it whenever you require more information. You will find it conveniently in my sidebar category “The Know Hows of Food” under the section “How To…”.

Now if I have gotten you into the mood here are a few of our favorite recipes. 

Recipes

JamsPreservesChutney-ApricotChutney01 framed 

Apricot Chutney

Ingredients
Printable version of recipe here.

(makes 3 200ml jars)

600g ripe apricots
1 red chili, slit in half, seeds removed and finely chopped
3-4 Shallots, finely chopped
1 tablespoon black mustard seeds
1 teaspoon coriander seeds
1/8 l white wine vinegar
100 g Demerara sugar
Salt
1/2 bunch fresh coriander leaves, coarsely chopped


Method

Place the whole apricots in a large pot. In a tea kettle bring water to a boil. Pour over the apricots until they are covered. Allow to sit for 30 seconds to 1 minutes. Then take them out, one at a time, peel, cut in half, remove pit and coarsely chop.

Add all of the remaining ingredients, except for the fresh coriander leaves. Pour in about 100ml of water and bring the entire mixture to a rolling boil. Turn the heat down and simmer for 20 minutes, stirring occasionally. Add the chopped coriander leaves.

Fill the chutney immediately into sterilized jars (as described above) and tightly screw the lids shut. Turn the jars upside down and allow to cool.

Notes:

  • Tastes great to cheese, lamb, and poultry.
  • Will keep in the fridge for 4 weeks
JamsPreservesChutney-Relishi01 framed 

Cucumber Zucchini Relish

Ingredients
Printable version of recipe here.

(makes 4 250ml jars)

2 large cucumbers, very finely chopped
2 large zucchini, very finely chopped
250g onions, very finely chopped
1 garlic clove, mashed
200 ml white wine vinegar
200g Demerara sugar
Salt

Method

Place all the ingredients in a large pot and bring to a boil, stirring regularly. Keep the mixture at a boil, regularly stirring for approx. 10 minutes.

Immediately fill in the relish into the sterilized jars (as described above)and tightly screw the lids shut. Turn the jars upside down and allow to cool.

Notes:

  • Is perfect on burgers, hot dogs, fish and steaks
  • Will keep in the fridge for 4 weeks
 JamsPreservesChutney-RaspChili01 framed


Spicy Raspberry Jam

Ingredients
Printable version of recipe here.

(makes 5 200 ml jars)

900g raspberries, washed, dripped dry on kitchen towel
2 red chilies, slit in half, seeds removed and very finely chopped
100ml Cassis Liqueur
500g gelling sugar (I used Dr. Oetker's Extra Gelling Sugar 2:1)

Method

Place the raspberries in a large pot, cover with sugar, pour in the cassis liqueur and add the chopped chili. Allow to steep for 15 minutes to release the juices.

Bring the mixture to a boil. Now start timing and keep the mixture at a rolling boil for 3 minutes stirring all the time. Check to see if the mixture gels using the saucer test mentioned above. If not keep at a boil for another minute and then check again.

Fill the jam in sterilized jars (as described above), leaving 3 mm space at the top of the jar, turn upside down and leave for 5 minutes. Then store in your pantry

 JamsPreservesChutney-Mirabelle01 framed


Mirabelle Silver Edge Lavender Preserve

Ingredients
Printable version of recipe here.

(makes 5 200 ml jars)

1 kg mirabelles (or yellow plums), cut in half, pits removed then quartered
2-4 sprigs silver edge lavender, tied tightly into a bouquet garni
500g gelling sugar (I used Dr. Oetker's Extra Gelling Sugar 2:1)

Method

Place the mirabelles in a large pot. Put the lavender bouquet garni into the pot and cover with the sugar. Stir well to coat the fruit with the sugar and to release the juices.

Bring the mixture to a boil under constant stirring. Now start timing and keep the mixture at a boil for a good 3 minutes, constantly stirring and crushing the fruit gently. Remove the bouquet garni and discard.

Check to see if the mixture gels using the saucer test mentioned above. If not keep at a boil for another minute and then check again. Skim off any foam.

Fill the jam in sterilized jars (as described above), leaving 3 mm space at the top of the jar, turn upside down and leave for 5 minutes. Then store in your pantry.

 JamsPreservesChutney-Fig01 framed


Fig Ginger Preserve

Ingredients
Printable version of recipe here.

(makes 5 200ml jars)

950g fresh figs, stems removed and peeled
30g fresh ginger, very finely chopped
5 tablespoons orange juice
500g fine sugar
1 packet (25g) commercial pectin

Method

Place the figs and ginger in a large pot. Pour in the orange juice and mix.  Mix the powdered pectin and sugar and then add to the figs.

Bring the mixture to a boil under constant stirring. Now start timing and keep the mixture at a boil for a good 3 minutes, constantly stirring and crushing the fruit gently

Check to see if the mixture gels using the saucer test mentioned above. If not keep at a boil for another minute and then check again. Skim off any foam.

Fill the jam in sterilized jars (as described above), leaving 3 mm space at the top of the jar, turn upside down and leave for 5 minutes. Then store in your pantry.


JamsPreservesChutney-Plum01 framed


Plum Cinnamon Preserve

Ingredients
Printable version of recipe here.

(makes approx. 3-4 200 ml jars)

1.3 kg red plums, cut into quarters, pits removed
120 ml water
1 kg sugar
1 stick cinnamon
1 tablespoon lemon juice
85 g commercial pectin

Method

Place plums, cinnamon, lemon juice and water in a large pot and bring to a rolling boil, stirring often. Cover and reduce heat to low and allow the mixture to simmer for 10 minutes, until the fruit softens. Stir often.  

Add the sugar, returning the heat to medium-high and bring back to a boil, stirring constantly. Incorporate the pectin, stirring constantly. Boil for another minute, then remove from heat. Skim off any foam.

Place the cinnamon stick in the jar then fill the jam in sterilized jars (as described above), leaving 3 mm space at the top of the jar, turn upside down and leave for 5 minutes. Then store in your pantry.

JamsPreservesChutney-RedFruit01 framed


Berry Cherry Jam

Ingredients
Printable version of recipe here.

300g black cherries, halved and pitted
220g blackberries
200g raspberries
1 tablespoon lemon juice
150g sugar
56g natural fruit pectin

Method

In a large pot mix the cherries, berries, lemon juice and pectin. Over a medium heat, bring the mixture to a boil, mashing the fruit with a wooden spoon. Boil for a further minute. Add the sugar and continue cooking, stirring often until the mixture thickens. Remove from heat. Skim off any foam.

Fill the jam in sterilized jars (as described above), leaving 3 mm space at the top of the jar, turn upside down and leave for 5 minutes. Then store in your pantry.


Verdict

It's all about mixing, tasting and experimenting. Jams, jellies, chutneys or relishes. There is not much of a science to it, just a few basic guidelines. You do not need special equipment, just a large pot that you use mainly for your jam/chutney making. You will find these recipes are fairly easy and will offer you a wonderful array of summer flavor throughout the year.


All photographs and written content on What's For Lunch, Honey? © 2006-2008 Meeta Khurana unless otherwise indicated. | All rights reserved | Please Ask First

43 comments Continue »

Danish Braid: Chocolate & Raspberries

| 63 comments
Daring Bakers Challenge June 2008
 
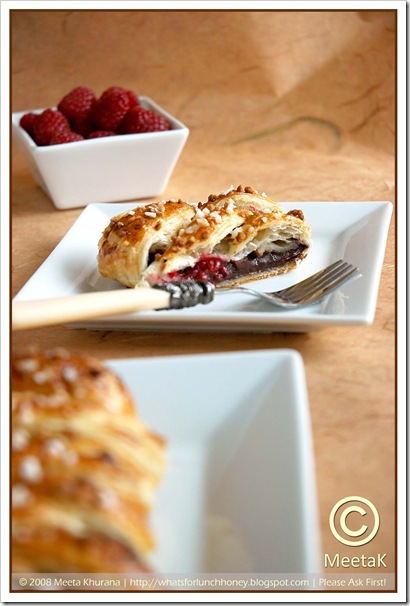
Chocolate Raspberry Danish Braid (01) by MeetaK


It's challenges like this I truly love. Flaky pastry filled with a sensual filling of chocolate pastry cream and tart raspberries. This month the adorable Kelly of Sass & Veracity and brilliant Ben of What's Cooking? got us turning and flipping over a buttery layer of Danish pastry.

I have to say this - I am glad that I have been in the Daring Baker group for over a year now, because if I was not I would have been doing one of my Voodoo dances I normally save for these kinds of challenges!

I remember my second challenge had me completely stressed. Who remembers the Gateau Saint Honoré? This challenge had me biting my finger nails and hitting my head against my trusted rolling pin for deciding to join a baking group. My second challenge, and I had to conquer 3 (out of 4) tough components that makes up the great Gateau! All 3 of which I had never made prior to that challenge!

Yes - puff pastry was one of those components. Looking back I kind of giggle now - because anyone who has made their own puff pastry will nod their heads in agreement when I say - one never goes back to the store-bought stuff. Homemade puff pastry is a lot of work - but it is so rewarding that even the best store-bought pastry cannot compete.

Since that challenge, I do often make my own puff pastry. I make huge batches and freeze them and am always surprised how fast it goes. Knowing that there is lovely homemade puff pastry in the freezer only makes me want to make more delicious pastries with it. It's great to have around - defrost overnight, smother with Nutella or jam in the morning and bake for a few minutes and we have a lovely crispy breakfast or snack for Soeren's lunchbox.

When this month's challenge was announced, surprisingly I was not phased out! Kelly and Ben chose the Danish Braid from from Sherry Yard’s The Secrets of Baking.

Danish dough belongs to the family of butter-laminated or layered dough, with puff pastry being the ultimate.  While the Danish dough is sweet and is yeast-leavened, puff pastry is not. The process of making Danish dough is less complex than that of puff pastry, but equally as important to achieve best results, and a great starting place to begin to learn about laminated doughs in general. Danish dough is extremely versatile, and once made can be used for a variety of baked goods. The possibilities are endless.

The guidelines for the challenge were quite easy:

  • Use the recipe as written to make Danish dough and create at least one Danish Braid.  The recipe will make two full braids unless we chose to make only half the dough.
  • We were to fill the Danish Braid with the apple filling provided by Kelly and Ben and/or any other filling as long as it was something we made ourselves from scratch. 
Chocolate Raspberry Danish Braid (04) by MeetaK

We had a few choices to modify the recipe:

  • The dough ingredients include ground cardamom and orange zest.  Cardamom is traditional in Scandinavian breads, but if it was cost prohibitive, or if there were dietary restrictions, we could leave it out or replace it with something else.  We could omit the orange zest or choose another type of citrus to flavor the dough.
  • The method or style of our braid was our choice.  We could vary the width of the dough strips, type of edging, or angle of cuts.
  • Often, a glaze, nuts, or sugar are used as toppings.  We could choose to use any or all of these, or others we found interesting.
  • We could use one or more fillings such as fresh berries, pastry cream, preserves or jams, curds.
  • If there’s a way to try something savory with the extra dough, then why not?

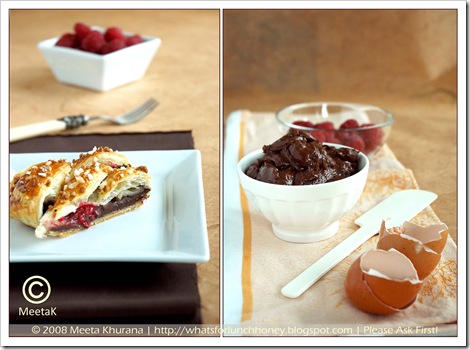
For my braids I chose to make a rich chocolate pastry cream using the recipe from my sugar daddy ;-) and paired it with the fruity freshness of raspberries. The pastry cream is something I make very often. It's simply exquisite and a breeze to whip up. Often I will make the pastry cream as a dessert and serve it as the world's best chocolate pudding! And when I do - I am the World's best mummy!

I left out the orange zest in the dough but kept the cardamom, as I find chocolate and raspberries pair well with cardamom. You will find the recipe here for the chocolate pastry cream as I made it to fill my braid, however, I have also included the recipe for the original filling - Apple filling. This way if you do decide to make the full amount of the dough you can give both fillings try.

You will be seeing plenty of Danish braids with several unique and excellent filling ideas today. So I hope you enjoy the Daring Bakers June challenge across the blogesphere.


Danish Braid
from Sherry Yard's The Secret of Baking

Printable version of recipe here.

Terminology:

  • Laminated dough – is layered dough created by sandwiching butter between layers of dough
  • Detrempe – ball of dough
  • Beurrage – butter block
  • Turn – each “fold & roll” of the dough produces a single turn in a 3-step process where the dough is folded exactly like a business letter in 3 columns.  Each single turn creates 3 layers with this method.

Chocolate Raspberry Danish Braid (03) by MeetaK 

DANISH DOUGH
Makes 2-1/2 pounds dough

Ingredients

For the dough (Detrempe)
1 ounce fresh yeast or 1 tablespoon active dry yeast
1/2 cup whole milk
1/3 cup sugar
Zest of 1 orange, finely grated
3/4 teaspoon ground cardamom
1-1/2 teaspoons vanilla extract
1/2 vanilla bean, split and scraped
2 large eggs, chilled
1/4 cup fresh orange juice
3-1/4 cups all-purpose flour
1 teaspoon salt
For the butter block (Beurrage)
1/2 pound (2 sticks) cold unsalted butter
1/4 cup all-purpose flour

Dough
Using a standing mixer:
Combine yeast and milk in the bowl of a mixer fitted with the paddle attachment and mix on low speed.  Slowly add sugar, orange zest, cardamom, vanilla extract, vanilla seeds, eggs, and orange juice.  Mix well. 

Change to the dough hook and add the salt with the flour, 1 cup at a time, increasing speed to medium as the flour is incorporated.  Knead the dough for about 5 minutes, or until smooth.  You may need to add a little more flour if it is sticky.  Transfer dough to a lightly floured baking sheet and cover with plastic wrap. Refrigerate for 30 minutes.

Without a standing mixer:  Combine yeast and milk in a bowl with a hand mixer on low speed or a whisk.  Add sugar, orange zest, cardamom, vanilla extract, vanilla seeds, eggs, and orange juice and mix well.  Sift flour and salt on your working surface and make a fountain.  Make sure that the “walls” of your fountain are thick and even.  Pour the liquid in the middle of the fountain. 

With your fingertips, mix the liquid and the flour starting from the middle of the fountain, slowly working towards the edges.  When the ingredients have been incorporated start kneading the dough with the heel of your hands until it becomes smooth and easy to work with, around 5 to 7 minutes.  You might need to add more flour if the dough is sticky.

Butter Block
Combine butter and flour in the bowl of a mixer fitted with a paddle attachment and beat on medium speed for 1 minute.  Scrape down the sides of the bowl and the paddle and then beat for 1 minute more, or until smooth and lump free.  Set aside at room temperature.

After the detrempe has chilled 30 minutes, turn it out onto a lightly floured surface.  Roll the dough into a rectangle approximately 18 x 13 inches and ¼ inch thick.  The dough may be sticky, so keep dusting it lightly with flour.  Spread the butter evenly over the center and right thirds of the dough.  Fold the left edge of the detrempe to the right, covering half of the butter.  Fold the right third of the rectangle over the center third.  The first turn has now been completed.  Mark the dough by poking it with your finger to keep track of your turns, or use a sticky and keep a tally.  Place the dough on a baking sheet, wrap it in plastic wrap, and refrigerate for 30 minutes.

Place the dough lengthwise on a floured work surface.  The open ends should be to your right and left.  Roll the dough into another approximately 13 x 18 inch, ¼-inch-thick rectangle.  Again, fold the left third of the rectangle over the center third and the right third over the center third.  No additional butter will be added as it is already in the dough. The second turn has now been completed.  Refrigerate the dough for 30 minutes.

Roll out, turn, and refrigerate the dough two more times, for a total of four single turns.  Make sure you are keeping track of your turns.  Refrigerate the dough after the final turn for at least 5 hours or overnight.  The Danish dough is now ready to be used. 

Storing: If you will not be using the dough within 24 hours, freeze it.  To do this, roll the dough out to about 1 inch in thickness, wrap tightly in plastic wrap, and freeze.  Defrost the dough slowly in the refrigerator for easiest handling.  Danish dough will keep in the freezer for up to 1 month.

FILLING
Chocolate Raspberry Danish Braid Diptych (01) by MeetaK

Chocolate Pastry Cream & Raspberries
Chocolate pastry cream adapted from Chocolate Desserts by Pierre Hermé's written by Dorie Greenspan

Makes 900 g of pastry cream

Ingredients

2 cups whole milk
4 large egg yolks
6 tablespoons sugar
3 tablespoons cornstarch, sifted
200 g bittersweet chocolate, melted
40 g unsalted butter, at room temperature
250 g fresh raspberries

Preparation

Fill a large bowl with cold water and ice cubes. Set aside a smaller bowl that will fit inside the ice bath and hold the pastry cream. Also set aside a fine meshed strainer.

In a small saucepan bring the milk to the boil. In the meantime, whisk the egg yolks, sugar and cornstarch together in another medium sized saucepan.

Once the milk is hot you will need to temper the egg mixture by adding tablespoonfuls of the milk to the egg mixture, whisking all the while. Still whisking, once the egg mixture starts to warm up, slowly pour in the rest of the milk.

Strain the mixture into the saucepan and heat over a medium heat. Whisking vigorously, without stopping, bring the mixture to a boil. Keep the mixture at a boil - whisking with all your might - for 1 to 2 minutes.

Still over the heat, whisk in the melted chocolate. Remove from heat and scrape the pastry cream into the small bowl.

The pastry cream should be thick, smooth and without any lumps.

Set the bowl holding the pastry cream in the ice bath, stirring frequently to keep the mixture smooth. Cool the pastry cream to 60 degrees C, then remove from the once bath and stir in the butter in three or four additions. Return the cream to the ice bath and leave it there until it has completely cooled.

Storing: Covered tightly with plastic wrap and pressing the plastic against the cream's surface to create and airtight seal, the pastry cream will remain fresh in the refrigerator for 2 days.

Leftovers: Use the rest as a dessert on it's own scattered with fresh raspberries and pistachios. Or use it to make other chocolate pastries.

Apple Filling
Makes enough for two braids

Ingredients
4 Fuji or other apples, peeled, cored, and cut into ¼-inch pieces
1/2 cup sugar
1 tsp. ground cinnamon
1/2 vanilla bean, split and scraped
1/4 cup fresh lemon juice
4 tablespoons unsalted butter

Toss all ingredients except butter in a large bowl.  Melt the butter in a sauté pan over medium heat until slightly nutty in color, about 6 - 8 minutes.  Then add the apple mixture and sauté until apples are softened and caramelized, 10 to 15 minutes. 

If you’ve chosen Fujis, the apples will be caramelized, but have still retained their shape. Pour the cooked apples onto a baking sheet to cool completely before forming the braid.  (If making ahead, cool to room temperature, seal, and refrigerate.) They will cool faster when spread in a thin layer over the surface of the sheet. 

Storing: After they have cooled, the filling can be stored in the refrigerator for up to 3 days. 

Leftovers: The filling can be used as an ice cream topping, for muffins, cheesecake, or other pastries.

Assembling the Danish Braid
Makes enough for 2 large braids

 Chocolate Raspberry Danish Braid (02) by MeetaK


Ingredients
1 recipe Danish Dough (see above)
2 cups filling, chocolate pastry cream or apple filling (see above)
For the egg wash:  1 large egg, plus 1 large egg yolk

Line a baking sheet with a silicone mat or parchment paper.  On a lightly floured  surface, roll the Danish Dough into a 15 x 20-inch rectangle, ¼ inch thick.  If the dough seems elastic and shrinks back when rolled, let it rest for a few minutes, then roll again.  Place the dough on the baking sheet.

Along one long side of the pastry make parallel, 5-inch-long cuts with a knife or rolling pastry wheel, each about 1 inch apart.  Repeat on the opposite side, making sure to line up the cuts with those you’ve already made.

Spoon the filling you’ve chosen to fill your braid down the center of the rectangle.  If using the chocolate pastry cream scatter the raspberries over the pastry cream.

Starting with the top and bottom “flaps”, fold the top flap down over the filling to cover.  Next, fold the bottom “flap” up to cover filling.  This helps keep the braid neat and helps to hold in the filling. Now begin folding the cut side strips of dough over the filling, alternating first left, then right, left, right, until finished.  Trim any excess dough and tuck in the ends.

Whisk together the whole egg and yolk in a bowl and with a pastry brush, lightly coat the braid. I scattered my braids with hazelnut brittle and coarse sugar.

Proofing and Baking
Spray or brush cooking oil  onto a piece of plastic wrap, and place over the braid.  Proof at room temperature or, if possible, in a controlled 35 degree C environment for about 2 hours, or until doubled in volume and light to the touch.

Near the end of proofing, preheat oven to 200 degrees C.  Position a rack in the center of the oven.

Bake for 10 minutes, then rotate the pan so that the side of the braid previously in the back of the oven is now in the front. Lower the oven temperature to 180 degrees C, and bake about 15-20 minutes more, or until golden brown.  Cool and serve the braid either still warm from the oven or at room temperature.

Storing: The cooled braid can be wrapped airtight and stored in the refrigerator for up to 2 days, or freeze for 1 month.


Verdict
Chocolate Raspberry Danish Braid (05) by MeetaK

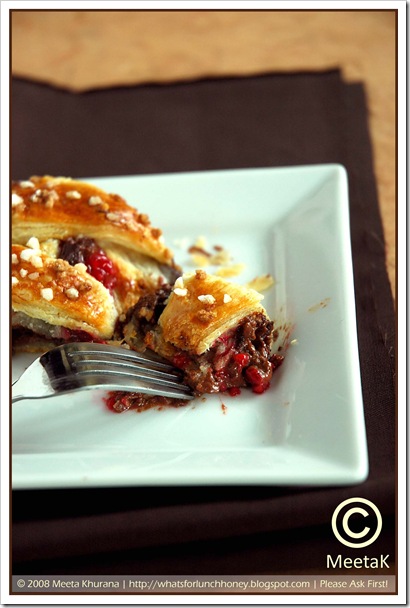
Like I said at the very beginning of this post - I love these kind of challenges. The dough was quite easy to make, even though it looks tedious it's not. If you've made puff pastry before you should have no trouble with this. For those who have never made puffy pastry, this dough is a great and simple way to acquaint yourself with the layered type of doughs. We loved the chocolate raspberry filling in this and I was quite surprised how fast both the braids disappeared.

Would I make this again?

Yes, I am actually thinking this might replace the puff pastry in some of the recipes in my kitchen. As I found it a breeze to whip up and always need dough on hand for Soeren's lunch boxes or when he has friends over, this dough will certainly be made in larger batches. As the dough is sweetened and contains flavoring it is not versatile for savory fillings.

What did I learn from this challenge?

I've never made Danish pastry before and was surprised at how easy it was. I liked the fact that it makes a nice easy and quick alternative the puff pastry.

A huge thanks to both Kelly and Ben for the great challenge this month!


All photographs and written content on What's For Lunch, Honey? © 2006-2008 Meeta Khurana unless otherwise indicated. | All rights reserved | Please Ask First

63 comments Continue »

Bombay Chowpatty: Vegetable Paneer Frankies with Mango Chutney

| 36 comments

Bollywood Cooking - Indian Street Food

Paneer Frankies (01a) by MeetaK


I think it would be safe to say that the most authentic of Indian cuisines is the huge array of lip smacking street food. For just a few rupees one can purchase hot, fresh and simply delectable snacks sold by vendors from myriad makeshift or portable stalls.

Street food in India is extremely popular, mainly because they are available at half the price compared to any restaurant food. Be it take-out food, junk food, snacks, or fast food - all are synonymous with street food and all of these can be purchased on any foot path, beach-side or road corner.

The street food in India is a fusion of various flavors, stimulating the taste buds of not only the locals but also the tourists visiting the country. You will find these portable stalls in every locality and neighborhood in any Indian metropolitan city. The snacks are prepared right there in front of your eyes, tempting you visually and with the wonderful spicy aromas. In fact some of the vendors gain such a reputation for their snacks that people will journey far to experience the food from a specific vendor.

Indian street food varies from region to region. Depending where you are in India, you will be offered such a huge selection of scrumptious snacks, each prepared more temptingly then the other.

The quintessential North Indian snack found almost everywhere is Chaat - a common name for all tangy, spicy and not all that nutritious delicacies. The tangy flavor comes from the use of lemon, pomegranate seeds, black salt and tamarind. An all time favorite, made of crispy small pancakes, salted and sprinkled with a variety of masala powders, splashed with yogurt and drenched in different chutneys. My mouth is watering just thinking about this. There is a fruity version of the chaat too - prepared with seasonal fruits, especially guavas, bananas, apples and papayas. I remember enjoy bowlfuls of this when I visited my grandparents in Delhi during summer break.

The Eastern part of India offers a potato patty dipped in a flour batter and deep fried. They are served with chutneys, raw onions and cucumber slices.

Traveling to the West, the Vada Pav is one of the most favorite and cheapest snacks found in the sophisticated metropolis Mumbai. Also known as the "poor man's burger" it is a sensational mashed potato patty, spiced with green chilies, gingers and other spices, then dipped is a batter made of herbs and gram flour. Finally it is sandwiched between soft buns and drizzled with hot and sweet chutneys. Simply irresistible. One of my favorites from this region is the Bhelpuri. Puffed rice served with a spicy mixture of chopped potatoes, onion, coriander leaves, green chilies and tomatoes, then topped with sweet
chutney, a dash of lime juice, sprinkled with rock salt, normal salt and a hint of red chili powder. Drooling yet?

In the south you will find several thattukadas, which are covered carts or vans with stoves and utensils. Here you can indulge in some of the most delicious dosas, a light rice-flour crispy pancake fired in coconut oil and served with a spicy potato filling and coconut chutney.

There are so many types of street foods that the space in this post is just not enough. Warm samosas with a hot masala chai, sweet dripping jalebis. The list is long!

These popular types of street food have to be eaten fresh and as soon as they are prepared. Each region offers it's own local flavor making it unique. Locals and even foreigners love to gorge on them, making the road side eateries a class in itself. So much so, Indian street food has become world famous.

The popularity of Indian street food outside India has drastically gained over the years. There are many restaurants in several cities around the world that specialize simply in Indian street food. Dubai is one such city.

It's where I find all my favorite snacks that I used to eat when I was vacationing in India. Memories are almost always attached to each dish. However, what I enjoy the most is seeing my son gorging down the same snacks I used to and still enjoy. Jalebis are his sweet favorite - but when it comes to savory, the Bombay Frankies are unbeatable.

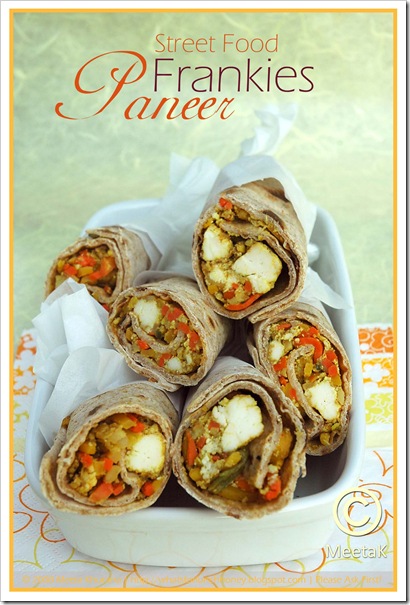
Frankies are the essence of Bombay street food. They are the Indian version of wraps if you will have it. During lunch time in Bombay - college kids will rush in hordes to their local food stall and indulge in one or several types of Frankies. What's so great about them is that they are so versatile and can be filled with anything you like. They are delicious, kid-friendly and perfect for a snack. Serve them with any kind of chutney to add a extra taste-level.

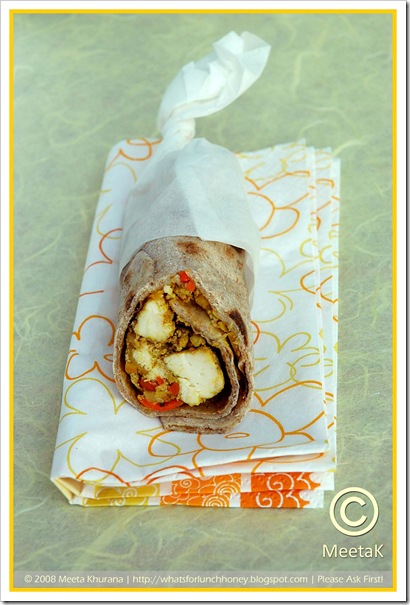
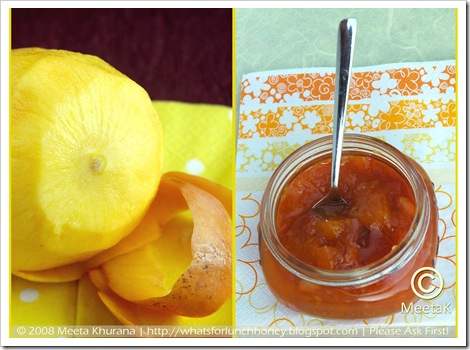
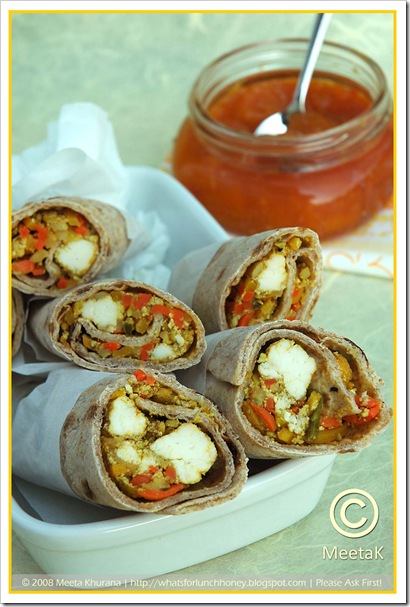
My Frankies are made with paneer and an array of vegetables. I spice mine with a mix of cumin powder, chaat masala and turmeric. Fresh ginger and garlic give a wonderful fragrance. Finally a dollop of fresh, homemade mango chutney tops off a perfect Frankie.

If you want a bit of the Indian street food in your kitchen this is one snack your family will love.


Ingredients
Printable version of recipe here.

Paneer Frankies (02) by MeetaK

For the Frankies

4-6 chapatis (you can also use whole wheat tortillas if you do not have fresh chapatis at hand)
1 medium red onion, thinly sliced
2 garlic cloves, minced
1 inch piece ginger, minced
2-3 green chilies, finely chopped
1/2 teaspoon turmeric
1 teaspoon cumin powder
1 teaspoon chaat masala
1/4 teaspoon red chili powder
juice of 1/2 lime
Salt and pepper
3 tablespoon canola oil
500g paneer, cubed. You'll find find step by step instructions to make paneer here.
250g mixed vegetables, julienne
Handful coriander leaves
1 egg, beaten

Heat 2 tablespoons oil in a large wok. When hot, add the onions and stir fry until transparent. Mix in the garlic, ginger and green chilies and sauté for another minute or so. Now add all of the spices. Cook for approx. 4-5 minutes, then add the vegetables and give it a good toss. Now add the paneer cubes and gently stir.

Drizzle the lime juice and sprinkle the coriander leaves. Mix well.

Assembling the Frankies

In a large skillet heat up a tiny drop of the remaining oil. Place the chapati (or tortilla) to heat through. Add a a little bit of water to the egg. Generously brush the egg wash onto the chapati and flip. Cook for 1-2 minutes, brushing with the egg wash on this side. Flip again and cook for another 1-2 minutes.

Place the chapati on a chopping board. Add a few tablespoons of the paneer filling and roll, similarly to a wrap. Repeat the process for all of the chapatis and filing.

Serve with mango chutney.

Ingredients


For the Spicy Mango Chutney

6-7 ripe mangoes, cut into chunks
200-250 ml white vinegar
Juice and zest of 4 limes
2 cups sugar
10 whole cloves
15-20 red peppercorns
1 large red onion, finely chopped
1 teaspoon red chili flakes
1 1/2 teaspoon coarse salt
2 tablespoons ginger, minced

Mango Chutney Diptych (01) by MeetaK

In a sauce pan add the vinegar, red onion, chili flakes, peppercorns, cloves, salt and sugar and bring to a boil over a medium heat. Reduce heat and simmer for approx. 15 minutes.

Add lime zest and juice, ginger and mangoes and stir well. Simmer for approx 40 minutes until the mangoes begin to soften and the mixture thickens. Remove from heat and transfer the chutney immediately into jars.

Refrigerated the chutney will last for up to 4 weeks.


Verdict

Paneer Frankies (03) by MeetaK

My mum knows my passions. So when I was in Dubai in April she took me to a fantastic street food restaurant. They served a delectable variety of typical Indian street food - all of the ones I mentioned above. But it was the Frankies that caught my eye. They were the right combination of sweet, zesty and spicy.

Back in Germany I created a bit of the street food in my own kitchen. These Frankies are simply superb. I love the combination with the mango chutney. I actually made fresh chapatis especially for these. Soeren found these absolutely delicious and Tom indulged in quite a few of these. Unfortunately no leftovers for later. My advice make several of these, because they'll go like hot cakes - err Frankies.

Hope you enjoyed a tiny peak into Indian street food. With this simple recipe I am sure you too can enjoy a taste of India at home.

You might enjoy these great Indian dishes too:

PooriBhaji04
Poori Bhaji
GajarHalwa 05
Gajar Ka Halwa
Chicken Curry02
Chicken Curry


All photographs and written content on What's For Lunch, Honey? © 2006-2008 Meeta Khurana unless otherwise indicated. | All rights reserved | Please Ask First

36 comments Continue »

Tomatoes in Agrodolce - A Tuscan Experience

| 26 comments
Tomatoes in Agrodolce (03) by MeetaK

It's that time of year again when the gorgeous Ivonne and the lovely Lisa drum up the blog world to join them at their wonderful Festa. But these girls keep forgetting the food and always have an empty table ;-) So, they ask us to come over and help them fill their tables with wonderful delicacies.

And we do - because we all cannot resist a good party and we know both these girls really do know how to throw the most awesome parties.

The turn out last year was fantastic and we all had a great time. I had brought along a creamy Italian dessert. The panna cotta was topped with blackberries and I was thrilled to learn that it happens to be one of Ivonne's favorite desserts.

This year I decided to keep my dish Italian. Not only because of my passion for the Italian cuisine but also because I know Lisa too shares the same passion and Ivonne - well because I simply adore the incredible recipes and stories she shares from her nonna.

I love the beautiful and plush Tuscany region in Italy. Florence is my favorite city and ever since my dad took me on that first Italian trip I fell in love with it.

It was on a trip in June of the year I turned 30 and Soeren was due in a few months that I first tried this dish. It was Tom's birthday present to me and he was also fulfilling a wish I had had since I was 16, to celebrate my 30th in Florence.

After re-discovering Florence we were sipping on fruity chianti and lemonade (I was sipping on the lemonade while Tom was enjoying the chianti ;-)), in a quaint trattoria on the outskirts of the city, taking in the most gorgeous sunset one can imagine. As the skies blazed orange and red I mentally and emotionally clicked a snapshot of the moment. Burned in my memory and placed in the section of the brain where happy and fulfilling moments are stored. Never forgotten but always remembered and fondly reminisced upon.

Like I am today.

The Italians are a warm and generous folk and being 6 months pregnant I was always smiled upon whenever I walked into a store or a restaurant. People even put out their cigarettes when we took a table next to them in any of the eateries we visited. The older nonnas, usually sitting on benches enjoying watching their grandchildren playing, would nod their heads, almost in approval. All in all it was an exhilarating experience for me.

The family that owned the trattoria were incredible. The news that an Indian pregnant woman had taken seat in their restaurant must have spread like wildfire in the kitchen, because soon I was greeted by the several generations of women who obviously were responsible for cooking, while the men in the family served. The fact that many of them could not speak English and our Italian is below basic did not seem to matter - we chatted with hands and feet, giggled and laughed talked about food and wine and all things fine - until late in the night.

During the whole evening we were spoilt in terms of food. I cannot remember that we even ordered anything - the food just kept appearing on our table and we were told to try out every delicacy. What a feast! We had everything from antipasti, risotto, fish to sweets and dessert. I have never been so full in my life. It was in this lovely night that I also discovered the tangy and zesty agrodolce. Fresh vegetables like tomatoes were pickled in this sweet-sour fluid giving an extraordinary flavor.

At the end of the evening - or rather late night - we were touched by their hospitality and left speechless by the fact that we were not allowed to pay for all the food we ate. How does one thank such people?

After Soeren arrived I took a picture of the three of us and sent this to them with an open invitation to visit us. Everything else just did not seem appropriate enough to me. It's been 5 years now and we are in touch with each other via mail, postcards and pictures. Each time I get a postcard I am always reminded of that evening. Apparently the first picture I sent them, of us, is hanging in the kitchen of the trattoria and the story is re-told several times.

It seems appropriate to me to pay respect to this family by giving them their own place on my blog. By re-telling the story and sharing the recipe of my favorite item that evening - tomatoes in agrodolce - I'd like to show my readers how much this evening meant to us and hope that you too will be reminded of equally beautiful moments in your life that you will always cherish.

Agrodolce literally means soursweet and comes from the Sicilian agru e duci. An Italian sweet and sour sauce made from sugar, citrus juices, vinegar, and dried fruits.

Tutti a tavola


Reminder!

Don't forget to send me your favorite liquid creations for this month's Monthly Mingle. I am looking forward to parting with you and your cocktails, milkshakes, lassis, drinks on the rocks, hot or cold drinks. Liquid Dreams is all about mixing up some of the most delicious drinks and bringing it to this months mingle.

Deadline: September 10th!


Ingredients

Tomatoes in Agrodolce (05) by MeetaK


1 kg mini Roma tomatoes - washed and dried
1 bunch fresh basil leaves - washed and dried
1/4l white balsamic vinegar
1/4l dark balsamic vinegar
3 tablespoons mixed peppercorns - white, black and red
4 tablespoons sugar
1 tablespoon salt
1 packet Dr. Oetker preserve help (optional)


Method

Tomatoes in Agrodolce (04) by MeetaK


In a saucepan pour the vinegar, 1/4l water and add the peppercorns, sugar and salt. Bring to a boil then, if using, add the preserve help.

Place the tomatoes in the boiling liquid for a minute. Using a slotted spoon remove them from the liquid.

In sterilized jars layer the tomatoes with the basil leaves and then pour the liquid until everything is covered. Allow to cool to room temperature and then screw on the lids.

This makes about 2 large 750 ml jars full and will keep for about a month. Store in the refrigerator. The tomatoes agrodolce can be enjoyed as antipasti with warm ciabatta or foccacia bread, but it also tasted fantastic with grilled meat and fish.


Verdict

Tomatoes in Agrodolce (02) by MeetaK


Almost everyone who visited us this summer for a barbecue had the true pleasure of experiencing the flavor of these tomatoes. We shared the story of that special evening in Tuscany, with all of our friends and savored new fond moments created for us to remember.

Isn't is just fascinating how friends and feasts harmonize perfectly with each other to give some of the best memories we'll ever have?


With this one last thought in my mind I'd like to thank Ivonne for the gorgeous parcel she sent me. Ivonne you got me this time - it was unexpected and a pleasant surprise. I share the exact same sentiments as you wrote in your beautiful card. I am so looking forward to cooking up a few of the oven specialties from the cookbook "al forno" by Maxine Clark. Here's to friends, friendship and feasts! Agli amici, all'amicizia ed alle festività!


All photographs and written content on What's For Lunch, Honey? © 2006-2007 Meeta Albrecht unless otherwise indicated. | All rights reserved | Please Ask First
26 comments Continue »