Showing posts with label M Bakes. Show all posts

Vanilla Infused Coconut Raspberry Doughnuts

| 15 comments
VanillaCoconutRaspberryDoughnuts_WM-0101

I grew up in airports. That’s not literally true, of course, but it captures something about the shape of my childhood: summers spent in India, school years in Asia or the Persian Gulf, and constant movement between worlds. Our suitcases were always half-packed, and goodbyes came with the certainty of hellos somewhere else. I spent my childhood learning, again and again, how to walk into a new place and find my footing.

15 comments Continue »

That Tea Time Nibble: Tahini Granola Cookies

Tahini-Granola-Cookies-WM-0222

I recently stumbled upon a hilarious Instagram REEL that jokingly poked fun at the habit of bloggers writing long intros before sharing a recipe. Guilty as charged!

Continue »

Pistachio and Lemon Cream Macarons

| 66 comments
 Pistachio Lemon Cream Macarons (02) by MeetaK
I've always said - the sweetest of surprises are most precious and come in small boxes. This time it's no different.

The macarons story began on Twitter, when a few of us started discussing the delicacy of macarons and the high failure rate many have faced. As the discussions evolved it turned into a kind of challenge. Are we "mac retards?" was a question that was posed.

66 comments Continue »

C'est Bon: Chocolate Eclairs

| 125 comments

Daring Bakers Challenge August 2008

Choc Eclairs (01) by MeetaK

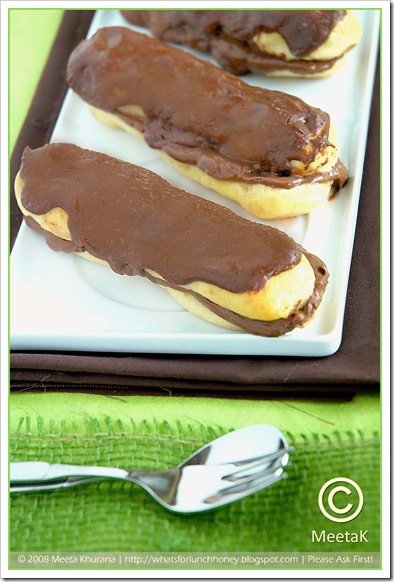
None other than your's truly was hosting this month's Daring Bakers challenge! So you can imagine my nervousness and my excitement all rolled up in one. I had two very handsome and talented helping hands though. Those hands belonged to the exceptional Tony of Olive Juice.

I pretty much was sure I was going to get the over a million Daring Bakers (slight exaggeration there) to make a recipe from the sugar daddy himself - Pierre Hermé. I was just stuck between macarons or éclairs.

In the end it was the éclairs that won, simply because these sinfully good French pastries brought back several wonderful memories of growing up in hotels. I remember sneaking into the side of the pastry kitchen and then stealing the freshly made éclairs from the pastry chef - who always seemed to place a tray full of these just in the right corner for me to grab a few. And there was always a glass of milk next to the tray. Funny don't you think?

When I told Tony about my decision he seemed really excited too so we both made a test batch of these in early July and knew straight away this was to be the August challenge. We decided on the modifications for the challenge. Under the motto - Culinary Liberty For All, Tony and I thought we should give enough leeway for creativity. After all my favorite challenges were always those which allowed me to use my own ideas.

What’s the point in cooking if not to cook what YOU want to eat?

The possibilities for éclairs are endless. So we attached just a couple of general guidelines for eclair month at the Daring Bakers.

  1. The dough used for the eclairs must be a pâte à choux from the recipe given below.
  2. Keep one chocolate element in the challenge. The recipe below is for a chocolate glaze and a chocolate pastry cream. You choose which chocolate element you want to keep. Then feel free to mix and match flavors to the base recipe.
  3. Everything else is fair game. Enjoy!

With that in mind the challenge for August was opened.

Choc Eclairs (02) by MeetaK

I knew there were many advanced bakers in the group who had made éclairs before, but with the allowed modifications I was hoping to allow them more creativity and leeway to try new flavor combinations. For the others who had never made éclairs before I knew this was going to be a challenge they might enjoy.

Éclairs consist of 3 elements:

Although I have made all the elements of the éclairs individually in previous challenges, I had never actually made éclairs. So it was going to be challenging and fun for me too.

For my first batch of éclairs I used mint flavored chocolate with 70% cacao. I love this pastry cream and have often made it to fill several pastries and cakes, like the chocolate crepe cake and the Danish braid. This time I experimented with a Brazilian mint chocolate bar. The results were sensational and I really loved the flavor it gave the entire éclairs.

My second batch were made 100% to the recipe given here. Pure, perfect and pleasurable. Nothing like purely chocolate éclairs!


Pierre Hermé’s Chocolate Éclairs

Recipe from Chocolate Desserts by Pierre Hermé
Printable version of recipe here.

(makes 20-24 Éclairs)
  • Cream Puff Dough (see below for recipe), fresh and still warm
  1. Preheat your oven to 375 degrees F (190 degrees C). Divide the oven into thirds by positioning the racks in the upper and lower half of the oven. Line two baking sheets with waxed or parchment paper.

  2. Fill a large pastry bag fitted with a 2/3 (2cm) plain tip nozzle with the warm cream puff dough.

    Pipe the dough onto the baking sheets in long, 4 to 41/2 inches (about 11 cm) chubby fingers.

    Leave about 2 inches (5 cm) space in between each dough strip to allow them room to puff.

    The dough should give you enough to pipe 20-24 éclairs.

  3. Slide both the baking sheets into the oven and bake for 7 minutes. After the 7 minutes, slip the handle of a wooden spoon into the door to keep in ajar. When the éclairs have been in the oven for a total of 12 minutes, rotate the sheets top to bottom and front to back. Continue baking for a further 8 minutes or until the éclairs are puffed, golden and firm. The total baking time should be approximately 20 minutes.

Notes:

  1. The éclairs can be kept in a cool, dry place for several hours before filling.

Assembling the éclairs:

  • Chocolate glaze (see below for recipe)
  • Chocolate pastry cream (see below for recipe)
  1. Slice the éclairs horizontally, using a serrated knife and a gently sawing motion. Set aside the bottoms and place the tops on a rack over a piece of parchment paper.

  2. The glaze should be barely warm to the touch (between 95 – 104 degrees F or 35 – 40 degrees C, as measured on an instant read thermometer). Spread the glaze over the tops of the éclairs using a metal icing spatula. Allow the tops to set and in the meantime fill the bottoms with the pastry cream. 

  3. Pipe or spoon the pastry cream into the bottoms of the éclairs. Make sure you fill the bottoms with enough cream to mound above the pastry. Place the glazed tops onto the pastry cream and wriggle gently to settle them.

Notes:

  1. If you have chilled your chocolate glaze, reheat by placing it in a bowl over simmering water, stirring it gently with a wooden spoon. Do not stir too vigorously as you do not want to create bubbles.
  2. The éclairs should be served as soon as they have been filled.

Cream Puff Dough
(makes 20-24 Éclairs)

  • ½ cup (125g) whole milk
  • ½ cup (125g) water
  • 1 stick (4 ounces; 115g) unsalted butter, cut into 8 pieces
  • ¼ teaspoon sugar
  • ¼ teaspoon salt
  • 1 cup (140g) all-purpose flour
  • 5 large eggs, at room temperature
  1. In a heavy bottomed medium saucepan, bring the milk, water, butter, sugar and salt to the boil. 

  2. Once the mixture is at a rolling boil, add all of the flour at once, reduce the heat to medium and start to stir the mixture vigorously with a wooden spoon. The dough comes together very quickly. Do not worry if a slight crust forms at the bottom of the pan, it’s supposed to. You need to carry on stirring for a further 2-3 minutes to dry the dough. After this time the dough will be very soft and smooth. 

  3. Transfer the dough into a bowl of a mixer fitted with the paddle attachment, or using your handmixer or if you still have the energy, continue by hand. Add the eggs one at a time, beating after each egg has been added to incorporate it into the dough.

    You will notice that after you have added the first egg, the dough will separate, once again do not worry. As you keep working the dough, it will come back all together again by the time you have added the third egg. In the end the dough should be thick and shiny and when lifted it should fall back into the bowl in a ribbon.

  4. The dough should be still warm. It is now ready to be used for the éclairs as directed above.

Notes:

  1. Once the dough is made you need to shape it immediately.
  2. You can pipe the dough and the freeze it. Simply pipe the dough onto parchment-lined baking sheets and slide the sheets into the freezer. Once the dough is completely frozen, transfer the piped shapes into freezer bags. They can be kept in the freezer for up to a month.

Chocolate Pastry Cream

  • 2 cups (500g) whole milk
  • 4 large egg yolks
  • 6 tbsp (75g) sugar
  • 3 tablespoons cornstarch, sifted
  • 7 oz (200g) bittersweet chocolate, preferably Valrhona Guanaja, melted
  • 2½ tbsp (1¼ oz: 40g) unsalted butter, at room temperature
  1. In a small saucepan, bring the milk to a boil.  In the meantime, combine the yolks, sugar and cornstarch together and whisk in a heavy‐bottomed saucepan.

  2. Once the milk has reached a boil, temper the yolks by whisking a couple spoonfuls of the hot milk into the yolk mixture.Continue whisking and slowly pour the rest of the milk into the tempered yolk mixture.

  3. Strain the mixture back into the saucepan to remove any egg that may have scrambled.  Place the pan over medium heat and whisk vigorously (without stop) until the mixture returns to a boil. Keep whisking vigorously for 1 to 2 more minutes (still over medium heat).Stir in the melted chocolate and then remove the pan from the heat.

  4. Scrape the pastry cream into a small bowl and set it in an ice‐water bath to stop the cooking process. Make sure to continue stirring the mixture at this point so that it remains smooth.

  5. Once the cream has reached a temperature of 140 F remove from the ice‐water bath and stir in the butter in three or four installments. Return the cream to the ice‐water bath to continue cooling, stirring occasionally, until it has completely cooled. The cream is now ready to use or store in the fridge.

Notes:

  1. The pastry cream can be made 2‐3 days in advance and stored in the refrigerator.
  2. In order to avoid a skin forming on the pastry cream, cover with plastic wrap pressed onto the cream.
  3. Tempering the eggs raises the temperature of the eggs slowly so that they do not scramble.

Chocolate Glaze
(makes 1 cup or 300g)

  • 1/3 cup (80g) heavy cream
  • 3½ oz (100g) bittersweet chocolate, finely chopped
  • 4 tsp (20 g) unsalted butter, cut into 4 pieces, at room temperature
  • 7 tbsp (110 g) Chocolate Sauce (recipe below), warm or at room temperature
  1. In a small saucepan, bring the heavy cream to a boil. Remove from the heat and slowly begin to add the chocolate, stirring with a wooden spoon or spatula. 

  2. Stirring gently, stir in the butter, piece by piece followed by the chocolate sauce.

Notes:

  1. If the chocolate glaze is too cool (i.e. not liquid enough) you may heat it briefly in the microwave or over a double boiler. A double boiler is basically a bowl sitting over (not touching) simmering water.
  2. It is best to glaze the eclairs after the glaze is made, but if you are pressed for time, you can make the glaze a couple days ahead of time, store it in the fridge and bring it up to the proper temperature (95 to 104  F) when ready to glaze.

Chocolate Sauce
(makes 1½ cups or 525 g)

  • 4½ oz (130 g) bittersweet chocolate, finely chopped
  • 1 cup (250 g) water
  • ½ cup (125 g) crème fraîche, or heavy cream
  • 1/3 cup (70 g) sugar
  1. Place all the ingredients into a heavy‐bottomed saucepan and bring to a boil, making sure to stir constantly.  Then reduce the heat  to low and continue stirring with a wooden spoon until the sauce thickens.
  2. It may take 10‐15 minutes for the sauce to thicken, but you will know when it is done when it coats the back of your spoon.

Notes:

  1. You can make this sauce ahead of time and store it in the refrigerator for two weeks. Reheat the sauce in a microwave oven or  a double boiler before using.
  2. This sauce is also great for cakes, ice-cream and tarts.


One of the huge plus points about being in such a group is that there are so many experienced bakers out there, who are kind enough to give us a tip or two. The Daring Bakers Forum was full of extremely useful tips and tricks for this challenge. So I thought I would share them with you too. I thank everyone for sharing all your ideas, tips and tricks for this challenge.

Éclairs 101: Tips & Tricks: (Scroll up for recipe)

  • Instead of piping individual éclairs, pipe one long line of dough on your baking tray line with parchment. Then freeze until almost firm, cut the éclairs, using a sharp knife, in the desired size. Place them in the oven and bake.
  • It is important to let the choux pastry dough cool down a bit before you add the eggs. If eggs are added to a warm dough it causes the eggs to coagulate and the dough will not rise as required. If you are making the dough by hand, place a piece of plastic wrap and cover the surface so that the plastic wrap is touching the surface of the dough. Poke a few holes in it to allow the steam to escape.
    If using an kitchen machine, place the paddle attachment and turn on to medium speed. Allow the dough to turn for a minute or so, cooling it down faster. Add the first egg, turn up the speed to high. This will bring down the temperature so that you can add the remaining eggs.
  • Your éclairs deflate after you take them out of the oven
    You are not baking them long enough. The instructions for the recipe indicates a total baking time for the éclairs to be 20 minutes, however, the first time I made these they deflated after I took them out of the oven. The second time I made the éclairs I baked them for 15 minutes longer and they were fine.
  • Freezing éclairs - the éclair shells can be frozen unfilled and unglazed. Take them out and place them in a preheated oven at about 150 degrees C for a minute or two.
  • How well do they hold up? Although the éclairs taste and look best when they are served fresh, you can place them in an airtight container and keep them in the refrigerator overnight. My tip here would be not to glaze them. Glaze them on the day you plan to serve them. This is due to the fact the glaze will loose its shine and the condensation trapped in the glaze will cause it to look speckled.
  • If you do not have a pastry bag or the right sized tips - simply use a freezer bag and cut a corner the appropriate size and pipe the dough!
  • Once the éclairs have baked, turn the oven of and allow the éclairs to cool in the cooling oven. This will help the éclairs hold up their shapes and give a crispier texture.
  • Once you take the shells out of the oven, make small slits in the sides to release steam. Steam once cooled turns to water, which is the main reason why éclairs might turn soggy.

Verdict

When I first made these in July, I had the same problems as many of my fellow DBs. In the oven they puffed up beautifully and looked like a million dollars. However as soon as I took them out of the oven, they flattened on me miserably. But thanks to the tips I shared with you above, my second batch were a real success. These were a decadent treat. Not only did they bring back memories, I also spent a great afternoon with Soeren who was my eager helper and spoon licker for this challenge. Tom is a chocolate kind of guy and has a bad sweet tooth. As my challenge taster, these pastries were his favorite to date. I served these at a little cocktail party and really had a tough time convincing my guests that these were homemade.

Would I make this again?

Yes! I am proud that I managed these. Because of the fact I love éclairs I now do not have to wait to visit my parents in Dubai to enjoy hotel style éclairs. I can make them in my own kitchen.

What did I learn from this challenge?

Many things - like all those wonderful tips mentioned above. What it takes to make the perfect éclair shells and do's and dont's of this delicate pastry.

At this stage I really have to thank two lovely ladies, Natalie of Gluten A Go Go and Helen of Tartelette, who went out of the way to help Tony and myself answer tricky questions and give their expertise advice on how to make the best éclairs.

Phew! I cannot believe I just hosted my own Daring Baker challenge! If anyone had told me this before my first challenge I would have given them a very funny look indeed! I hope that everyone who completed the challenge enjoyed it as much as I did. I also wish everyone who makes these delectable chocolate pastries good luck and enjoy a piece of heaven!

You might find these pastry and cake "How Tos" helpful too:

If you are looking for more helpful tips and tricks, you will find several other "how tos" in the sidebar category The Know Hows of Food under the section How To...


All photographs and written content on What's For Lunch, Honey? © 2006-2008 Meeta Khurana unless otherwise indicated. | All rights reserved | Please Ask First

125 comments Continue »

Flavors: Orange Cake

| 61 comments
Orange Cake (03) by MeetaK

Stepping out of the elevator I could already smell the enticing fragrance of freshly baked cake. It always made me smile. The few seconds it took to walk down the corridor to our apartment door, I would try to guess what aromas were lingering in the air. After I rang the doorbell, I would close my eyes and take a deep breath, savoring the scent.

My mother would open the door with a huge smile on her face and her eyes twinkling. She knew what I was doing and what I wanted.

"Wait!" she would say holding me back for a few minutes longer. It was torture, but she was always in a playful mood when she baked. "Guess!" I would close my eyes again, trying to penetrate the fragrance in the air. It was a game we would often play, who would have known back then that these games would play an important role in my foodie life later.

My mother did not get to bake that often. Unfortunately - because she was a great baker. Her cakes were always put together to highlight a certain ingredient, flavor or fragrance. She was not a fan of over-killing a baked good by the excessive use of ingredients. Instead she would use each ingredient carefully and make sure they complemented the main flavor of the cake.

As my father worked in luxury hotels, we were never short of extravagant and pompous cakes and pastries at home. An Austrian Sacher torte, French eclairs or an Italian Millefoglie - we would have it all. You're probably thinking "WOW!"

Yes, it was nice and we indulged in these scrumptious pastries often. But what we loved the most were my mothers homemade simple baked cakes. That was our real treat. We would really savor each bite and enjoy her guessing games in the process.

Carrot cake, orange cake, ginger cake, banana torte, lemon-coconut cake - these were all her specialities, and as you can see, it was the ingredients in the name of her cakes that played the key role.

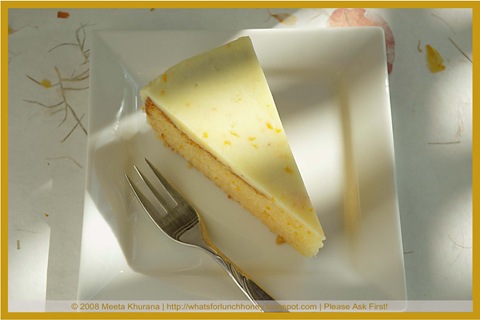
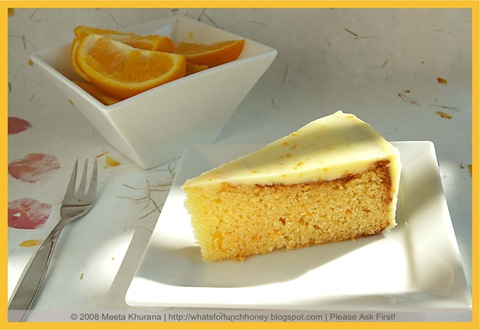
I loved the orange cake the best. It was a simple blend of flavors, using the zesty orange peels and orange juice to give a pure accent to the cake. When she made it the entire floor, we lived on, was filled with a sweet, tangy, citrussy aroma.

Oranges
Orange (01) framed by MeetaK


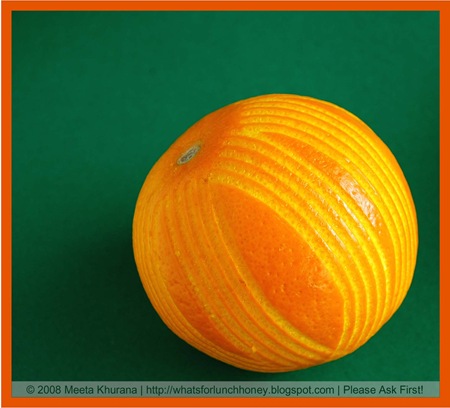
Oranges are one of the most popular fruits in the world. It's no surprise either! They are juicy, sweet and well-known for their concentration of vitamin C. Oranges make the perfect snack and add a special tang to many recipes. What's more you can use almost every part of the orange in your cooking. 

Oranges come in two general categories: sweet and bitter. The former being the type most commonly consumed. Popular varieties of the sweet orange include Valencia, Navel and Jaffa oranges, as well as the blood orange. The blood orange is a hybrid species that is smaller in size, more aromatic in flavor and has red hues running throughout its flesh. Bitter oranges are often used to make jam or marmalade and their zest serves as the flavoring for liqueurs such as Grand Marnier and Cointreau.

Health Benefits

Oranges are ranked No. 1 on nutrition among five popular fruits (apples, bananas, grapes and pears) and are among the healthiest items in the produce section that provide valuable health benefits. They are one of Mother Nature's best super foods, packed with an unbelievable array of disease-fighting nutrients, all tucked neatly beneath the peel.

Oranges supply 80 fat-free calories packed with energizing carbohydrates that fuel energy levels. We all know that oranges are a powerhouse when it comes to Vitamin C. One orange supplies a healthy dose of Vitamin C, which plays an important role in cancer prevention, healthy blood circulation and wound healing. They are also a good source of the crucial B-vitamin folate, which is essential in preventing birth defects and fighting heart disease. Oranges also contain an array of phytochemicals, which help fight age-related diseases.

Oranges provide antioxidants, which help protect the skin from free-radical damage known to cause signs of aging. Oranges are loaded with disease "phyt-ing" phytochemicals. These substances, such as flavonoids, which are found in oranges, act as antioxidants and may protect against heart disease. According to a Finnish study, women with the greatest intake of flavonoids had half the risk of dying from heart disease compared to women in the study with the lowest intake.

Selecting & Storing

It is not necessary for oranges to have a bright orange color to be good. As a matter of fact, the color of non-organic oranges may be due to injection of Citrus Red Number 2 into their skins.

Organic or not, oranges that are partially green or have brown spots may be just as ripe and tasty as those that are solid orange in color. Oranges with soft spots or traces of mold should be avoided. As oranges are among the top 20 foods in which pesticide residues are most frequently found, buy organic oranges whenever possible.

When choosing oranges go for fruit that have smoothly textured skin and are firm and heavy for their size. These will have a higher juice content than those that are either spongy or lighter in weight. In general, oranges that are smaller will be juicier than those that are larger in size, as will those that have thinner skins.

Oranges can be stored either at room temperature or in the refrigerator. They will generally last the same amount of time, two weeks with either method, and will retain nearly the same level of their vitamin content. The best way to store oranges is loose rather than wrapped in a plastic bag as they can easily develop mold when exposed to moisture.

Orange juice and zest can also be stored for later use. Place freshly squeezed orange juice in ice cube trays until frozen, and then store them in plastic bags in the freezer. Dried orange zest should be stored in a cool, dry place in an airtight glass container.

Now that I have a child of my own, I find myself making the same cakes my mother would make for me for the exact same reasons. I want to tickle Soeren's tastebuds and have his senses concentrate on individual flavors and aromas. We too play guessing games, which I hope will help him in his grown up life too. Maybe I am one of the few mothers who feels proud when my son says "I want to be a good cook when I grow up!"


Reminders!

Monthly Mingle - One-Dish Dinners
Come on over with your casseroles, crockpots or baked dishes. I am looking for innovative and creative one-dish meals. Looking forward to having you all over.

Deadline: March 10th, 2008

Eat Fresh
Share your fresh produce with us. Show us your weekly bounty from the Farmer's Market, grocery stores or CSA box.

Deadline: March 31st, 2008


Ingredients
Printable version of recipe here.
Orange Cake (09) by MeetaK


250g all-purpose flour
4 teaspoons baking powder
40g vanilla pudding powder
340g sugar
3 eggs
80g oft butter - cut in pieces
2 teaspoons orange zest - preferably organic orange
250ml orange juice

For the Orange Buttercream

90g confectioner's sugar - sifted
125g soft butter
1 tablespoon orange juice
1 teaspoons orange zest - preferably organic orange


Method
Orange Cake (06) by MeetaK

Pre-heat the oven at 180 degrees C. Prepare a round cake form (23 cm diameter) by buttering the base and the sides. Line with baking paper.

Sift flour, baking powder and the pudding powder into a large mixing bowl. Add the eggs, sugar, butter, orange zest and juice to the dry ingredients and with a hand mixer whisk into a smooth thick mixture.

Pour the cake mixture into the cake form, even out with a rubber spatula and bake approx. 50 minutes. The cake is done when a toothpick or knife is inserted in the middle of the cake and it comes out clean.

Take out of the oven and allow to cool for 5 minutes in the form. This might be a difficult task and you will be dying to taste, but if you unmold it too soon the cake will break. Run a knife along the sides of the cake and tip out onto a cooling rack. Peel off the baking paper. Allow to cool completely before frosting the cake.

For the Orange Buttercream

In a small bowl mix all the ingredients together until thick and creamy. Spread the buttercream evenly over the top and sides of the cakes. Refrigerate for 30 minutes.

Tip: You can substitute the butter with 125g of cream cheese. This adds a wonderful delicate touch to the frosting. 


Verdict
MM-OrangeCake (01) by MeetaK

This is Soeren's favorite cake too! So much so he wanted it for his 5th birthday last year (August). It surprised many mothers that there was NOT a chocolate cake in sight. Don't kids always want a chocolate cake for their birthdays? Not Soeren he prefers the wonderful, zesty flavors of a simple orange cake. It is a pleasure to bite into the cake. Delicate and moist where the orange is highlighted in style.

I am rather chuffed that I have been nominated for the Inspiring Food Photography this month by Margot of Coffee & Vanilla. If you have a minute you can head on over to Margot's blog and vote for me. Voting lasts all this month. I'd love to have that scrumptious looking badge to display on my blog LOL!

If you are looking for more cake decorating ideas, my hunk of a colleague over at the Daily Tiffin, Dharm, has written a fantastic article about cake decorating you might find helpful.

Other aromatic cakes you might enjoy:

CranberryUpsideDown1 Cranberry Upside-Downer
Persimmon Spice Cake - Slice Persimmon Spice Cake
CherryCake04 Sour Cream Cherry Cake
WhiteChocolateBrownie03 White Chocolate and Raspberry Brownies


This month the lovely Marta of An Italian in the US has chosen the orange as her Fresh Produce of the Month. It's a great event featuring a seasonal fruit or vegetable and I always enjoy taking part. This is my entry for her great event. Gracie Marta!


All photographs and written content on What's For Lunch, Honey? © 2006-2008 Meeta Khurana unless otherwise indicated. | All rights reserved | Please Ask First

61 comments Continue »

My Family's Traditional Fruit Cake

| 78 comments
Cooking School: Dundee Fruitcake

Fruit Cake (04) by MeetaK


My mother is a beautiful, proud and decorous Punjabi woman. All her life she has lived an impeccable life. Brought up under the strict rules of my grandfather and the doting love of my grandmother, she grew up to be a woman of morals and high expectations. She watched over her own children like a lioness watches over her cubs. Never missing a beat when something was wrong or bothering us. She sacrificed, but all along kept her individuality, never loosing "herself" along the way.

Where ever she went her beauty and striking resemblance to India's most stunning dream girl always attracted a lot of attention, at times even creating havoc on the streets of downtown Delhi. (I am not going to mention the fact that my dad looks like India's hottest actor, for fear you might think I'm making it all up - but it's true!)


Growing up with my mum was divine. She had a way with words and things that always made us children see the sense in things, even if in the beginning of the discussion we were dead against the idea. This quality was also cherished by my friends, who often spent endless hours discussing their problems and issues with my parents. The house was always full of our friends, coming in and out. There was of course another thing my friends loved about my mum - her food.

We always had a fridge full of food. Be it the delicious desserts and cakes my dad brought back from the hotel or the multitude of different dishes my mum had prepared, we never threw anything away. It would always be passed around when our friends were over, during a debate, a soccer game, a problem solving discussion or simply when me and my best friends would return home in the middle of the night after a party and crave for something out of my mum's fridge.

She acquired her skills for the Indian cuisine by my grandmother, who was an exceptional cook. My grandmother groomed my mother, like any good Indian family, at a young age and cooking was one of the most important things an Indian girl learns.

However, her talent for the European cuisine was obtained by another great figure in her, and ultimately in my, life.

Tante Stephanie was the mother of one of my mother's best friends, Annette. They met during the time my mother traveled the oceans with my father, who at the time was a marine engineer on a ship. It was not long before both found that, although brought up in separate corners of the world, they had a lot in common. A lot but not everything. The one thing that distinguished them was - food.

While my mother loved cooking and learned how to make any dish quickly, Annette found food, and everything about food, tasteless. She would eat without appetite and sit at the dinner table only due to pure habit.

It was no surprise that Tante Stephanie found joy in my mother's ability to grasp the flavors of a dish by simply tasting them. She was ecstatic at my mother's enthusiasm to learn more about the cuisines she was introduced to. When Annette passed away at an early age it was a loss to both, however they found consolation in each other and of course - food.


Fruit Cake (03) by MeetaK


My memories of Tante Stephanie are simply grand. She always smelled of violets. Even to this day when ever the fragrance of violets wafts through my nose I am taken back to her lovely house on the Loire and the endless evenings on her terrace, eating, drinking and chatting. Tante Stephanie was half French and half Scottish and the food she prepared represented the artisanal cooking of both countries. Traditional, down to earth and down-right good. Cooking was definitely her biggest strengths. She was able to reproduce a dish by simply tasting it. Regardless of how complicated the aromas and flavors would be, Tante Stephanie would know what ingredients were used, in which quantities, how long it was cooked for and how she would perfect it. Her neighbors often called her sorcière, witch and I was always spellbound by the way she moved and casted her spells in her kitchen.

My mother savored the time she spent with Tante Stephanie in the kitchen. Each recipe that she inherited from Tante Stephanie was cherished and often recreated in our own kitchen back home. Being the ideal student however, my mother never missed the chance to add her own note to the dish. It was her way of perfecting a perfect dish.

This fruit cake is one of the recipes that was handed over to my mother by Tante Stephanie. The Dundee fruit cake was a kind of family jewel on Tante Stephanie's Scottish side of the family. Her grandmother, her mother and finally she herself prepared it during the Christmas season, each lady adding her own little touch to the cake. Tante Stephanie showed her true affection for my mother by handing the recipe over to her a year before she passed away. My mother in return paid respect to this great gift by preparing this incredible fruit cake each year in December. She too added her touch to the cake.

A few years ago I inherited the recipe from my mother. She showed me how to prepare it and we had a great time in the kitchen talking about the great Tante Stephanie. I have been making this cake every year since then, adding my own note to the fruit cake.

Although you might be thinking all these modifications that have been made to the cake over the years might not have left much of the original version, I would like to console you. The cake is still very much in it's original form and each sorcière who was handed the recipe simply perfected it in her own way.

Paying my respect to such wonderful traditions and to family, I present to you my family's traditional feast - the perfect perfect perfect Dundee fruitcake! ;-)


Fruitcake Notes

Fruit Cake (05+2) by MeetaK


Printable version of recipe and notes here.

Before jumping in and making the fruitcake I wanted to share a few important notes with you. These were all a part of Tante Stephanie's teaching and the notes my mother made. With a little care while preparing the fruitcake and considering these notes, I am sure practically anyone will be able to make a wonderful fruity and delicious fruitcake equally as exquisite as the ones I had the pleasure of enjoying at Tante Stephanie's or later at my mum's.

So, in future if you should ever make a fruit cake, either this one or any other one, you will find some very helpful notes here to refer to.

Basics
The batter for the fruitcake is basically a regular cream cake batter, where butter is creamed together with the sugar and then the eggs are added and beaten in portions to make a smooth mixture.

Before you start read the recipe carefully and set out all the required kitchen machines and ingredients. Measure all the ingredients as required by the recipe and set aside.

You will need to allot a lot of time to make a really good fruitcake, because the preparations and the baking time takes a little bit longer than most cakes.

Before you start with the batter prepare your cake form carefully, by lining it with baking paper and place the oven rack/baking sheet right in the middle of the oven. Then pre-heat the oven at the required temperature.

Preparing the Cake Form
Butter or spray your form, making sure that you butter the sides and base well. Fruitcakes require to be lined with a double layer of baking paper, on the sides as well as on the bottom. Cut out two sheets of baking paper to fit the base and strips to fit the sides of your cake form. Line the base with both sheets of baking paper and overlap the strips for the sides. Press down and straighten out all the creases.

Because of the longer baking time, fruitcakes require more protection from the heat. This is basically to avoid the cake from getting too dark around the sides and base. Therefore, pack the outer sides of your form in a few sheets of newspaper. As the oven is set to a low temperature this is totally unhazardous. To protect the form with newspaper, take a few sheets and wrap it around the form tightly, making sure that the newspaper is not sticking in the form. Then simply tie some kitchen thread around the from tightly.

The Cake

Fruit Cake (05) by MeetaK


As I mentioned above, it is advisable to weigh all the ingredients and prepare your kitchen machines in advance. Sieve your flour and baking powder, chop up your dried fruit and nuts. If using dates or prunes, check if you need to pit them. Take the butter out of the refrigerator in advance so that it is soft once you are ready to use it. Even eggs should be at room temperature and should be taken out in advance.

When is the cake done?
This was my mum's single one question to Tante Stephanie and many years later, I too asked my mum the same question. Every oven is different, gas, electric, etc. Tante Stephanie simply suggested to use the old toothpick trick. About 20 to 30 minutes before the required baking time of the cake is up, stick a toothpick into the middle of the cake, if it comes out clean then it is ready and can be taken out of the oven.

Leave the cake to cool in the cake form overnight. Fruitcakes are actually the most wonderful type of cakes. Their aromas and flavors infuse with each other as time goes on. Tante Stephanie compared the fruitcake to a good bottle of wine - time brings out the best of flavors. So, by leaving the cake for a few days or, as we do, a few weeks - you will be rewarded with an aromatic, fruity and moist cake.


Ingredients

Fruit Cake Dried Fruit (02) by MeetaK


250 g soft butter
230 g brown sugar
4 eggs - lightly beaten
160 g raisins
160 g currants
185 g mixed dried fruit - dates, figs, apricots, prunes
60 g dried cherries
60 g Amarena cherries - substitute with cocktail cherries
95 g powdered almond
90 g almond slivers
240 g all-purpose flour - sieved
1 teaspoon baking powder - sieved
2 tablespoons rum
120 g whole almonds - peeled

Notes about the ingredients:
The original Dundee cake is made with currants, raisins and sultanas. My mother substituted the sultanas with a variety of mixed dried fruit. Tante Stephanie also used cocktail cherries in her version of the cake. My own touch was substituting theses with delicious Amarena cherries. Furthermore, Tante Stephanie used dried orange an lemon peel in her cake, which gave a wonderful fragrance. This time I chose to use dried, slightly sour cherries. Cranberries would also make a great additions to the cake.


Method
Fruit Cake (01) by MeetaK


Pre-heat the oven to 150 degrees C. Prepare a round cake form (20 cm diameter) as explained above.

In a mixing bowl cream the butter and sugar using a hand mixer or your kitchen machine, until smooth. Slowly add the eggs in portions - beating each portion until in has been fully incorporated into the batter.

Transfer to a larger mixing bowl and add all of the dried fruit, Amarena cherries and the almond slivers and powder. Fold into the batter.

Add the sieved flour and baking powder and pour in the rum. Using a metal spoon carefully fold into the butter cream.

Pour the batter into the cake form and smooth out the top. Line with the whole almonds. Bake for 2 to 21/2 hours. About half an hour before the the time is up check to see if the cake is done. Place a toothpick into the middle of the cake, if it comes out clean it is ready to be taken out.

Allow to cool for at least 4 hours, recommended overnight. Store in an airtight container for a few days, to allow the flavors to infuse.


Verdict
Fruit Cake (06) by MeetaK


It's always a heavenly experience when I make and then eat the cake. I am always taken back to Tante Stephanie's house on the Loire or my mums's kitchen in Doha. Filled with good memories and cheerful spirit this cake is pure pleasure. I normally make the cake towards the end of November. It is then stored for a week in an air tight container and then we enjoy the full flavor of this luxurious cake throughout December. The cake will be on the dry side when you cut it a day after it has been baked, but if it is kept for a few days it will begin to get more moist as the fruits combine their juices into the cake.

This is my own entry to this months Monthly Mingle - Traditional Feasts.


Technorati Tags: , , , , , , , , , ,


All photographs and written content on What's For Lunch, Honey? © 2006-2007 Meeta Albrecht unless otherwise indicated. | All rights reserved | Please Ask First
78 comments Continue »

Tender Potato Focaccia & Bread Rolls

| 91 comments
Daring Bakers November 2007 Challenge

Focaccia (03b) by MeetaK


I was jinxed with this one! I truly was - not with regards to the recipe but with regards to finding time to actually complete it. The month has been so busy Phew! Every time I alloted time to start the challenge something would get in the way. And I was so excited to tackle this great challenge.

The challenge was from the truly wonderful and close to my heart Tanna of My Kitchen in Half Cups. It was as if Tanna had managed to look into the deep realm of my brain and picked out the one thing that has been on my mind a lot lately. Bread - and bread baking!

I live in Germany where good bread is plentiful. I have even been doing an interesting German bread series on The Daily Tiffin, where I have shown the several different varieties my baker offers. So, I have never really found the need to actually bake my own bread. But as I did the "Inside a German Bakery" series, I was more and more intrigued by bread baking. I just did not actually dare to make my own!

Hey, and being a Daring Baker does not mean you magically are relived of all your fears. Ohhhh noooo! You still have them - but what the Daring Baker group really does to you is make you confront your fears, challenge yourself and, in my opinion the best part of this group, motivate, cheer and help you along each step of the way.

So, as I said when Tanna chose a Tender Potato Bread from Home Baking: The Artful Mix of Flour and Traditions from Around the World by Jeffrey Alford and Naomi Duguid, I was at first fearful but the optimist in me was quite ecstatic. Especially as one of the variations we were allowed to make was a focaccia. It's something I was recently looking into and Tanna's magical powers pulled the idea out of my head, put it through her trick box and turned it into reality.

It was time to knead bread!

Potato Roll (03) by MeetaK


At the time I was emailing Hilda of Saffron and Blueberry and discussed the prospect of doing it together, but both our schedules did not seem to match and as the days sped past I was finding myself with less and less time. Hilda finally did manage to finish her challenge ahead of me and gave me a few helpful tips. All I needed was a day with ohhhh - approximately 72 hours and I was in business.

I finally thought of making the dough the night before and then doing it the next morning and once again the folks over at our DB blog were great with ideas, help and advice.

In the end I did manage to complete the challenge all in one day. It was brilliant, soothing and incredible. I was kind of irritated the day I chose to make the bread - but take it from me, on such days, folks, forget your shrink - just bake bread! I kneaded the bread, slapped it around, punched it and knuckled it back and forth. It was awesome. In the end I was rewarded with a soft, tender, moist crumb so wonderfully aromatic it was heavenly.

The allowed modifications for this challenge were as follows:
  1. The recipe was to be followed to the "T" until we get to shaping the bread.
  2. The bread had to be savory and not sweet.
  3. We were to knead by hand (medical exception allowed)
  4. We could not use a biga, sponge, or starter method.
  5. Recipe ingredient exception allowed only if allergy or an ingredient not available or cost prohibitive in our region.
  6. We could shape the dough anyway we liked: as a loaf, as rolls, as focaccia.
  7. We could season the bread in any way we wanted.
  8. We could fill it if we wanted to, keeping the filling savory
I was thankful that after the few previous sweet Daring Baker challenges we were getting to go savory again.

I also got to use my new measurement utensils I bought from Dubai. Together with my new digital weighing scale that gives me the weights in grams/kilos and ounces/pounds, I am armed for any future challenges!!


Reminder!


Come join me for a Traditional Feast this month. Bring along your favorite dish to celebrate Thanksgiving, Christmas, Hanuka or Diwali.

Details can be found here.
Deadline: December 3rd.


Ingredients
Printable version here.

4 medium to large floury (baking) potatoes, peeled and cut into chunks.
4 cups (950 ml) water, reserve cooking water
1 tablespoon plus 1 teaspoon salt
2 teaspoons active dry yeast
6 ½ cups to 8 ½ cups (1 kg to 1350g) unbleached all-purpose
1 tablespoon unsalted butter, softened
1 cup (130g) whole wheat flour

Note: For the beginner bread baker it is suggested to use no more than 8 ounces of potato; for the more advanced no more than 16 ounces. I used approximately 9 ounces, which did not make the dough as sticky as it probably would have if I had used more.


Making the Dough (Directions are for making by hand):

Put the potatoes and 4 cups water in a sauce pan and bring to boil. Add 1 teaspoon salt and cook, half covered, until the potatoes are very tender.

Drain the potatoes, reserving the potato water, and mash the potatoes well. Tanna had suggested using a food mill for this, I always use my mill to make mashed potatoes as it gives the smoothest results. So, I too would suggest this.

Measure out 3 cups (750ml) of the reserved potato water. Add extra water if needed to make 3 cups. Place the water and mashed potatoes in the bowl you plan to mix the bread dough in. Let cool to lukewarm (70-80°F/21 - 29°C) – stir well before testing the temperature – it should feel barely warm to your hand. You should be able to submerge you hand in the mix and not be uncomfortable.

Add yeast to 2 cups all-purpose flour and whisk. Add yeast and flour to the cooled mashed potatoes and water and mix well. Allow to rest/sit 5 minutes.

Note about adding yeast: If using active dry yeast or fresh yeast, mix and stir yeast into cooled water and mashed potatoes and water and let stand 5 minutes. Then add 2 cups of flour to the yeast mix and allow to rest several minutes. If using instant dry yeast, add yeast to 2 cups all-purpose flour and whisk. Add yeast and flour to the cooled mashed potatoes and water and mix well. Allow to rest/sit 5 minutes.

I used instant dry yeast and simply whisked it into my flour. Sprinkle in the remaining 1 tablespoon salt and the softened butter; mix well. Add the 1 cup whole wheat flour, stir briefly.

Add 2 cups of the unbleached all-purpose flour and stir until all the flour has been incorporated. At this point 4 cups of the possible 8 ½ cups as suggested by the recipe have been used.

Turn the dough out onto a generously floured surface and knead for about 10 minutes, incorporating flour as needed to prevent sticking.

The dough was very sticky to begin with, but as it takes up more flour from the kneading surface, it becomes easier to handle. Scrape the dough off the surface using a scraper.

Keep adding flour until you feel the dough has the right texture. I personally only needed a little over 6 cups.

The kneaded dough will still be very soft and moist, but don't worry, leaving it on parchment or wax paper to proof and to bake makes it easier to handle. Place the dough in a large clean bowl and cover with plastic wrap or lid. Allow to rise for about 2 hours or until doubled in volume.

Flour the surface generously and then turn the dough out onto the surface. Knead gently for several minutes. It will be moist and still a little sticky.

Focaccia (01) by MeetaK


Forming the Bread:
I decided to use half of the dough to make a focaccia and the other half to make rolls. I was able to get one medium sized focaccia (approx 10 x 15 inches) and 6 medium sized rolls with the dough

To make rolls:
Butter a 13 x 9 inch sheet cake pan or a shallow cake pan. Cut the dough into 6 equal pieces. Shape each into a ball under the palm of your floured hand and place on the baking sheet, leaving 1/2 inch between the balls. Cover with plastic wrap and let rise for about 35 minutes, until puffy and almost doubled.

To make focaccia:
Flatten out the dough to a rectangle about 10 x 15 inches with your palms and fingertips. Tear off a piece of parchment paper or wax paper a little longer than the dough and dust it generously with flour. Transfer the focaccia to the paper. Brush the top of the dough generously with olive oil and topping (please see below). Cover with plastic and let rise for 20 minutes.

Baking the bread(s):

Note about baking order: Bake the focaccia before you bake rolls.

Note about cooling times: Let all the breads cool on a rack for at least 30 minutes before slicing. Rolls can be served warm or at room temperature.

For rolls:
Brush the tops of the rolls with a little melted butter or olive oil (the butter will give a golden/browned crust). Slash the rolls crosswise two or three times with a razor blade or very sharp knife and immediately place on baking sheet in the oven.

Just before placing the rolls in the oven, I sprinkled my rolls with a few black cumin seeds to give a delicious aromatic flavor. Believe me, the fragrance that lingered in the kitchen was simply gorgeous!

Bake rolls until golden, about 30 minutes.

Transfer the rolls to a rack when done to cool.

For foccaia:
Place a no edged baking/sheet (you want to be able to slide the shaped dough on the parchment paper onto the baking sheet and an edge complicates things). Place the baking sheet on a rack in the center of the oven and preheat to 450°F/230°C.

Just before baking, dimple the focaccia all over again with your fingertips. Leaving it on the paper, transfer to the hot baking sheet. Bake until golden, about 10-12 minutes. Transfer to a rack (remove paper) and let cool at least 10 minutes before serving.


Focaccia (04) by MeetaK


Focaccia Topping of my choice:
My topping consisted of some lovely roasted Piquillo Peppers, black olives, basil and coarse sea salt.

200 g of roasted peppers - cut into strips
Handful of Ligurian balck olives - coarsely chopped
Handful of basil leaves - chopped
Coarse sea salt

Simply layer the topping on the focaccia before allowing it to rest for 20 minutes (see above). After the focaccia has rested, dimple bread again and bake as mentioned above.

Alternative suggested toppings:
Simple topping: Olive oil, coarse salt, and rosemary leaves

Anchovy-Onion Focaccia:Top with onions slow-cooked in olive oil or bacon fat, a scattering of chopped anchovy fillets, and flat-leafed parsley leaves.

Important Notes
Conversion Chart for yeast:
1 oz/ 1 Tablespoon of fresh yeast = 0.4 oz/ 1.25 teaspoon active or instant dry yeast = 0.33 oz / 1 teaspoon instant or rapid rise (bread machine) yeast. (Reference: Crust & Crumb by Peter Reinhart).

Notes about Flour:
King Arthur Artisan Organic All-Purpose Flour is fairly new in the markets in the US and is advertised to be best for making European-style hearth breads with a protein level of 11.3%


Verdict
This is simply the most tender focaccia I have ever had. It was not very potato-ey but there is a wonderful potato aroma to the crumb. We had the focaccia filled with Italian prosciutto and a green mixed salad. It was a great dinner. Tom actually asked me "Did you really make this yourself!" He was blown away by the texture and the flavor the focaccia offered. Soeren devoured the focaccia at lightening speed and wanted to take a sandwich to school in his lunch box the next day. Apparently everyone wanted a bite. We had the rolls the day after. I tasted half a little after they came out of the oven and they were quite good. However, the next day, I placed them in the oven to warm through again and the truth is they tasted even better. I presume the flavors were able to combine and infuse more. The cumin seeds added a wonderful pungent flavor and with some strong cheese it was another treat we loved.

Would I make this again?
I already have!! I made the rolls for Thanksgiving again, this time topped with Thyme and yet again it was simply awesome. I already have plans to make a loaf using the same dough this weekend. It's easy and straightforward. Never once did I feel overwhelmed while making the challenge. I followed the recipe and was amazed how easily everything came together.

What did I learn from this challenge?
Have no fear when making bread. I have to say the challenge taught me a few things. That bread is not really the same as baking a cake - where you do have to weigh everything out to perfection. Here I went with my own feeling. For example I did not use the entire 8 1/2 cups of flour as proposed in the recipe - I used about 6 and a bit. My feeling told me that the texture of the dough was OK after that amount. I also liked the idea that we were left enough room to experiment with different types of breads - loaves, rolls or focaccia. That made me more creative. The cumin seeds idea was only a minor thing but it came to me at the spur of the moment and it was brilliant. I am learning that there are so many great sides to baking. The group is allowing me to discover so many hidden facets in me I did not even know existed!

Tanna, you are gorgeous and amazing. I thank you for daring us to make this challenge. I also really thank you for going out of your way and explaining every detail, answering every question on the DB blog and giving fantastic instructions. All that made me a little less fearful and more of an optimist!

You'll be seeing a lot of Tender Potato Bread variations today and if you feel encouraged to bake your own bread this is the perfect way to start.

Please do check out some of my other talented and daring colleagues over at the Daring Baker blogroll. We've grown to more than 400!

Check out my other Daring Baker challenges on the left sidebar under "A Proud Daring Baker". You'll find each challenge listed chronologically in the index. Have fun browsing!


Technorati Tags: , , , , , , , , , , , ,


All photographs and written content on What's For Lunch, Honey? © 2006-2007 Meeta Albrecht unless otherwise indicated. | All rights reserved | Please Ask First
91 comments Continue »

Bostini Cream Pie

| 75 comments
Daring Bakers October 2007 Challenge

Bostini Cream Pie 01a by MeetaK


I'm back from the warm, sunny and fast paced Dubai. After a lovely 2 week vacation with my parents I come back home to a cold Germany! But it's good to be home and my head is already spinning around with many new ideas and recipes I'd like to present and realize.

Before I left though, I did manage to squeeze in this month's Daring Bakers challenge. It was just too scrumptious not to!

Our lovely hostess this month was Mary of one of my fave blogs Alpineberry. Mary chose a wonderful recipe for us this month. It was straight forward but still challenging enough to tickle our baking fetishes. She chose a Bostini Cream Pie.

A Bostini Cream Pie is a take on the Boston Cream Pie, which basically is a vanilla layer cake filled with cream and topped with chocolate glaze. The Bostini Cream Pie has been adjusted to give you a gorgeous vanilla bean custard cream, topped with an orange chiffon cake and then drizzled with a rich chocolate glaze. Sounds wonderful doesn't it? Now you know why I did not want to miss out on this.

I decided to invite a few friends over for a kind of pre-vacation dinner. I mean if I was going to be making someting so rich and delicious, I might as well share it with friends - right?

As it is the case with each challenge, we were allowed a few modifications. For this challenge the modifications were:
  1. We could replace the large volume of orange juice in the cake recipe and did not have to use orange for the flavoring. The flavor could be substituted with a flavor that we thought complements the other components as long as the chiffon cake was kept "light colored". Nothing "dark" like chocolate or coffee/espresso.
  2. As the serving size was quite large, we were free to half the recipe. However no guarantees were given that the recipes for the chiffon cake and custard would scale down successfully without affecting the final product.
  3. We could make as much or as little glaze as we liked. Scaling is straightforward since it's 1 part chocolate to 1 part butter.
  4. We could play around with the "size" of the dessert.
  5. High altitude modifications were allowed as long as we stayed "true" to the recipe.
  6. Conversion for certain dietary restrictions like gluten-free, dairy-free, vegan etc. was also allowed.
  7. Recipe ingredient exception allowed only if allergy or an ingredient not available or cost prohibitive in our region.


Today you will be seeing a lot of these fantastic treats. Our group as sky-rocketed to over 200 members! So my one word of advice is to eat before you start surfing the blogs today!

Enjoy!


Ingredients
Printable version here.

Bostini Cream Pie 01 by MeetaK


Custard:
180 ml (3/4 cup) whole milk
30g (2 3/4 tablespoons) cornstarch
1 whole egg - beaten
9 egg yolks - beaten
895 g (3 3/4 cups) heavy whipping cream
1/2 vanilla bean - you can also use vanilla extract if you do not have a bean on hand
95 g (1/2 cup) + 1 tablespoon sugar

Chiffon Cake:
150 g (1 1/2 cups) cake flour
145 g (3/4 cup) superfine sugar
1 1/3 teaspoons baking powder
1/3 teaspoon salt
80 ml (1/3 cup) canola oil
3 to 4 (1/3 cup) egg yolks - beaten
180 ml (3/4 cup) fresh orange juice
10 g (1 1/2 tablespoons) grated orange zest
1 teaspoon pure vanilla extract
8(1 cup)large egg whites
1 teaspoon cream of tartar

Chocolate Glaze:
8 ounces semi or bittersweet chocolate
8 ounces unsalted butter


Method

Bostini Cream Pie 03 by MeetaK


To prepare the custard:

Combine the milk and cornstarch in a bowl and blend until smooth. Whisk in the whole egg and yolks, beating until smooth. Combine the cream, vanilla bean and sugar in a saucepan and carefully bring to a boil. When the mixture just boils, whisk a ladleful into the egg mixture to temper it, then whisk this back into the cream mixture. Cook, stirring constantly, until the mixture is thick enough to coat the back of a spoon. Strain the custard and pour into 8 large custard cups or ramekin forms. I poured my custard in 6 flat oven-proof dishes. Refrigerate to chill.

To prepare the chiffon cakes:

Preheat the oven to 200 degrees C (325 F). Spray or grease 8 ramekin molds with nonstick cooking spray or oil. You may use 7-ounce custard cups, oven proof wide mugs or even large foil cups.

Sift the cake flour, sugar, baking powder and salt into a large bowl. Add the oil, egg yolks, orange juice, zest and vanilla. Stir until smooth, but do not over-beat.

Beat the egg whites until frothy. Add the cream of tartar and beat until soft peaks form. Gently fold the beaten whites into the orange batter. Fill the greased molds nearly to the top with the batter.

Bake approximately 25 minutes, until the cakes bounce back when lightly pressed with your fingertip. Do not over-bake. Remove from the oven and let cool on a wire rack. When completely cool, remove the cakes from the molds. Cover the cakes to keep them moist.

To prepare the glaze:

Chop the chocolate into small pieces. Place the butter in a saucepan and heat until it is just about to bubble. Remove from the heat and add the chocolate. Stir to melt. Pour through a strainer and keep warm.

To assemble:

Cut a thin slice from the top of each cake to create a flat surface. Place a cake flat-side down on top of the custard. Cover the tops with warm chocolate glaze. Serve immediately.


Verdict

Bostini Cream Pie 04 by MeetaK


This was incredibly smooth and rich. The consistency of the cake was wonderfully smooth - just like chiffon. Paired with the thick custard and the rich chocolate sauce the dessert was simply delicious. My guests were simply bowled over by this dessert. It is everything one loves about a dessert - sweet custard with moist cake and a splash of decadent chocolate. Soeren loved the thick creamy custard and wanted extras on the cake. Tom enjoyed the lovely texture of the cake and as for me I loved every bite of the Bostini Cream Pie - custard, cake and chocolate, right down to the last spoonful.

Would I make this again?
I certainly will. I love the way this was quite easy to whip up offering maximum taste. It's the type of dessert that fits perfectly into a fancy dinner party as you can make this a day ahead. For me it was a brilliant way to offer my guests an extravagant finale to a simpler meal. And I am sure in the two weeks I was away they certainly did not forget me and my desserts ;-)

What did I learn from this challenge?
I learned that fancy desserts and cakes do not have to take too long to make. I also learned that it takes a whole lotta eggs to make a sinfully good custard LOL!

Thanks to Mary for this fantastic challenge. It was fun and I was glad that it was easy enough to follow so that I was able to fit it into by busy schedule just before leaving to Dubai.

You'll find a list of all the scrumptious recipes I created since I joined the awesome group here. Have a browse through and dare to give some a try!

Now I am back and look forward to spoiling you all with a lot of great new recipes, ideas and photographs. And also stay tuned for my tales and stories about Dubai.

For more Bostini Cream Pies surf on through the wonderful list of talented Daring Bakers located on the blogroll.


Technorati Tags: , , , , , , , , , , ,


All photographs and written content on What's For Lunch, Honey? © 2006-2007 Meeta Albrecht unless otherwise indicated. | All rights reserved | Please Ask First
75 comments Continue »

Spinach & Fennel Loaf

| 18 comments


Ever since I got my hands on Sophie Dudemaine's Sweet and Savory Loaves, I have been going somewhat mad on making loaves and cakes. The sweet loaves are really nice but what's really getting me all zinged are the savory variations. If it was left to me I would be baking a new savory loaf everyday of the week.


That is why when dear dear Andrew announced the theme to this month's Waiter There's Something In My - Bread, I was excited to say the least.

What's in my bread? You'll be surprised at the ingredients used in this loaf. When I am making one of Sophie's loaves I am not always sure that it is going to work. It's easy to understand why I think this.

When I start putting all the ingredients together according to the instructions I just cannot imagine that they will combine so well. I mean after all many of the recipes in this book, defies all laws and guidelines of traditional loaves, as I know them. OK, she uses the basics to make a cake like batter, but the stuff that goes into the cakes leaves me rather stumped! I also keep thinking "Can a loaf contain so many ingredients?" This thought keeps me running back and forth to my oven to check if the loaf has not exploded in there.

No, they do not explode. The only explosion that takes place is in my mouth, when I taste these creations of wonder. They always turn out moist and depending on the ingredients some are dense others are fluffy. And they always taste just incredible.

I picked this one because it was the perfect Spring like loaf. Even Sophie categorizes this loaf in the Spring chapter. See, her loaves are organized not according to courses or ingredients etc. They are organized according to the seasons and months. This way you can always make a scrumptious loaf using all the fresh produce available in the current season. I find this so clever.

I made a few changes to the way the loaf is prepared, other than that I kept to the directions. I present to you a wonderful loaf adapted from Sophie Dudemaine's Sweet and Savory Loaves. A must have on every kitchen shelf!


Reminder!


Come celebrate Spring with me. This month Spring Is In The Air.
Deadline: May 09, 2007!


Ingredients:

500g fresh baby spinach
1 fennel bulb - chopped coarsely
1 tray/bunch cress
25g butter + a bit of olive oil - The original recipe calls for 50g of butter
approx. 1 teaspoon salt
approx 1/2 teaspoon pepper
1/2 teaspoon freshly grated nutmeg
2-4 teaspoons sesame seeds - double use
150g all-purpose flour
2-3 teaspoons baking powder
3 eggs
80ml sunflower oil - I do not use sunflower oil - instead I used organic rape oil
125ml luke warm milk
100g Appenzeller cheese - grated - The original recipe calls for Gruyère, but I had the Appenzeller on hand.


Method:

Preheat the oven at 180 degrees Celsius. Grease a loaf tin.

In a large pan heat the olive oil and 25g butter until melted. Add the spinach and sauté for a couple of minutes, just until the spinach slightly falls together. Add the cress. Sprinkle salt, pepper and the fresh nutmeg and allow to cook for approx. 5 minutes.

Add the Fennel and 1 teaspoon of the sesame seeds to the pan and cook for a further 5 minutes. Remove from heat and allow to cool.

In a mixing bowl mix together flour and baking powder. Add the eggs and rigorously beat with a whisk. Drizzle the rape oil and the warm milk into the batter, beating constantly. Add the grated cheese and fold in. Now add the vegetable/herb mixture to this and mix well.

Pour out into the loaf tin, sprinkle with the remaining sesame seeds and bake for 45-50 minutes. The cake is done when a toothpick is inserted into the middle of the cake and it comes out clean.

Take out and allow to cool. Take out of the tin and cut thick slices. Enjoy with your favorite spread.


Verdict:

These kind of loaves are so perfect for warm days. I served mine with some flavored quark. A refreshing glass of chilled dry white wine for us grown-ups and for Soeren some white grape juice. The evening was perfect. The loaf still warm, tasted exquisite. The aroma of the fennel lingering in the air and the flavor of the spinach dwelling on the tongue. This loaf is packed with ingredients that harmonize perfectly with each other.

Daily Tiffin News:


If you like my work, stories and recipes, please take a moment to vote for me in the category you see fit. Vote here. Thanks for your support!


Technorati Tags: , , , , , , , , , , , ,


All photographs and written content on What's For Lunch, Honey? © 2006-2007 Meeta Albrecht unless otherwise indicated. | All rights reserved | Please Ask First
18 comments Continue »